New laser from Endurance Lasers
I mentioned my new laser in my post about the IBM power supply mod. I’ve been trying to cut 3mm plywood with my cheap chinese lasers, and they just weren’t doing a good job of it.
Previously I’ve used this 405nm 500mW module, but it was very low powered, and more importantly didn’t have a TTL pin for PWM control. Then I upgraded to a 2500mW model, which had a control board with PWM control. With PWM I can get great detail and shading doing raster graphics, but it’s still not enough power to cut through even thin plywood reliably. It will cut 3mm plywood sometimes, but you’ll hit spots on the wood that it just doesn’t have the power to go through, and your piece will get damaged when you try to remove it.
So I took a look at higher quality lasers, and found Endurance Lasers, a Russian site that sells laser modules. They even accept Bitcoin for payment, which is awesome!
I originally looked at the 5.6w version, but ended up buying their 8.5w+ model as well as a G2 lens and voltmeter for it. I paid close to CAD$800 with shipping and everything. After outgrowing my last two laser purchases rather quickly, I wanted to make sure this would be the last one I have to buy. In hindsight, I probably should have ordered the DIY kit and saved myself some money - I have all the skills needed to assemble it myself.
I love that the guy who runs Endurance Lasers gives you all the schematics, assembly diagrams and videos, and tons of other information. If anything breaks, it will be easy to repair myself. Some of it is a bit scattered and difficult to find, so if you are going to buy from them I recommend you go to the bottom of the page that links to all the other pages, and read through everything. There’s lots of useful information hidden in there.
Well here it is:
Getting The Laser Operational
There were a few modifications and upgrades I had to make to my CNC machine for the laser:
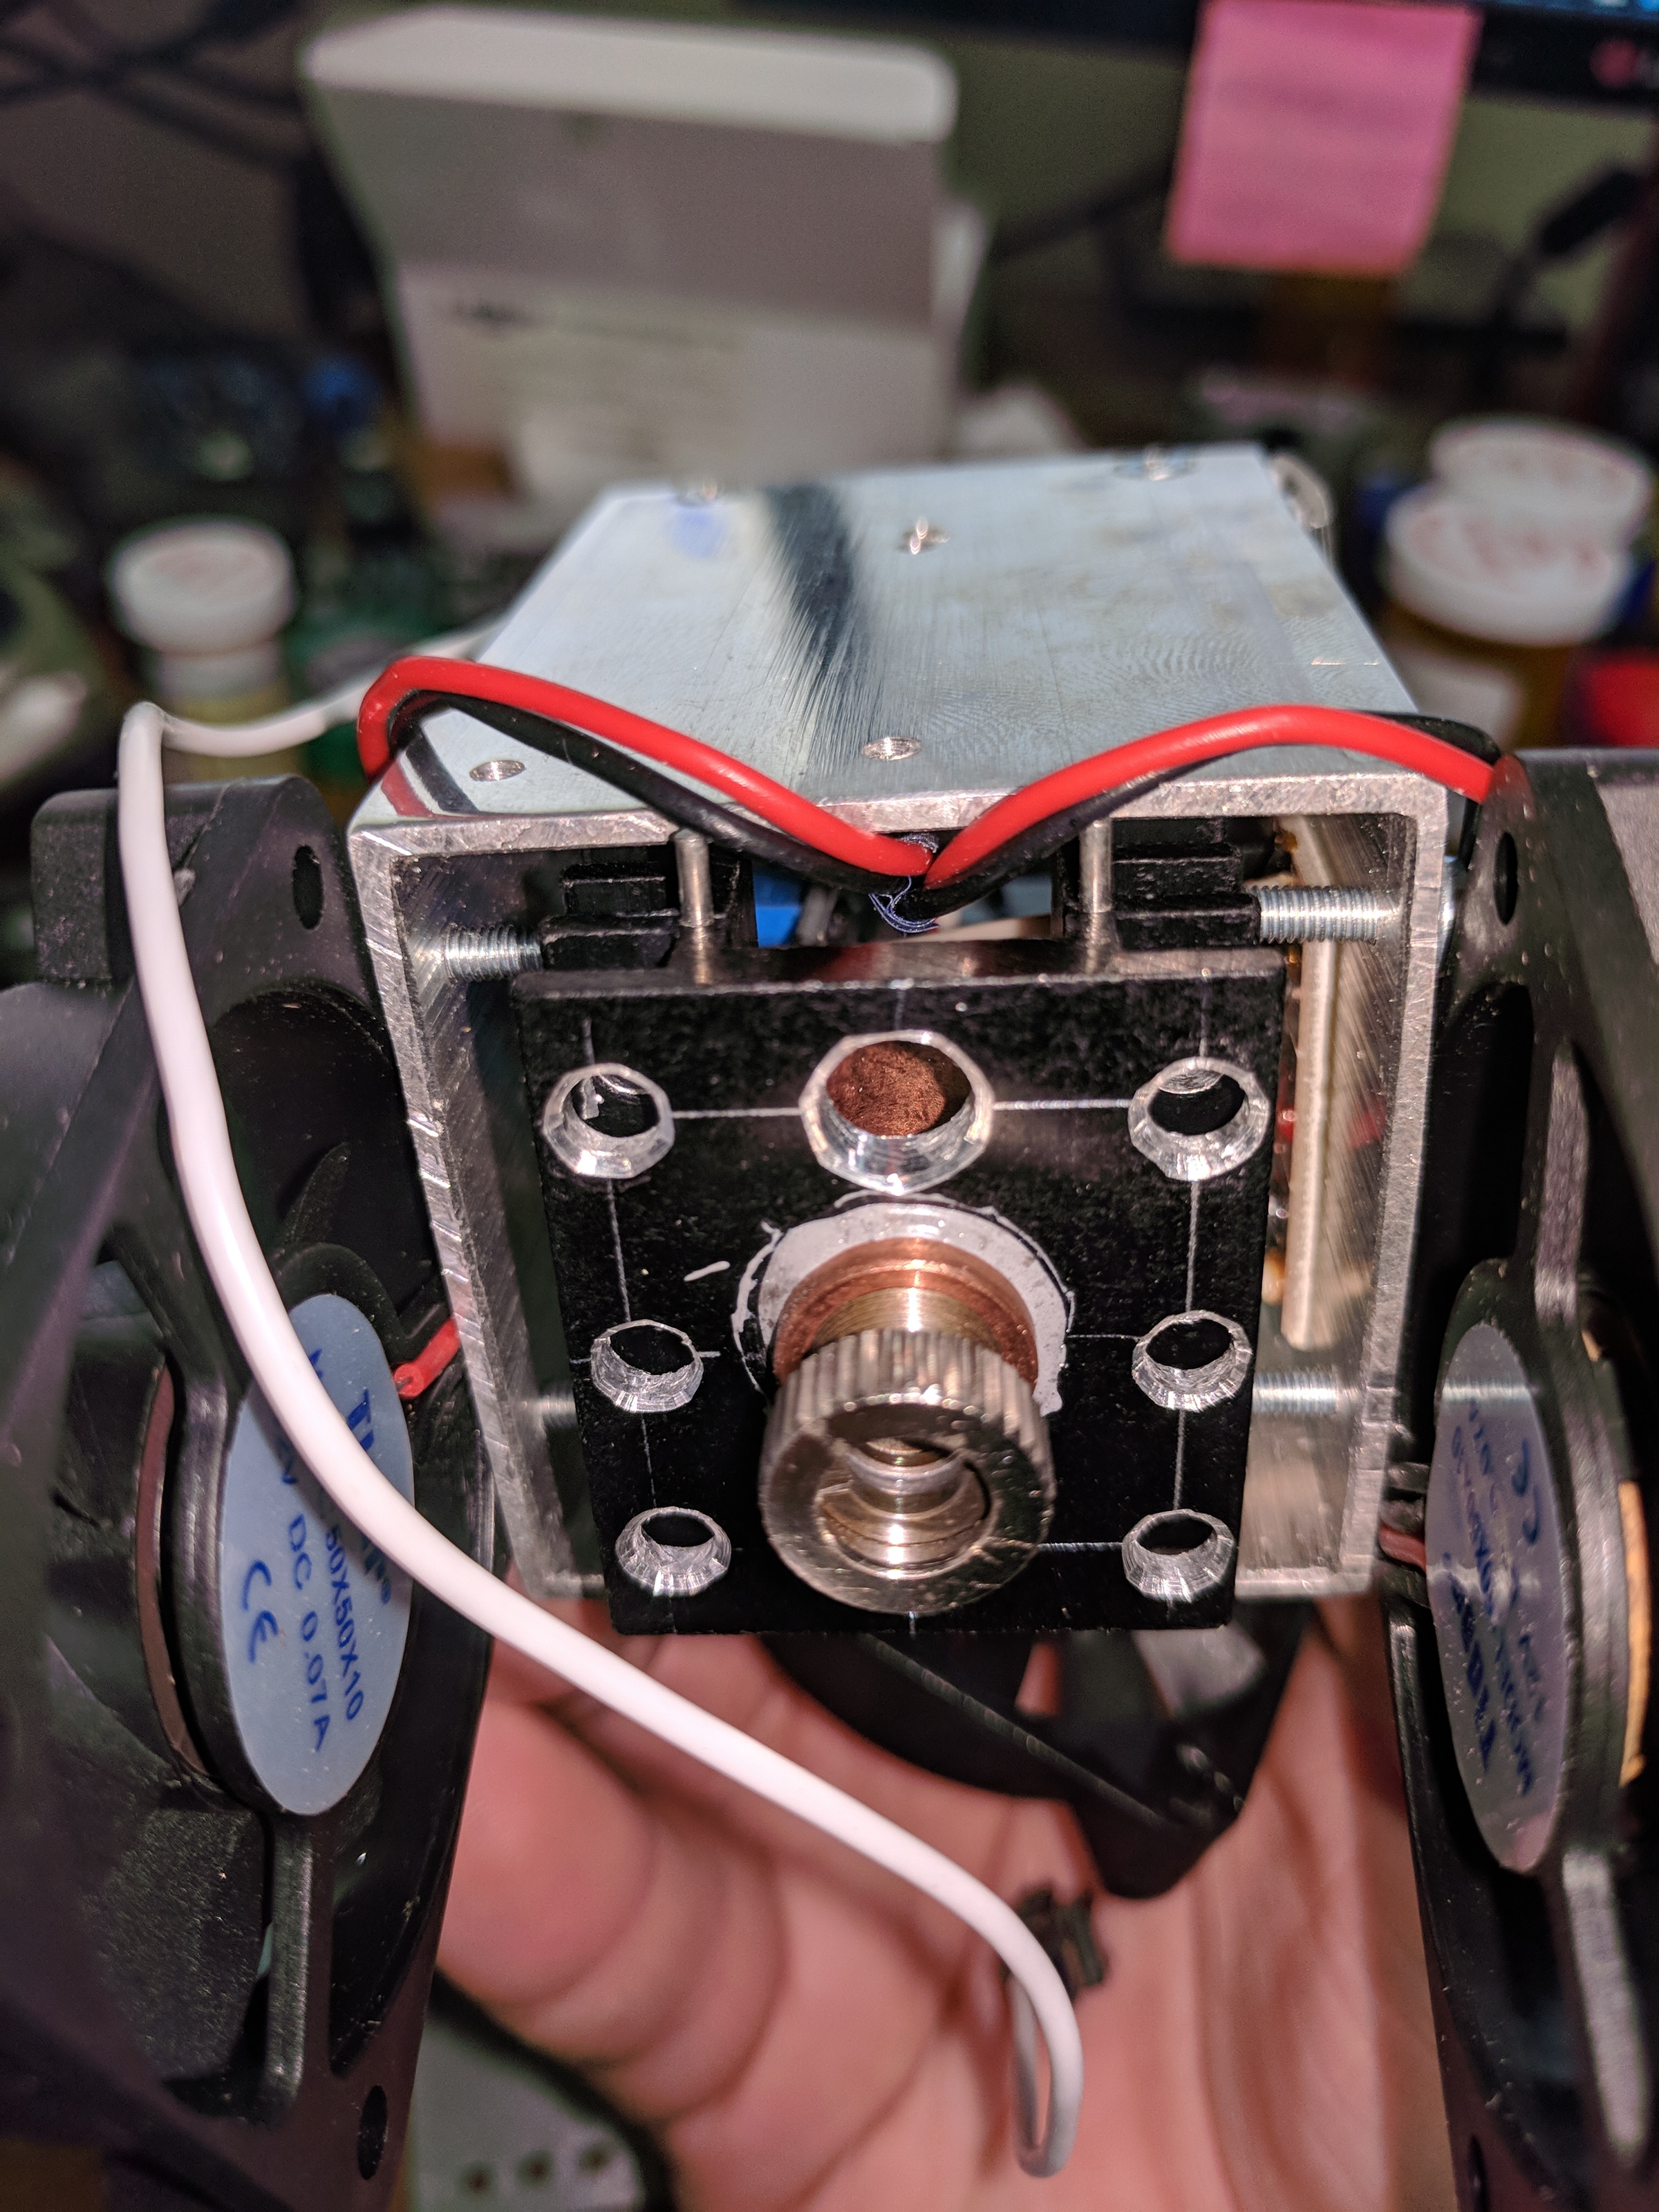
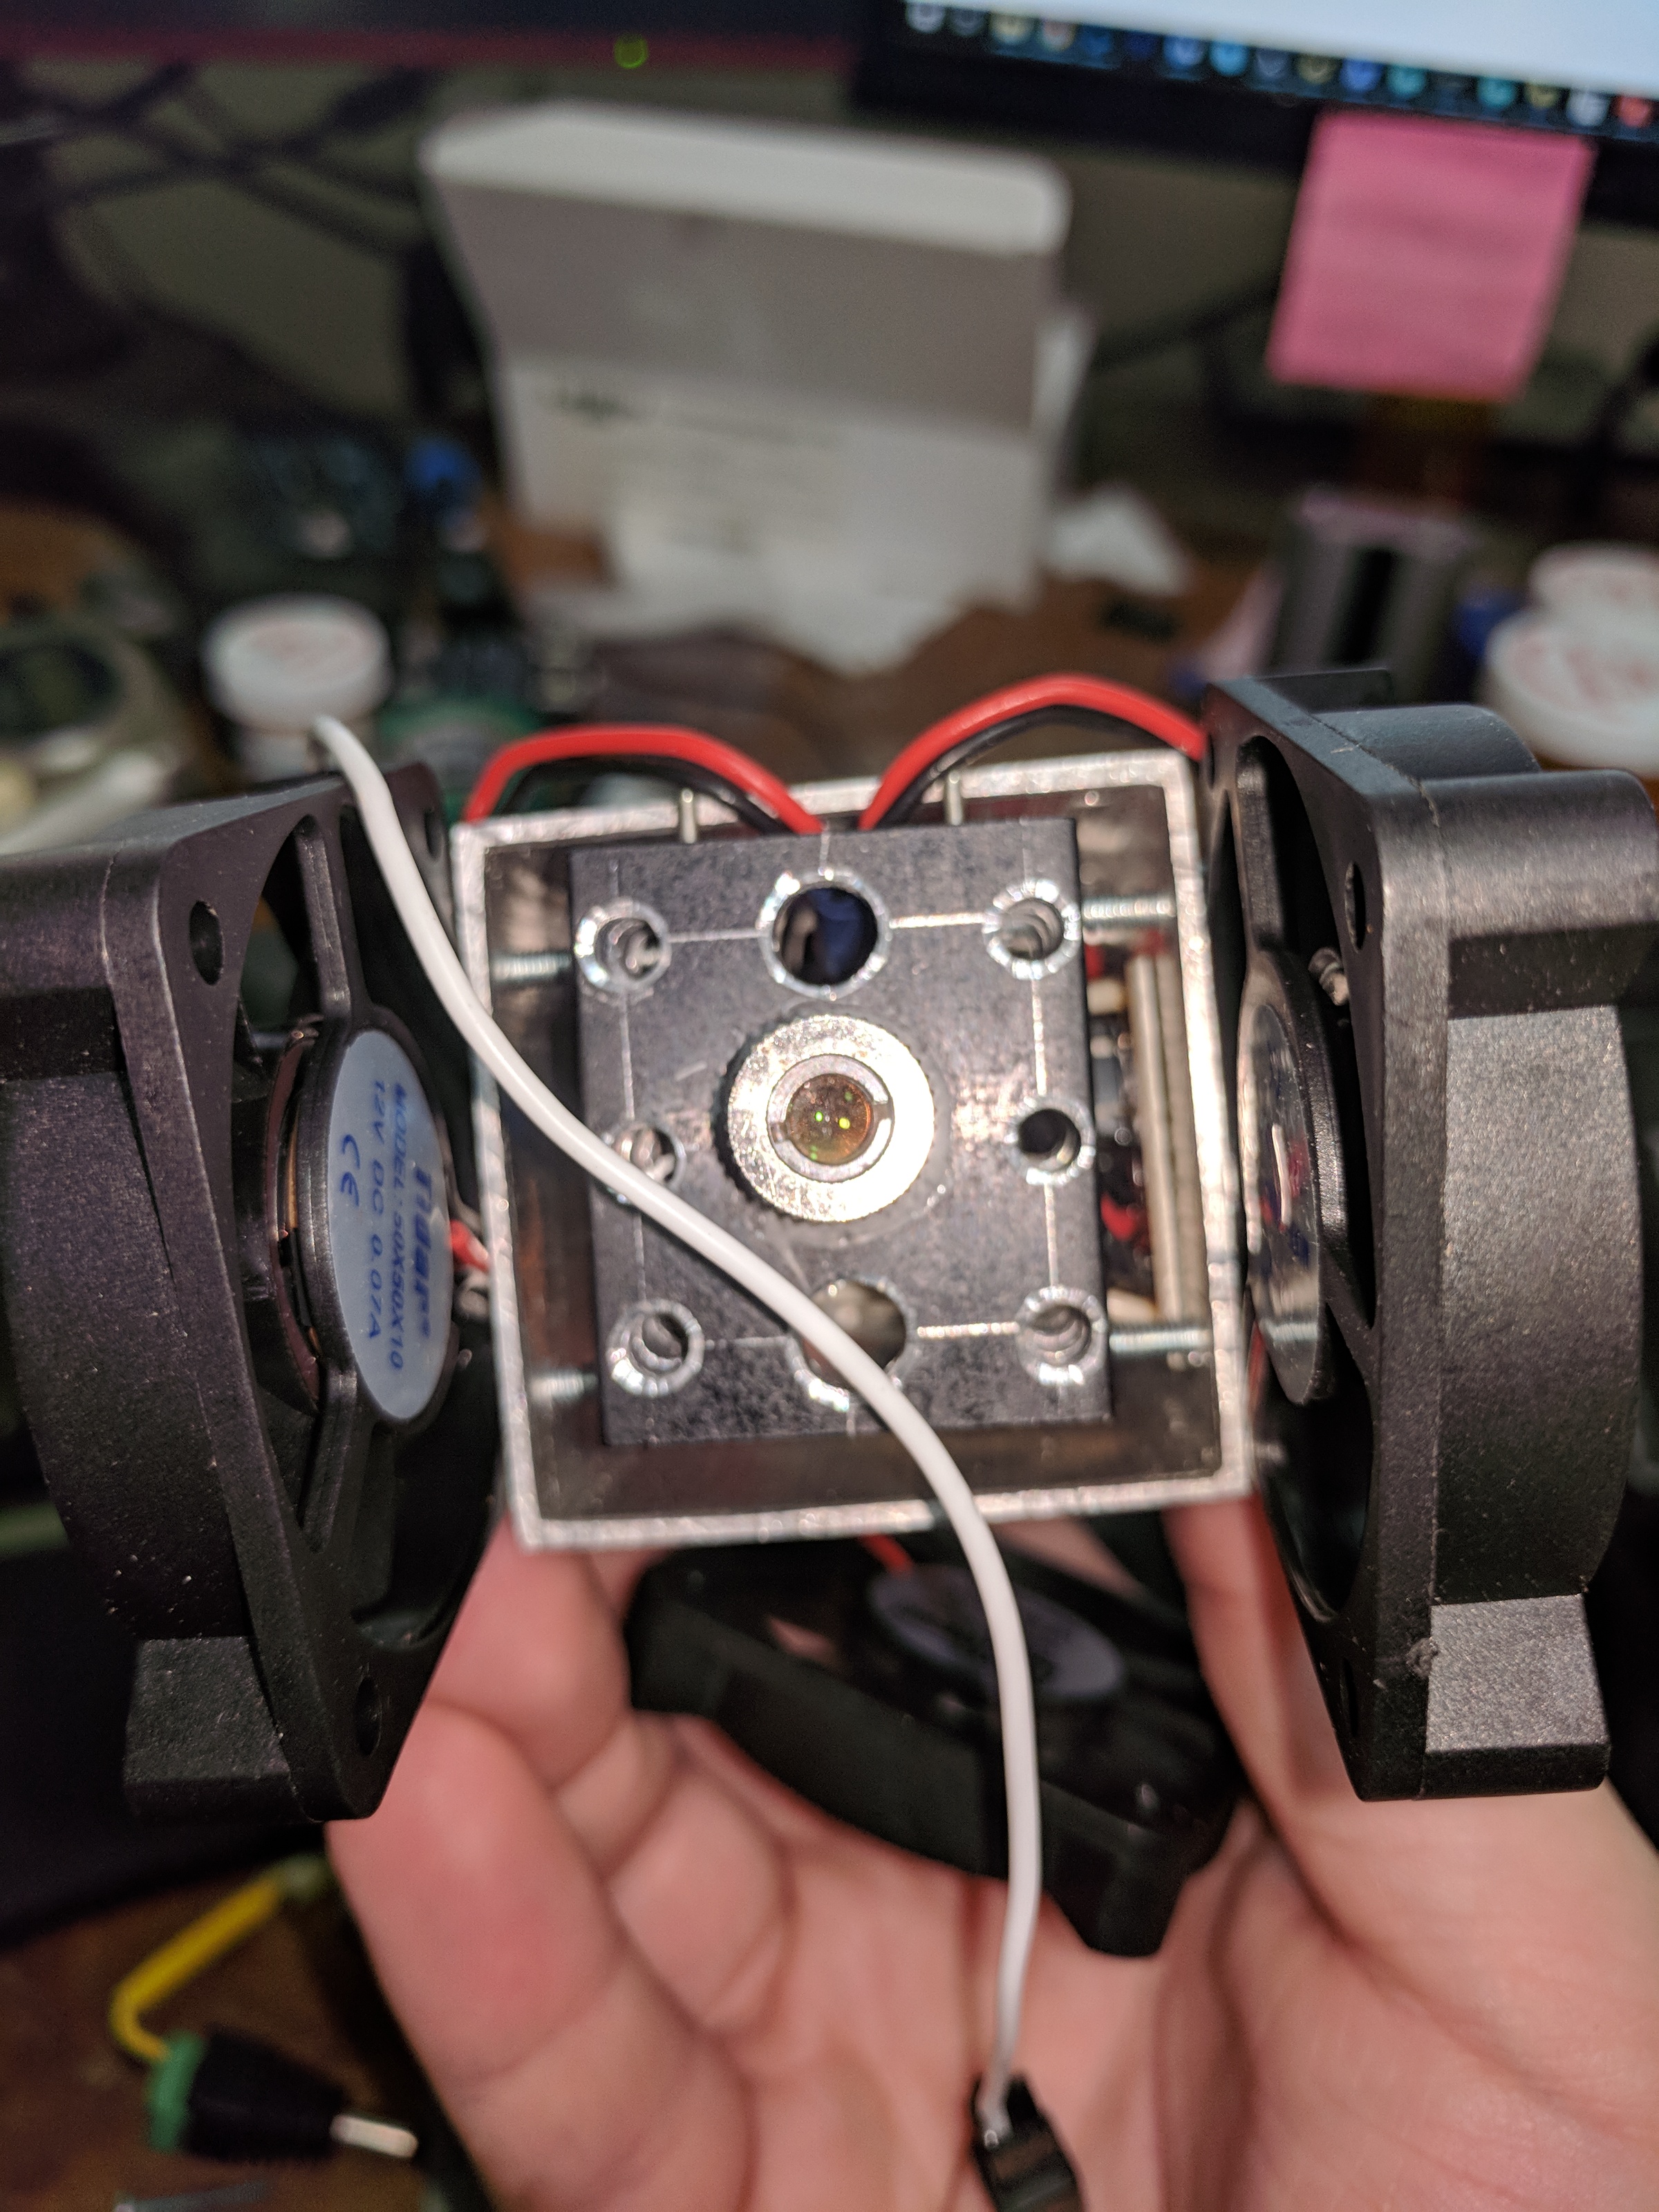
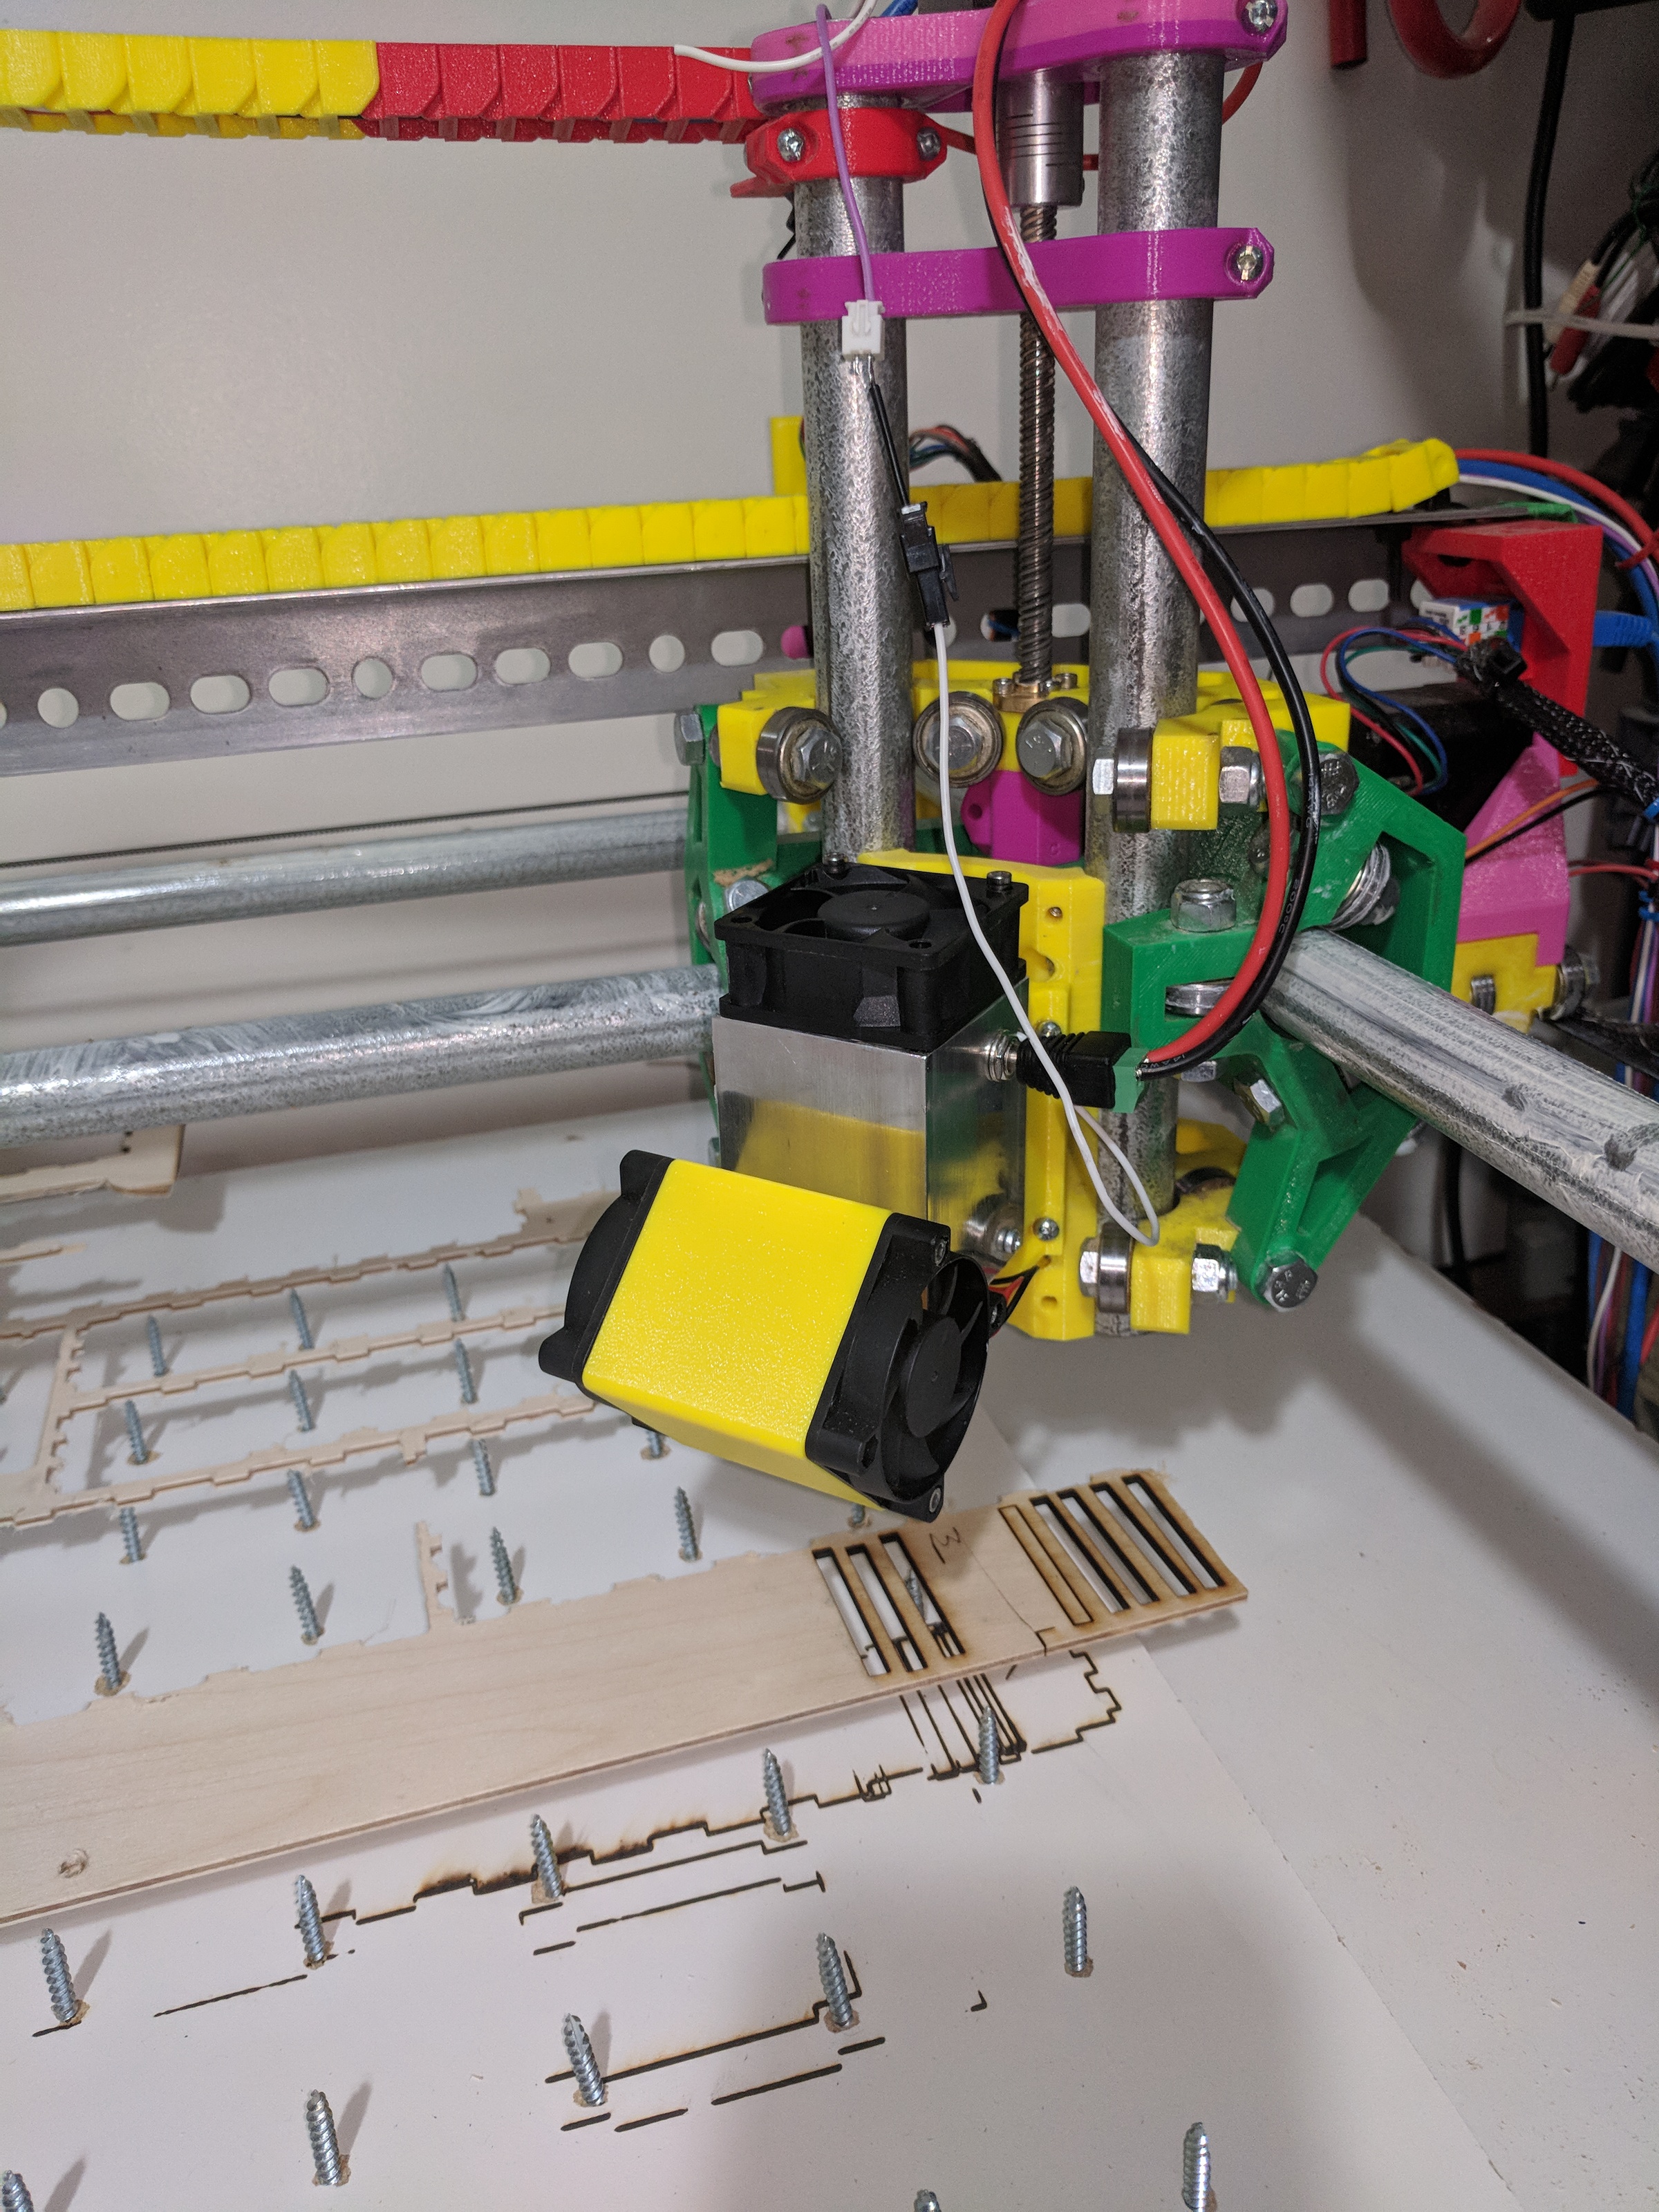
First order of business was printing the casing that redirects the side fan’s air towards the laser.
Then I had to design a mount for the laser. I ended up making a full 3d model of the laser itself with fairly accurate dimensions, then designing two different mount options. I got lots of practice with Fusion 360.
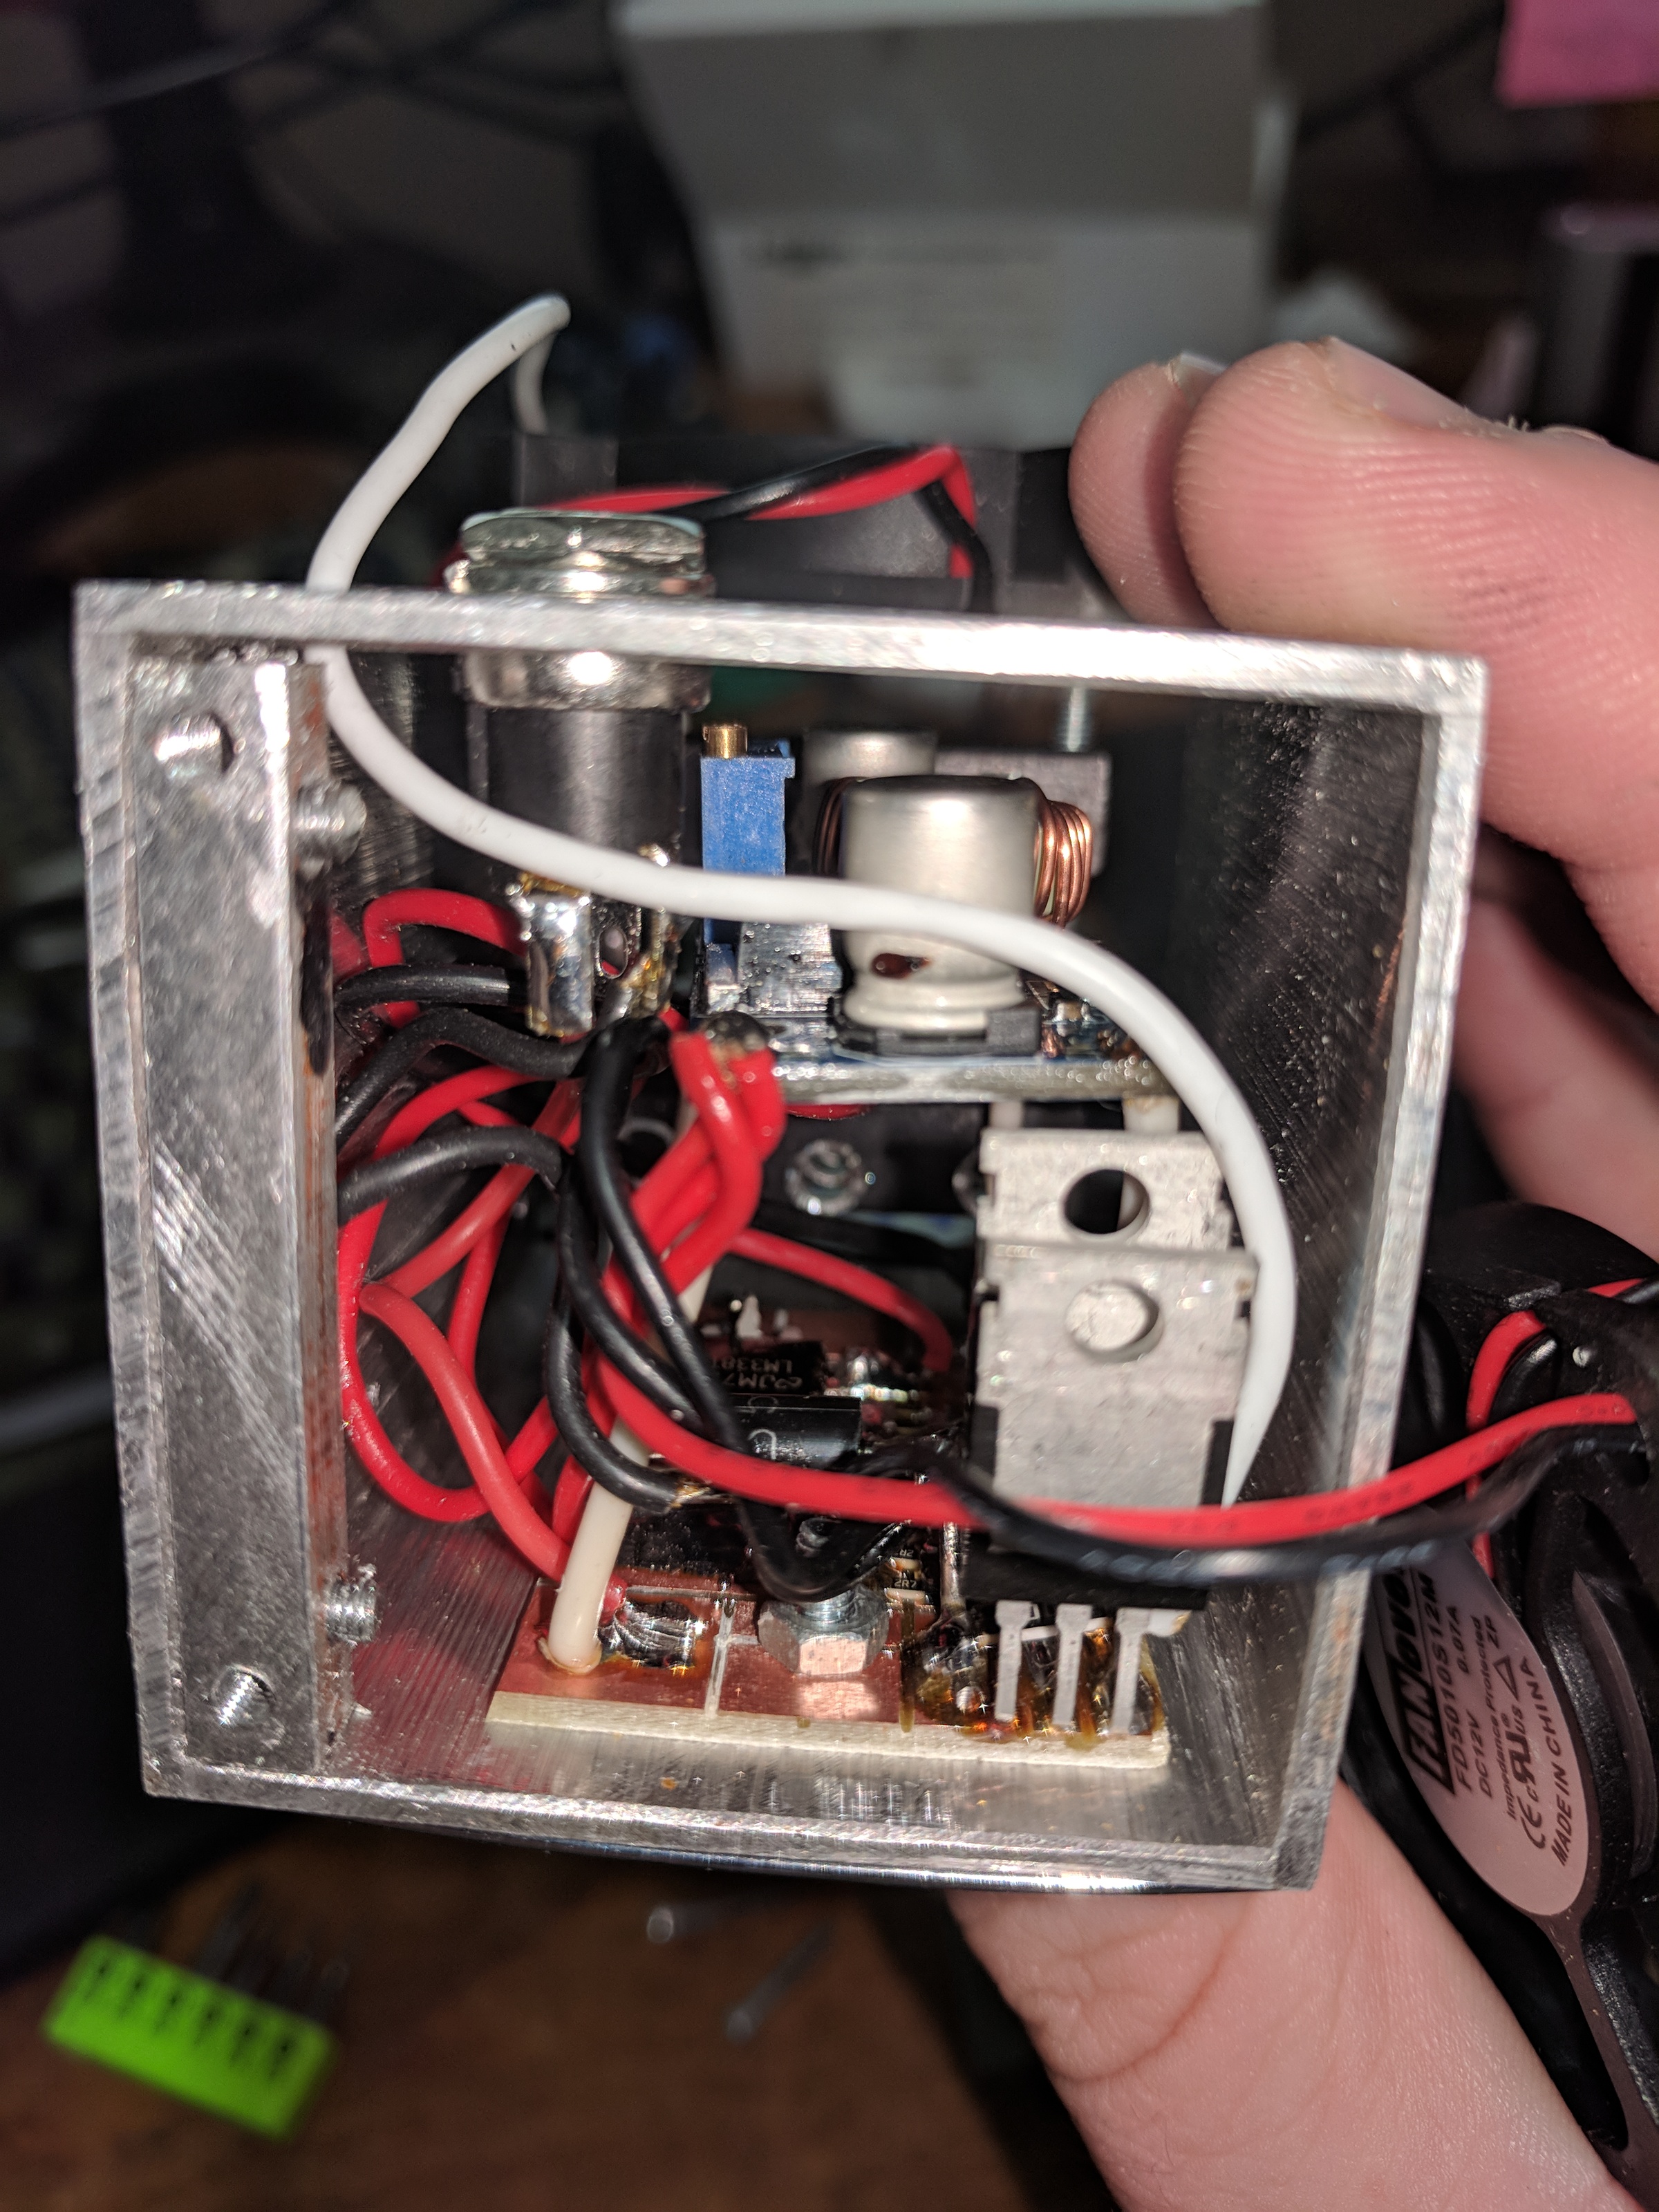
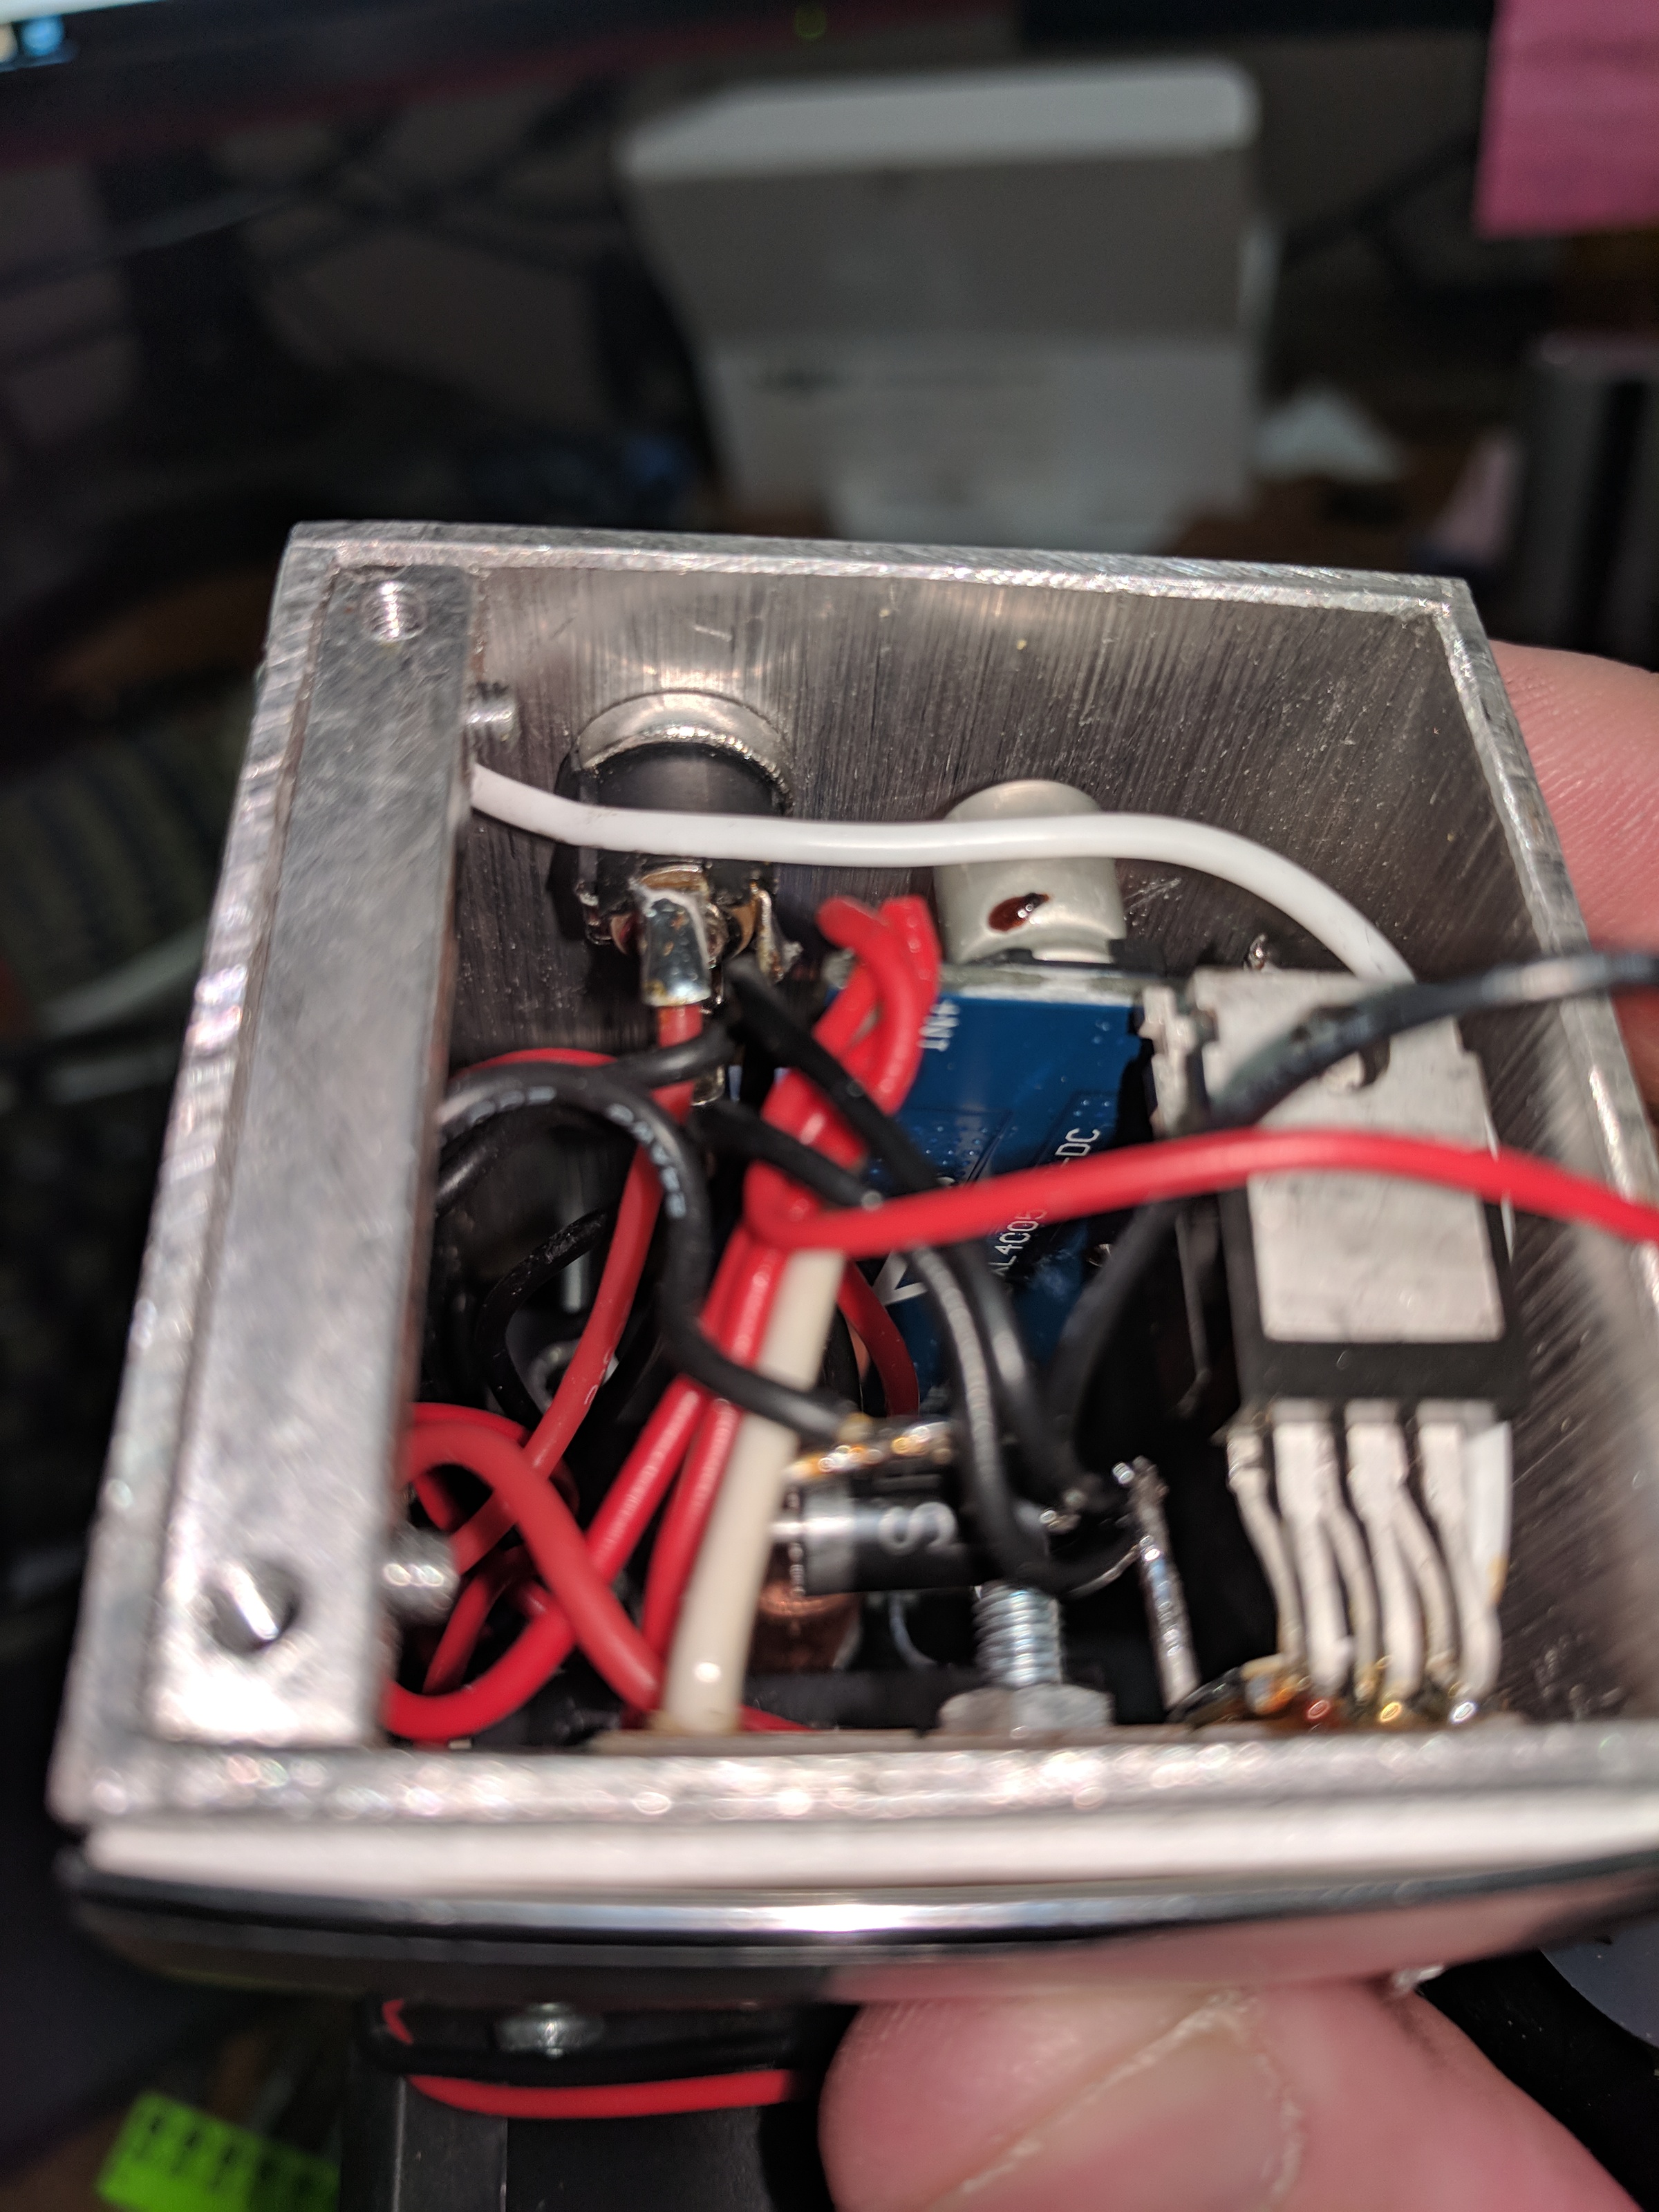
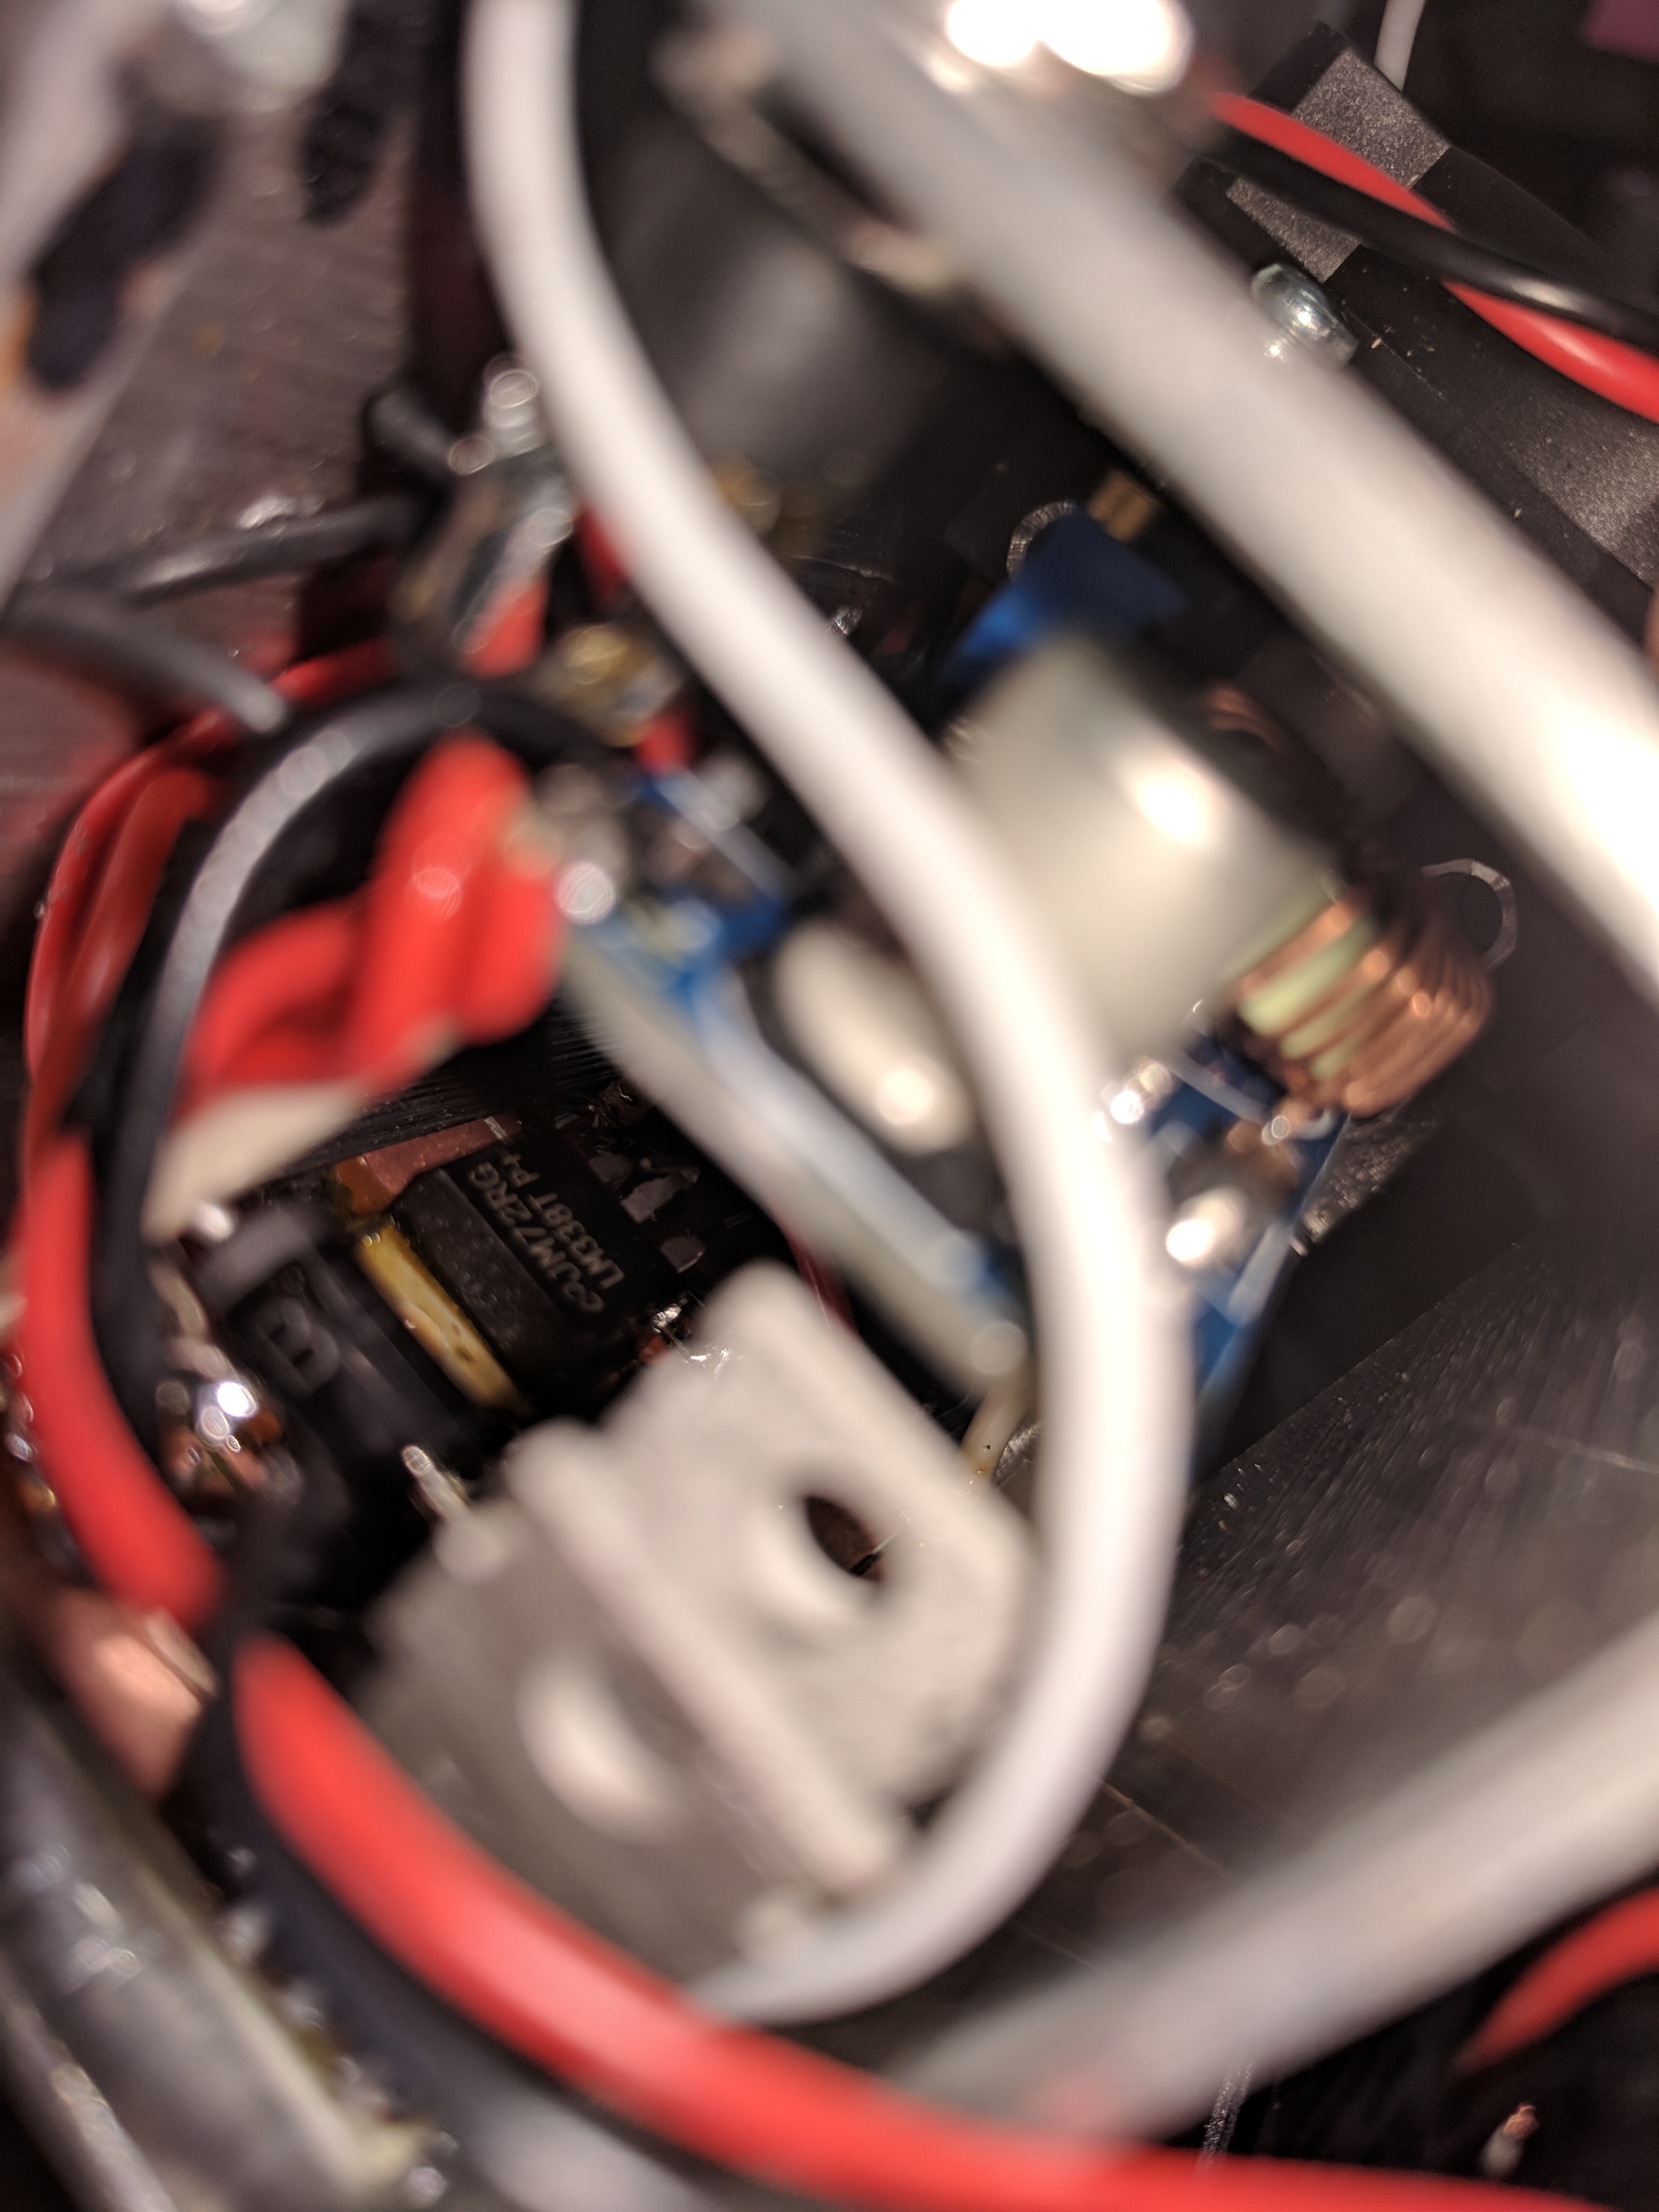
Next was upgrading the power wiring for the laser. I used 14awg silicone wire for the portion that goes from the laser to the shut off switch, since that’s subjected to constant flexing. The rest is run with 14awg solid household electric wire since I had a spool lying around. The PWM pin doesn’t require heavy duty wire, so the 20awg stuff I already had there was fine.
Then I printed a bracket to hold the voltmeter onto the table. After designing it, I realized that the voltmeter has a terrible viewing angle, so I mounted it crooked so I’d be able to see it.
Even with the thicker wires, I saw the voltage dropping to around 10v while the laser was running, so I upgraded my power supply.
First Cut
Here’s my first cut, with barely any effort made to calibrate the laser. This is in 1/8” baltic birch plywood.
As you can see, it’s not pretty, but it did cut all the way through!
Improved cutting surface
One thing I quickly realized is that if the wood you are cutting is pushed against the table, smoke builds up under there and burns the wood around it. You also get more reflections of the laser and more charing on the bottom side. Raising it above the surface fixes that. Professional machines use a metal honeycomb material to do that. But sourcing it locally is impossible, and even from cheap sites like Aliexpress it’s not all that cheap.
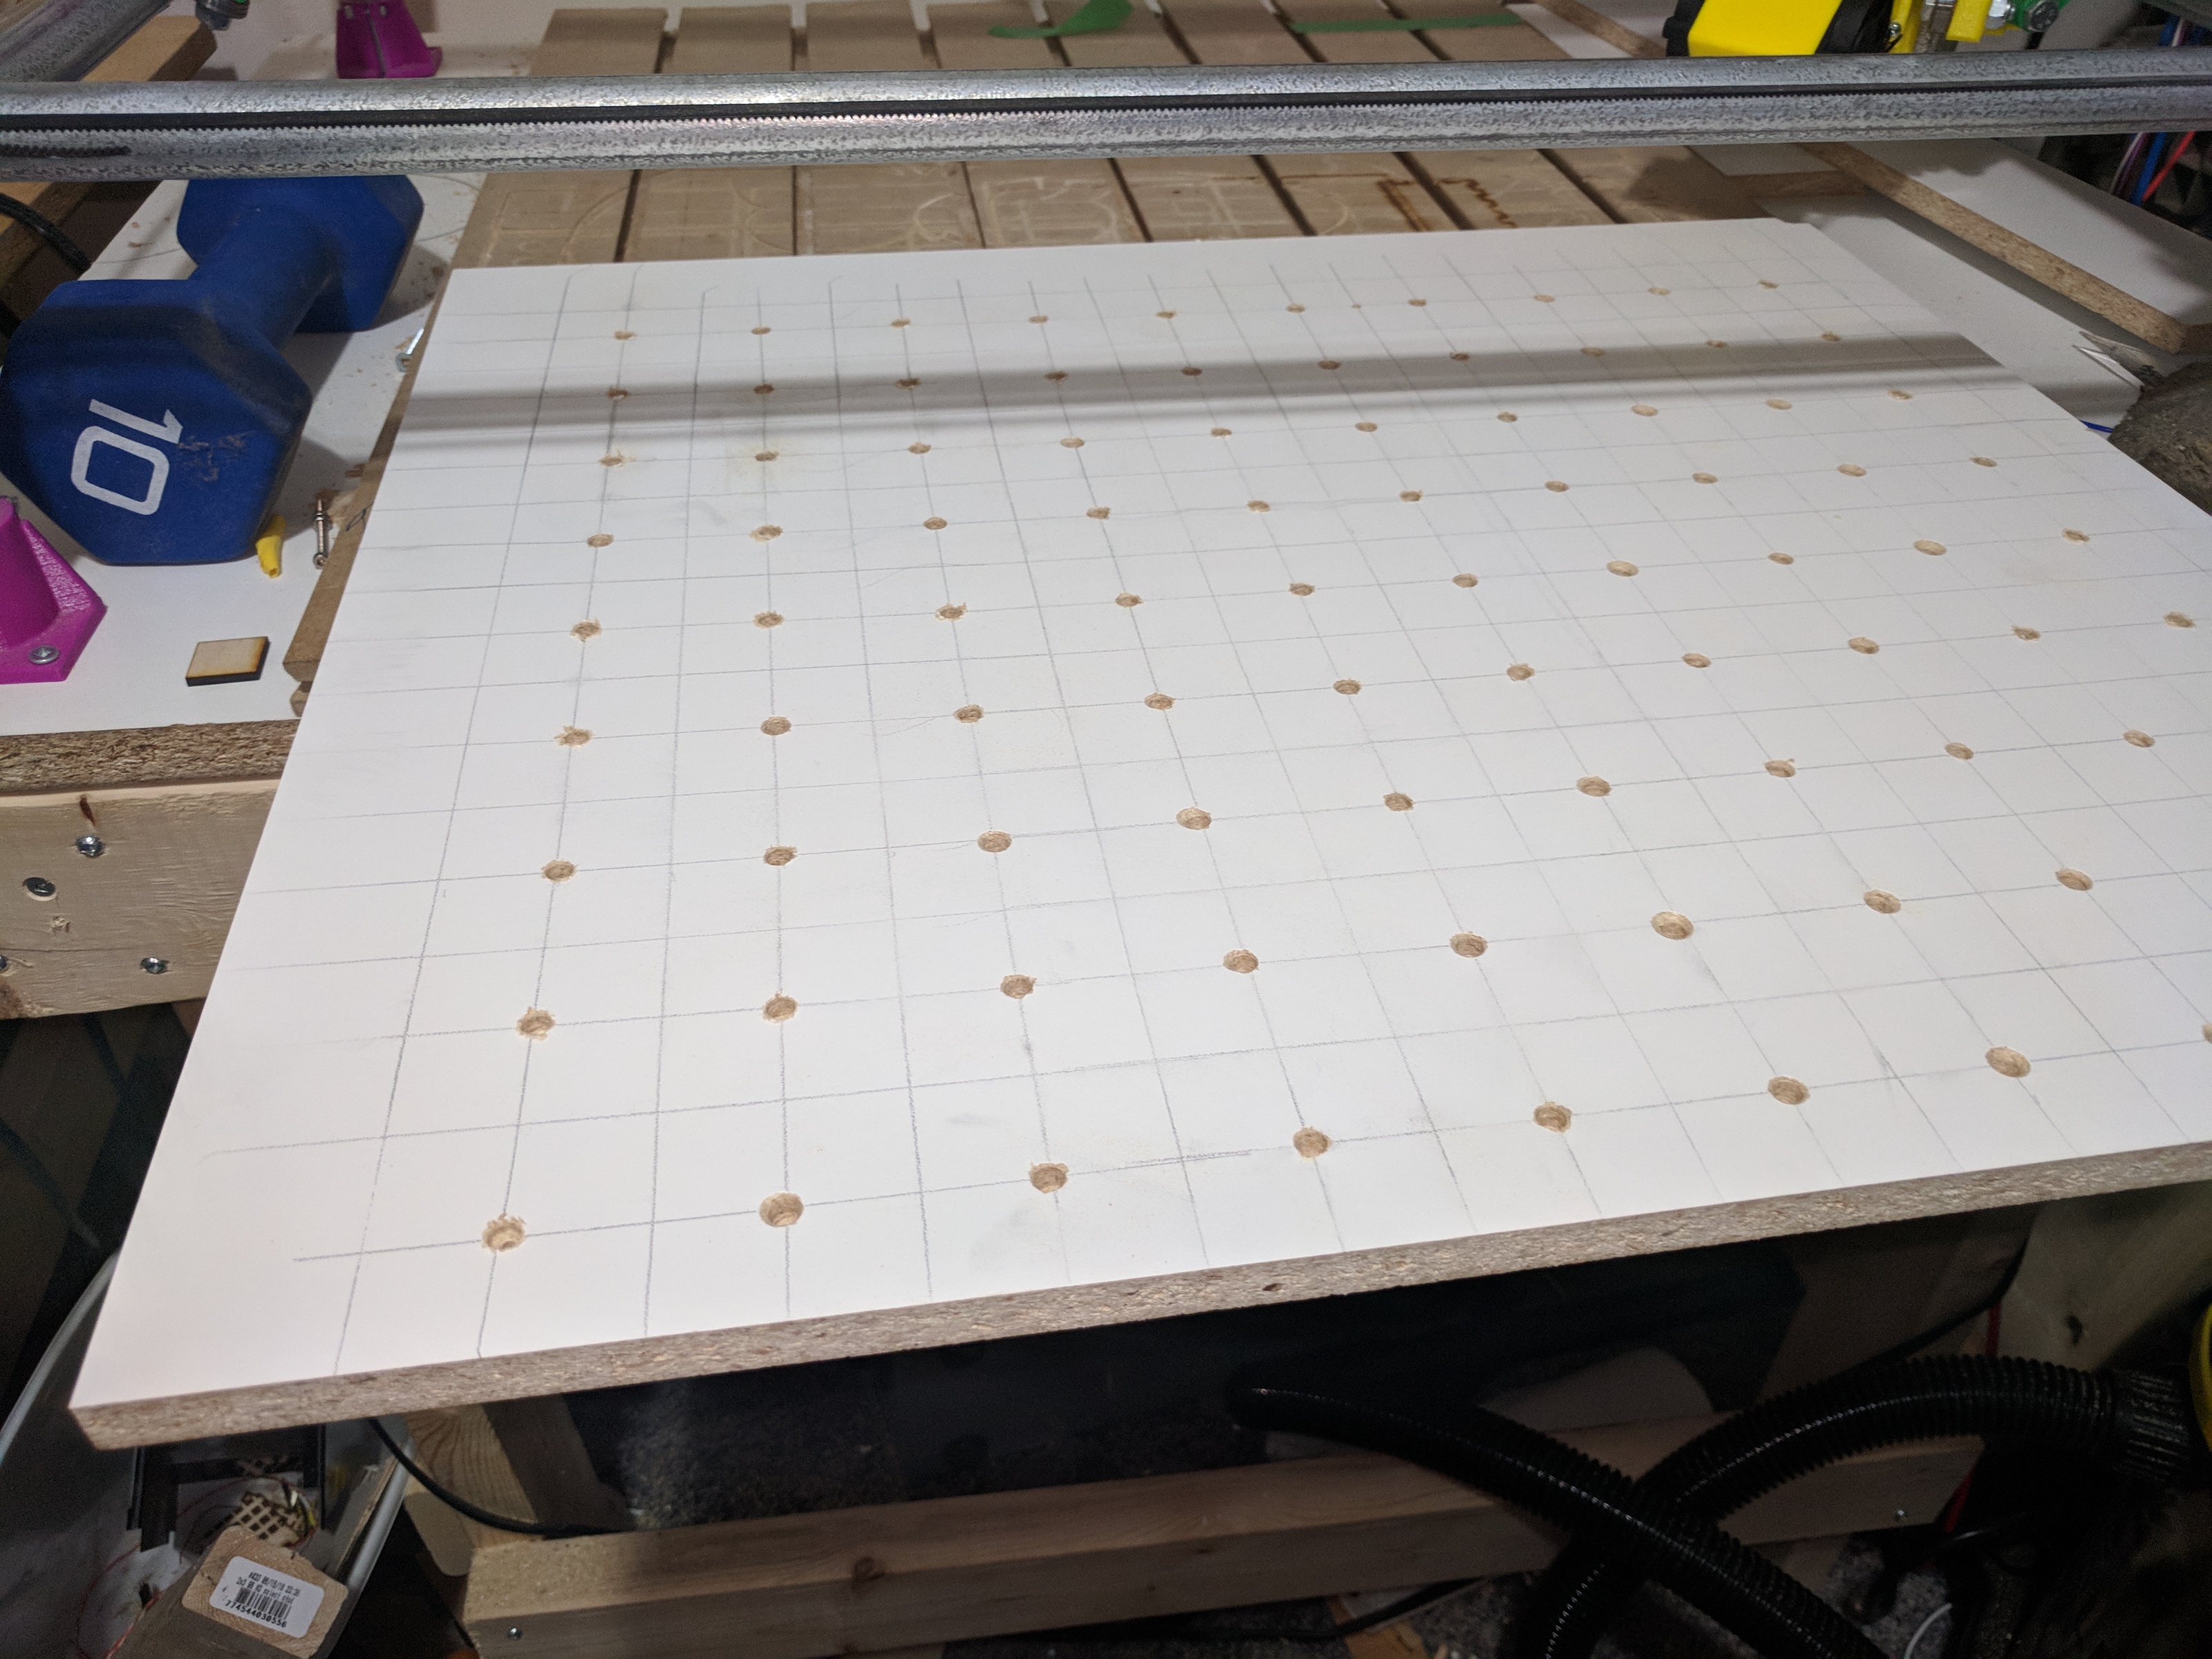
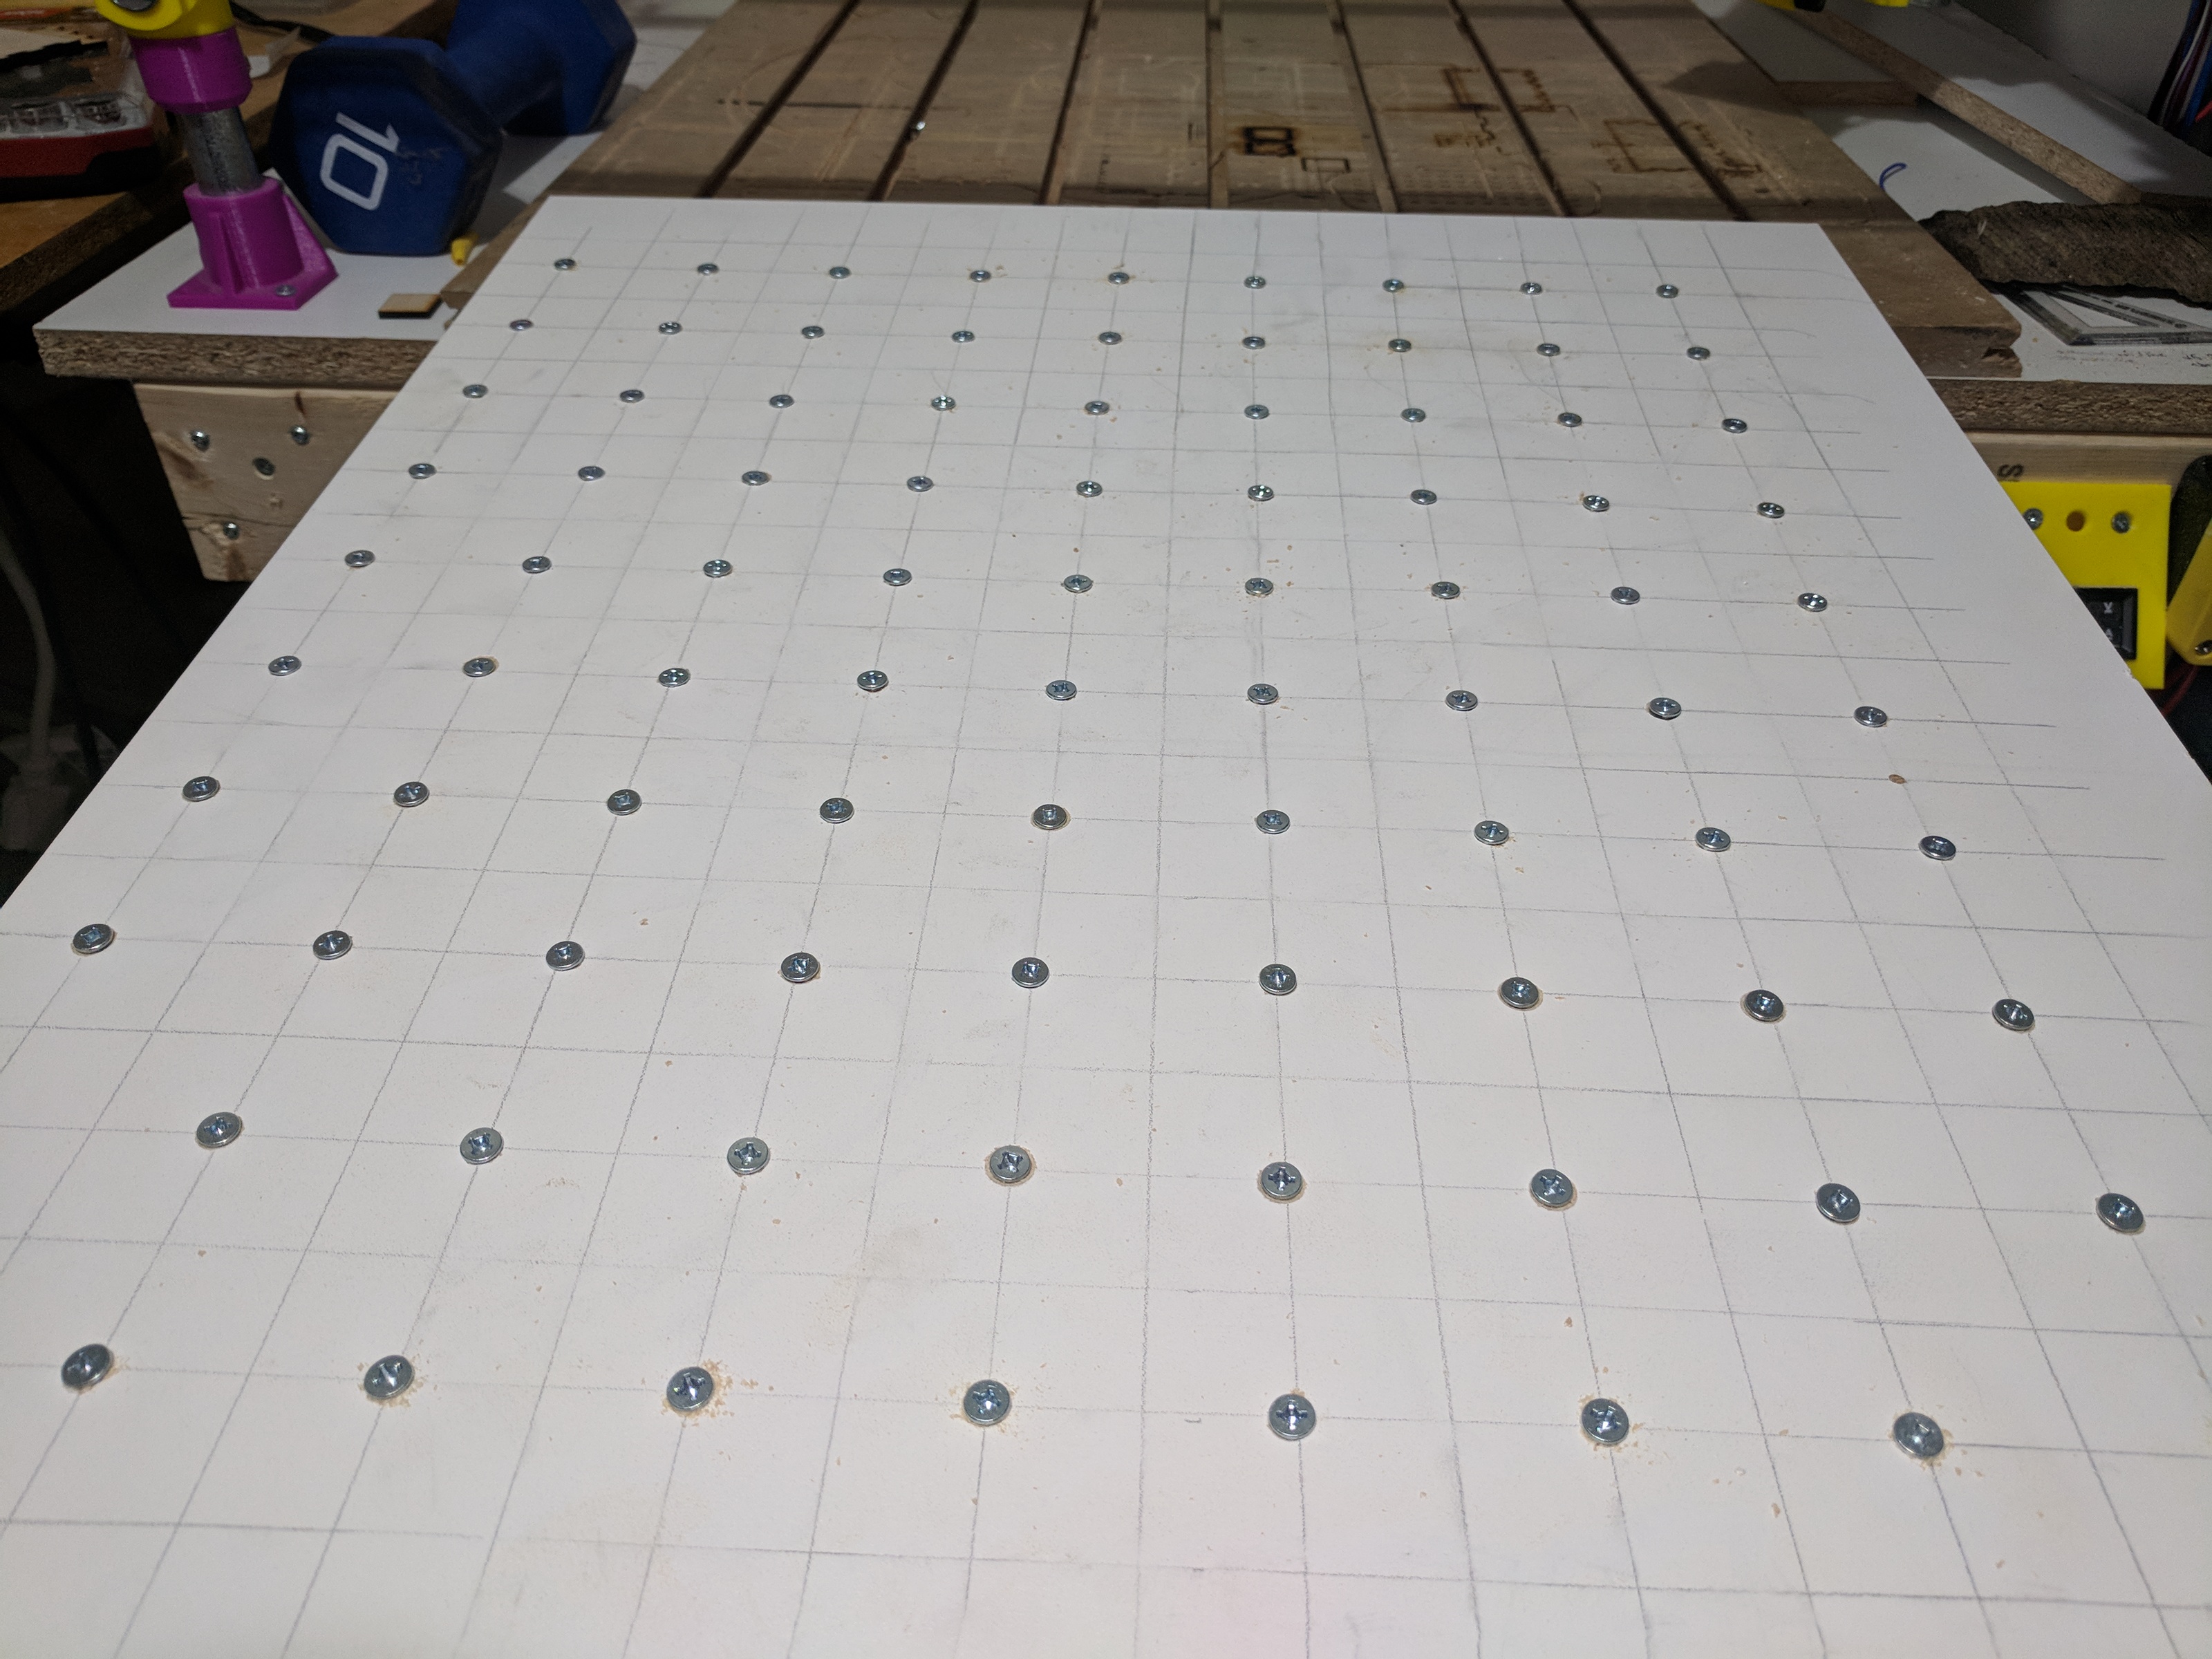
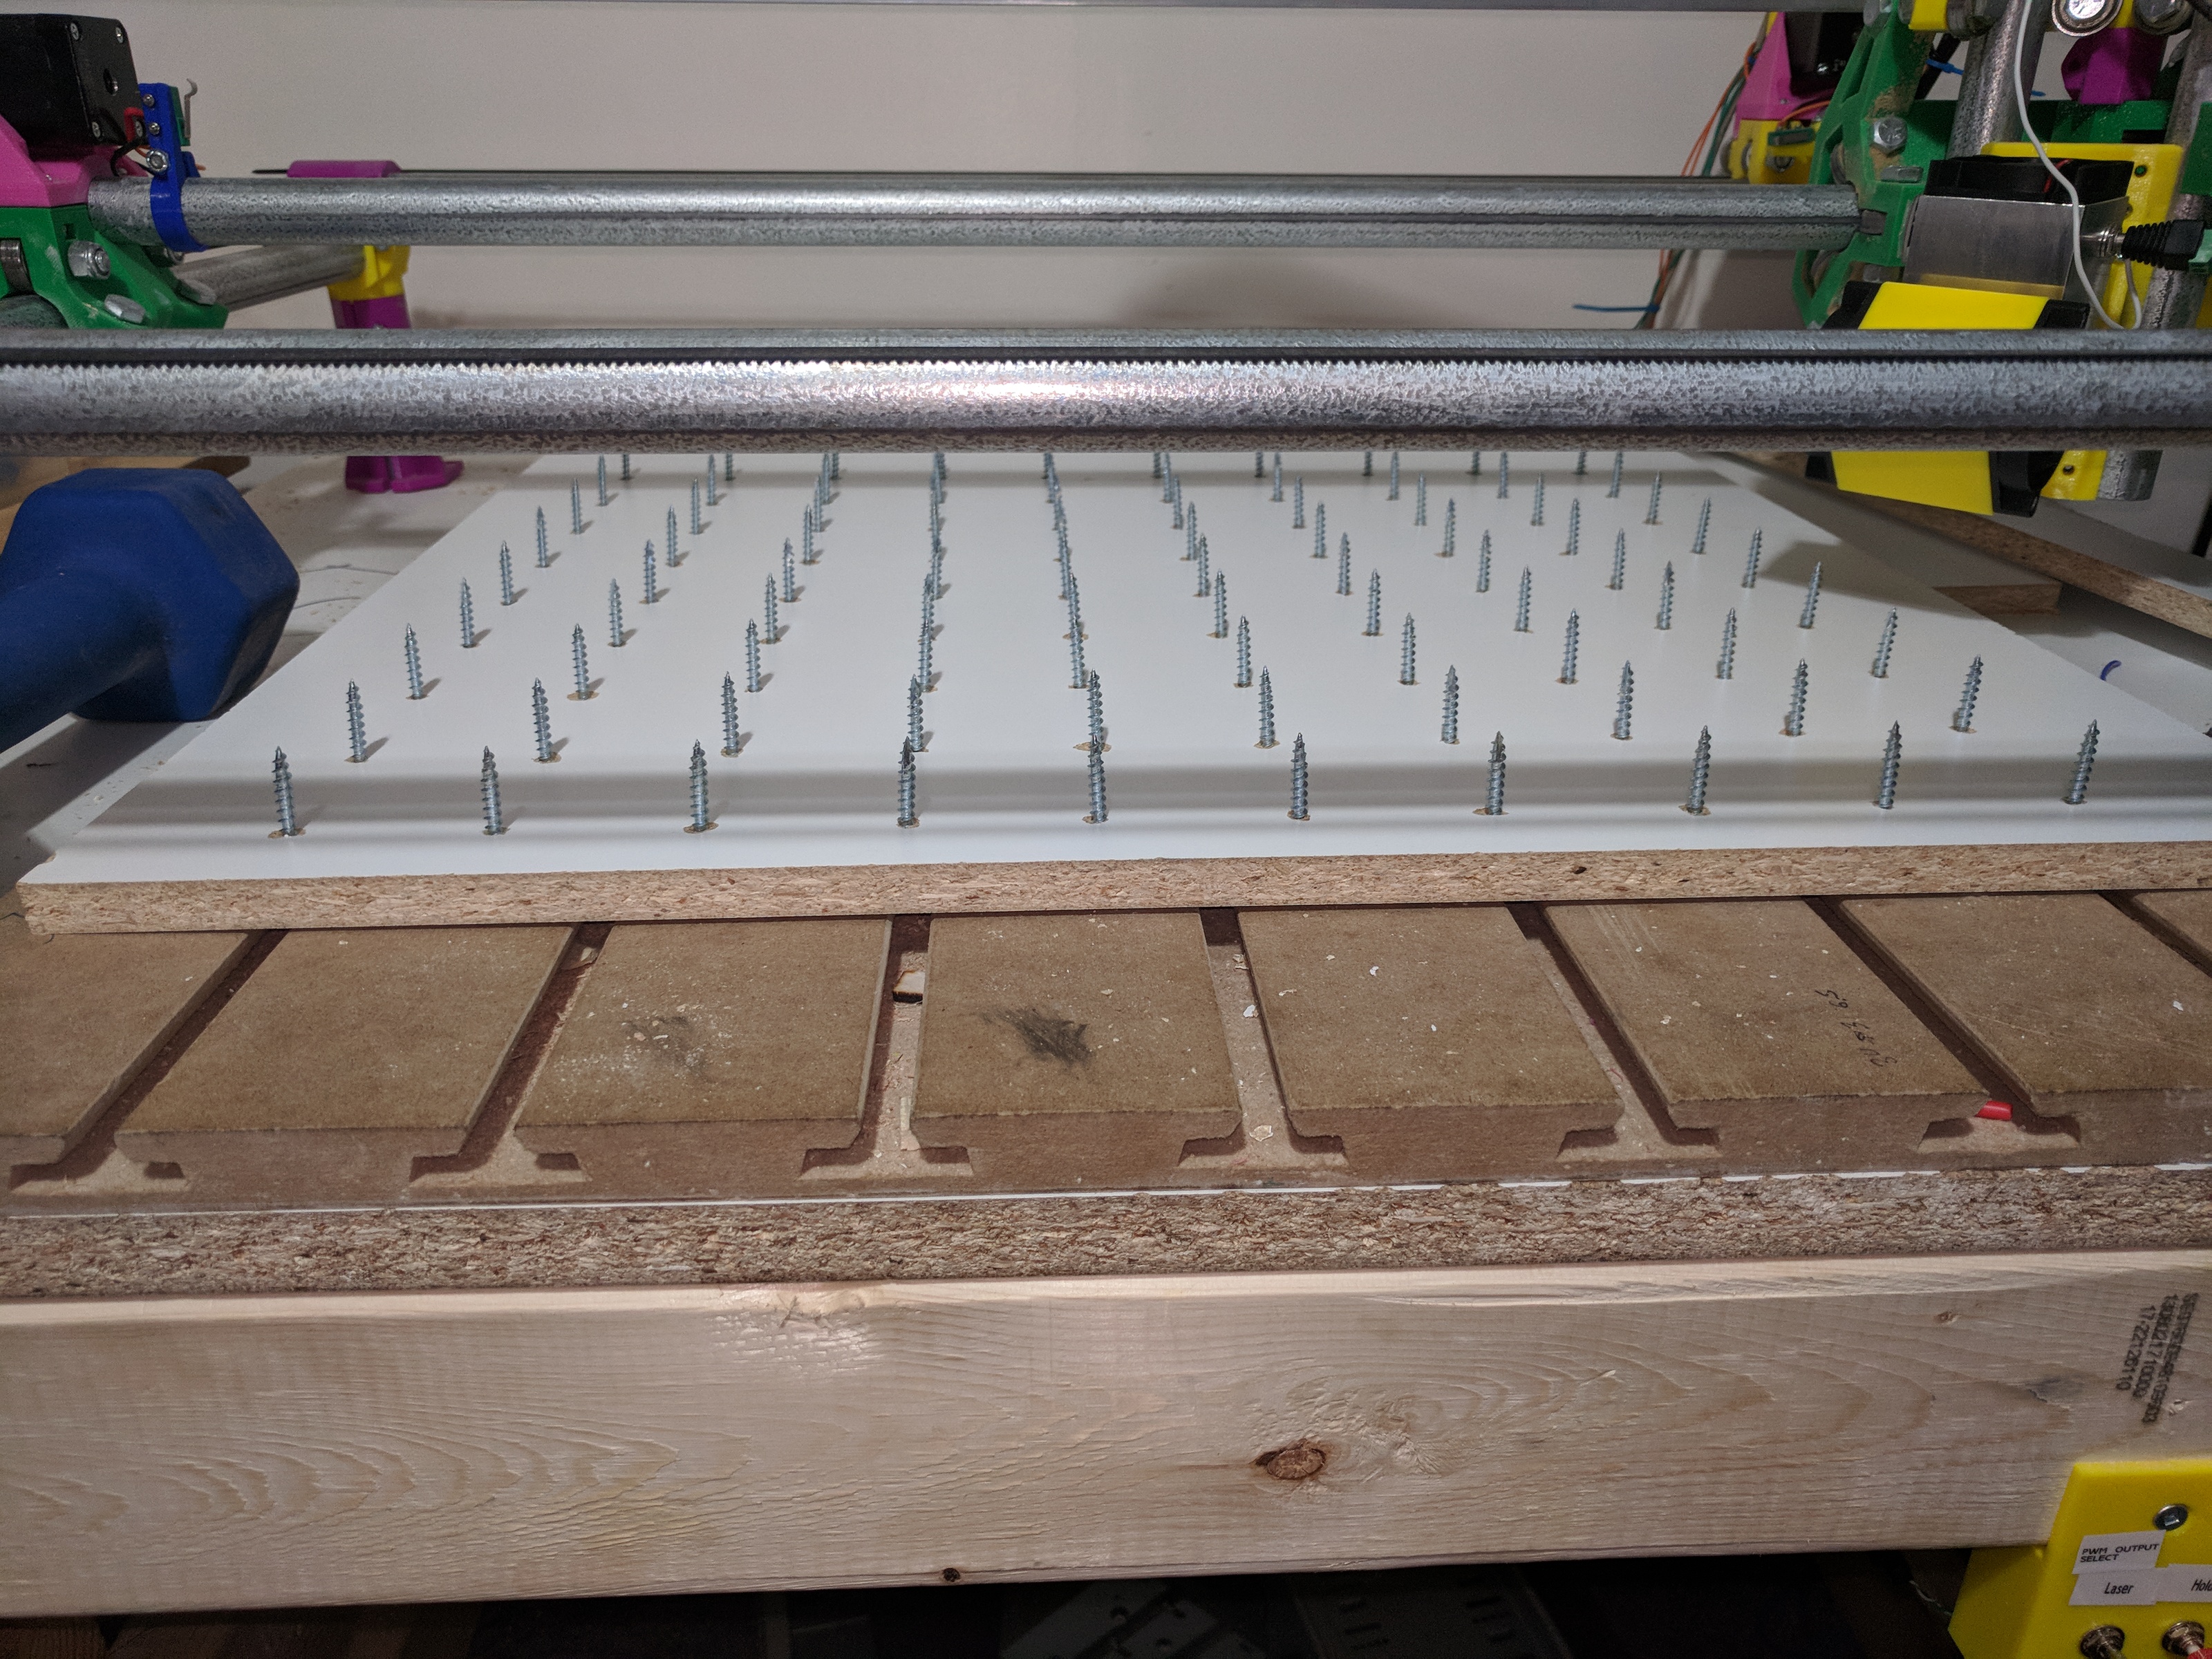
I did however have some scrap 3/4” melamine boards lying around, so I made my own kind.
I drew a grid on the board spaced about 2” apart, and drilled holes with a countersink bit. I didn’t countersink them all the way though - I wanted the heads to all stick out a bit and not be driven all the way into the wood. I used a #12 countersink bit, but didn’t drill far enough for the outer radius to get cut. Then I screwed in #8 1.5” screws. I wish I had a drill press to make sure the holes were all perfect - a few of them are tilted a bit, but it came out well enough.
It’s nowhere near as accurate as purchasing one, but it does the job.
Calibration
Calibrating the laser perfectly is important if you want good, clean cuts.
Focus/Height
This is how I figured out how to calibrate the laser’s focus:
- First I lowered the Z axis until the base of it just touched the workpiece. This always becomes my Z 0 position.
- Measured the distance from the workpiece to the laser lens - it’s 19mm. This won’t change, but was important for figuring out where the focus point should be. The focal length for the regular 3 element lens is around 60mm, so that means I should raise the Z axis by 41mm
- Turn the lens so it’s about half way in.
- Raise Z to 41mm
- Turn lens a bit to try to get a nice tight dot. Don’t worry about getting it perfect, just somewhere in the range that makes a small dot.
- Try engraving lines at different heights. I used this SVG with lines and markers for heights 31-51.
- Look for where you get the thinnest lines. They should go from thick, to thin, to thick again. That thin section is your usable cutting range.
In my test, the 51mm line was still fairly thin, so I might have to try going even higher. But in further testing, starting at 47mm seems to work best.
Now, as long as I don’t touch the lens, I can just lower the Z axis to touch the workpiece, then cut at Z 47mm.
Power, Speed and Passes
Too slow and you char the wood or even start a fire. Too fast and you don’t break through. The only way to figure this out is trial and error. And it will be different for each material you work with.
For cutting baltic birch plywood, the hardest part to cut is against the grain. Lines going with the grain cut easily. So I made an SVG of a 5cm by 0.5cm rectangle, and made the long sides be across the grain.
Then I tested with different combinations of power levels from 50-100%, heights from 45-50, and speeds from 60-250 mm/min. I made a spreadsheet to record my settings and the results. With option, I set it to a single pass and kept rerunning the job until it either cut through, or was obvious it wasn’t going to work well.
What I’m looking for is:
- How thin is the line on the top surface? Thinner is better.
- Is the wood around the cut charred? It’s going to be black on the edges no matter what, but the wood that remains shouldn’t look like coals from a camp fire.
- Did it cut all the way through? In how many passes? Some settings result in the piece falling out on it’s own, others are removable with a little pressure, others damage the wood when removing it because too many fibres are still attached.
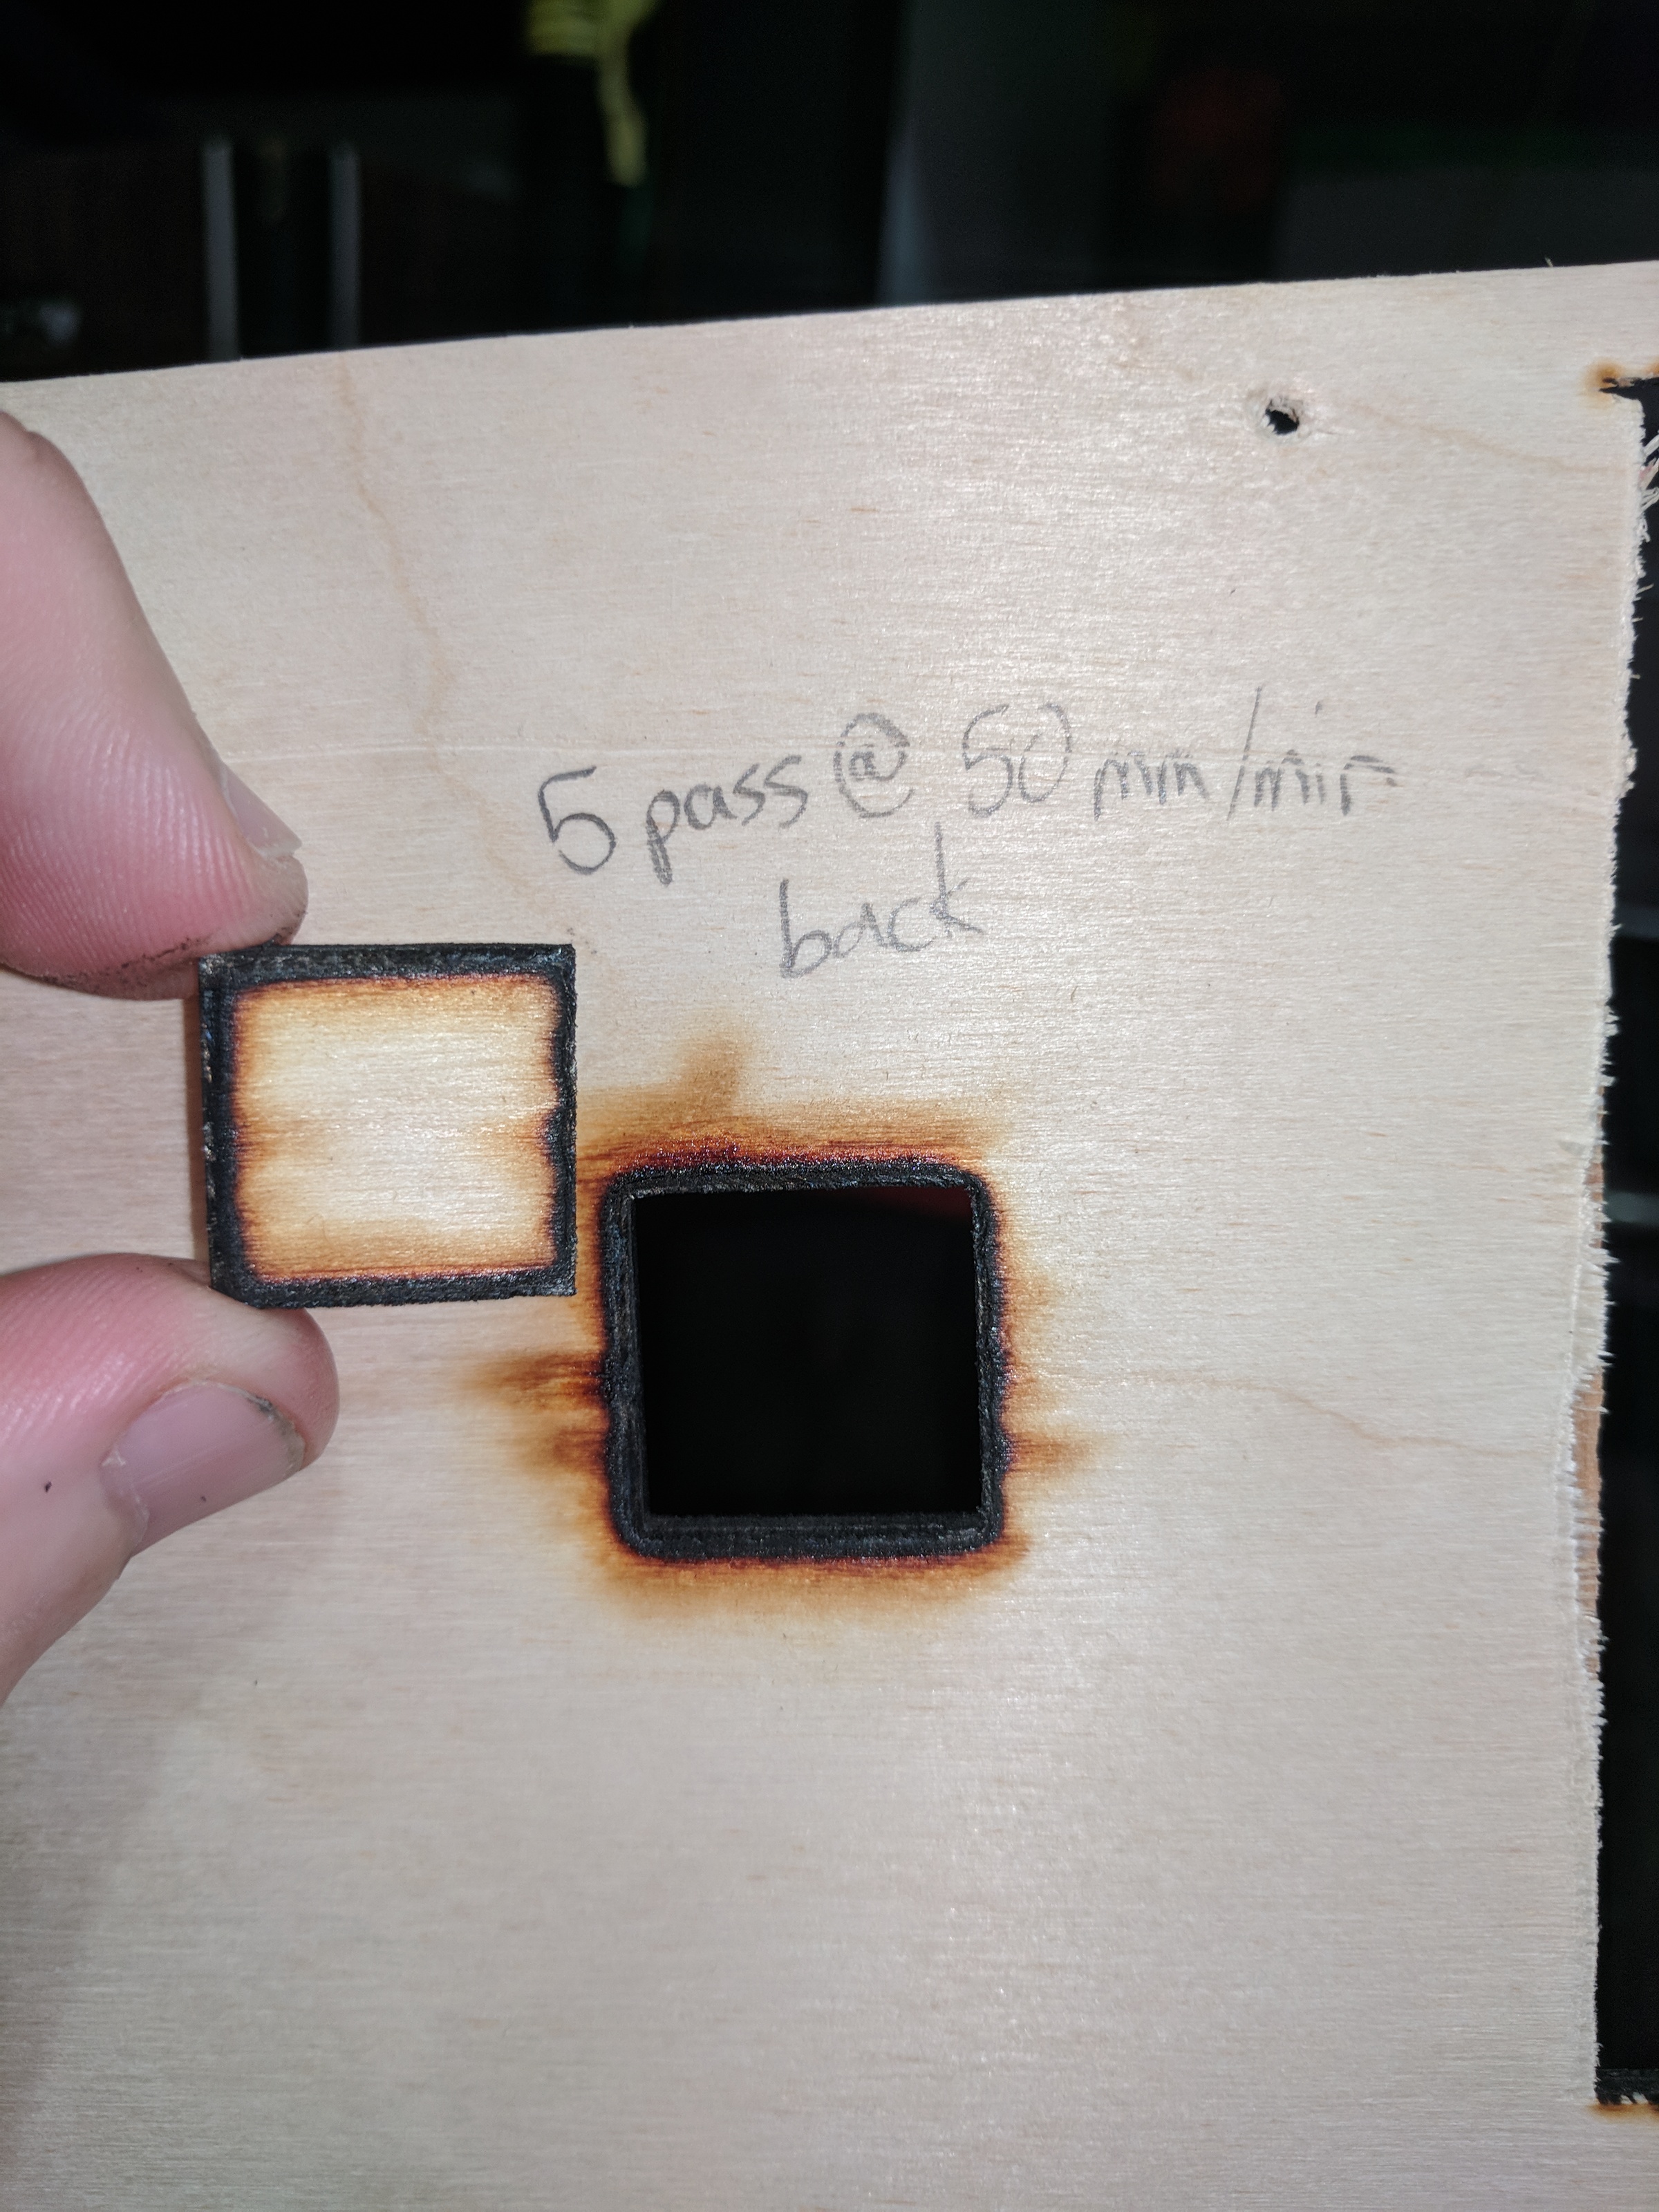
So far the best settings I’ve found after much trial and error are:
- 80% power
- 4 passes
- 47mm height
- 200mm/min
Problems
I do still have some issues with the equipment:
- The voltmeter isn’t all that great. It resets itself constantly when the laser is being run at < 100% duty cycle. Powering it separately instead of inline with the laser might help with that. Also, the LEDs for the amperate rating are blue. Which makes it nearly invisible when you have the safety glasses on - they block blue light almost entirely.
- The top fan on the laser died after at most a couple hours of operation. Replacing it was easy enough, and I opted to replace it with a more powerful fan while I was at it. But 50mm fans aren’t super common, so I was lucky to find one quickly. Update: I emailed George from Endurance Lasers about the fan dying. He offered to send me a new one right away. When I told him I had already replaced it, he refunded me the cost of the fan I bought. Now that’s good customer service! Very impressed with that.
Conclusion
This laser is a lot more powerful than the previous ones. I’m still working on fine tuning the settings, but it’s definitely up to the job. Once I’ve made some stuff I’ll post more pictures and videos of the machine in action.