D&D TV Table
I play Dungeons and Dragons, and we use a map on the table for our minis. But printing maps gets expensive. So why not go digital? Instead, we can use a TV built into a table and display the maps on there.
Originally I thought of using a projector. I’ve seen a few people build rigs using projectors. But the projectors I had access too need to be fairly far away from the surface they’re projecting on - higher than my ceiling if aimed down. I don’t think my wife would approve me cutting holes in the ceiling and the floor above to mount a projector! But I did have a nice 32” 1080p TV that wasn’t being used too much, so that’s what I went with.
Planning
The first step was figuring out exactly what I want out of the table. I had a few ideas:
- I wanted it to be relatively cheap - 2x4s and plywood, not fine lumber.
- Fit a 32” TV - since that’s what I had on hand for the project
- Be quite sturdy. I don’t want the table rocking or tipping
- Have a bit of room around the TV for people to sit their stuff, but not too much - our laptops can go on side tables.
The next step was mocking up the design in Fusion 360. I suck at making animations in Fusion 360, but the actual plans worked out pretty good. Starting with a 3D diagram lets me get all the measurements I need, and make certain everything is going to fit before I start buying any wood or cutting anything.
A couple things changed from that first mock up, but it worked out pretty good.
Materials, Tools and Cost
The materials used were:
- 5x 2x4s
- 4x 2x6s
- Less than half a sheet of 1/2” baltic birch plywood
- Wipe on poly
- 3” wood screws
- 1 1/2” wood screws
- 3/8” wood screws
- M6 threaded rod
- M6 hex nuts
- Fender washers
- Metal angle things for screwing down the table top (I forget what these are called, they come in a pack of 100)
- Plexiglass sheet (eventually replaced for glass)
- Glass sheet
- A TV
Tools used:
- Circular saw (only because my table saw isn’t very easy to work with for large sheets of plywood)
- Table saw
- Mitre saw
- Screw drivers
- Drill
- Impact driver (optional)
- Hack saw
- Tape measure
- Glass cutter
Most of the tools I already had or could borrow. The glass cutter I got on Amazon for under $20.
Excluding the TV and the new blade I needed for my saw, the materials cost a little under $200.
TV Selection
There is one very critical thing to look for when selecting a TV: Viewing angle.
Size and resolution matter too, but viewing angle is the most important. Some cheaper TVs have a terrible viewing angle, and viewing them from too high or low, or too far to the sides will make the colors wrong and warp the image. For this use case, with the TV lying flat and people on all sides of it, everyone is going to be in the absolute worst case viewing angle.
The TV I had is a Viewsonic VT3200 - a commercial display with a 170 degree horizontal, 160 degree vertical viewing angle. And it looks fantastic, no matter where you sit at the table.
Build Pictures
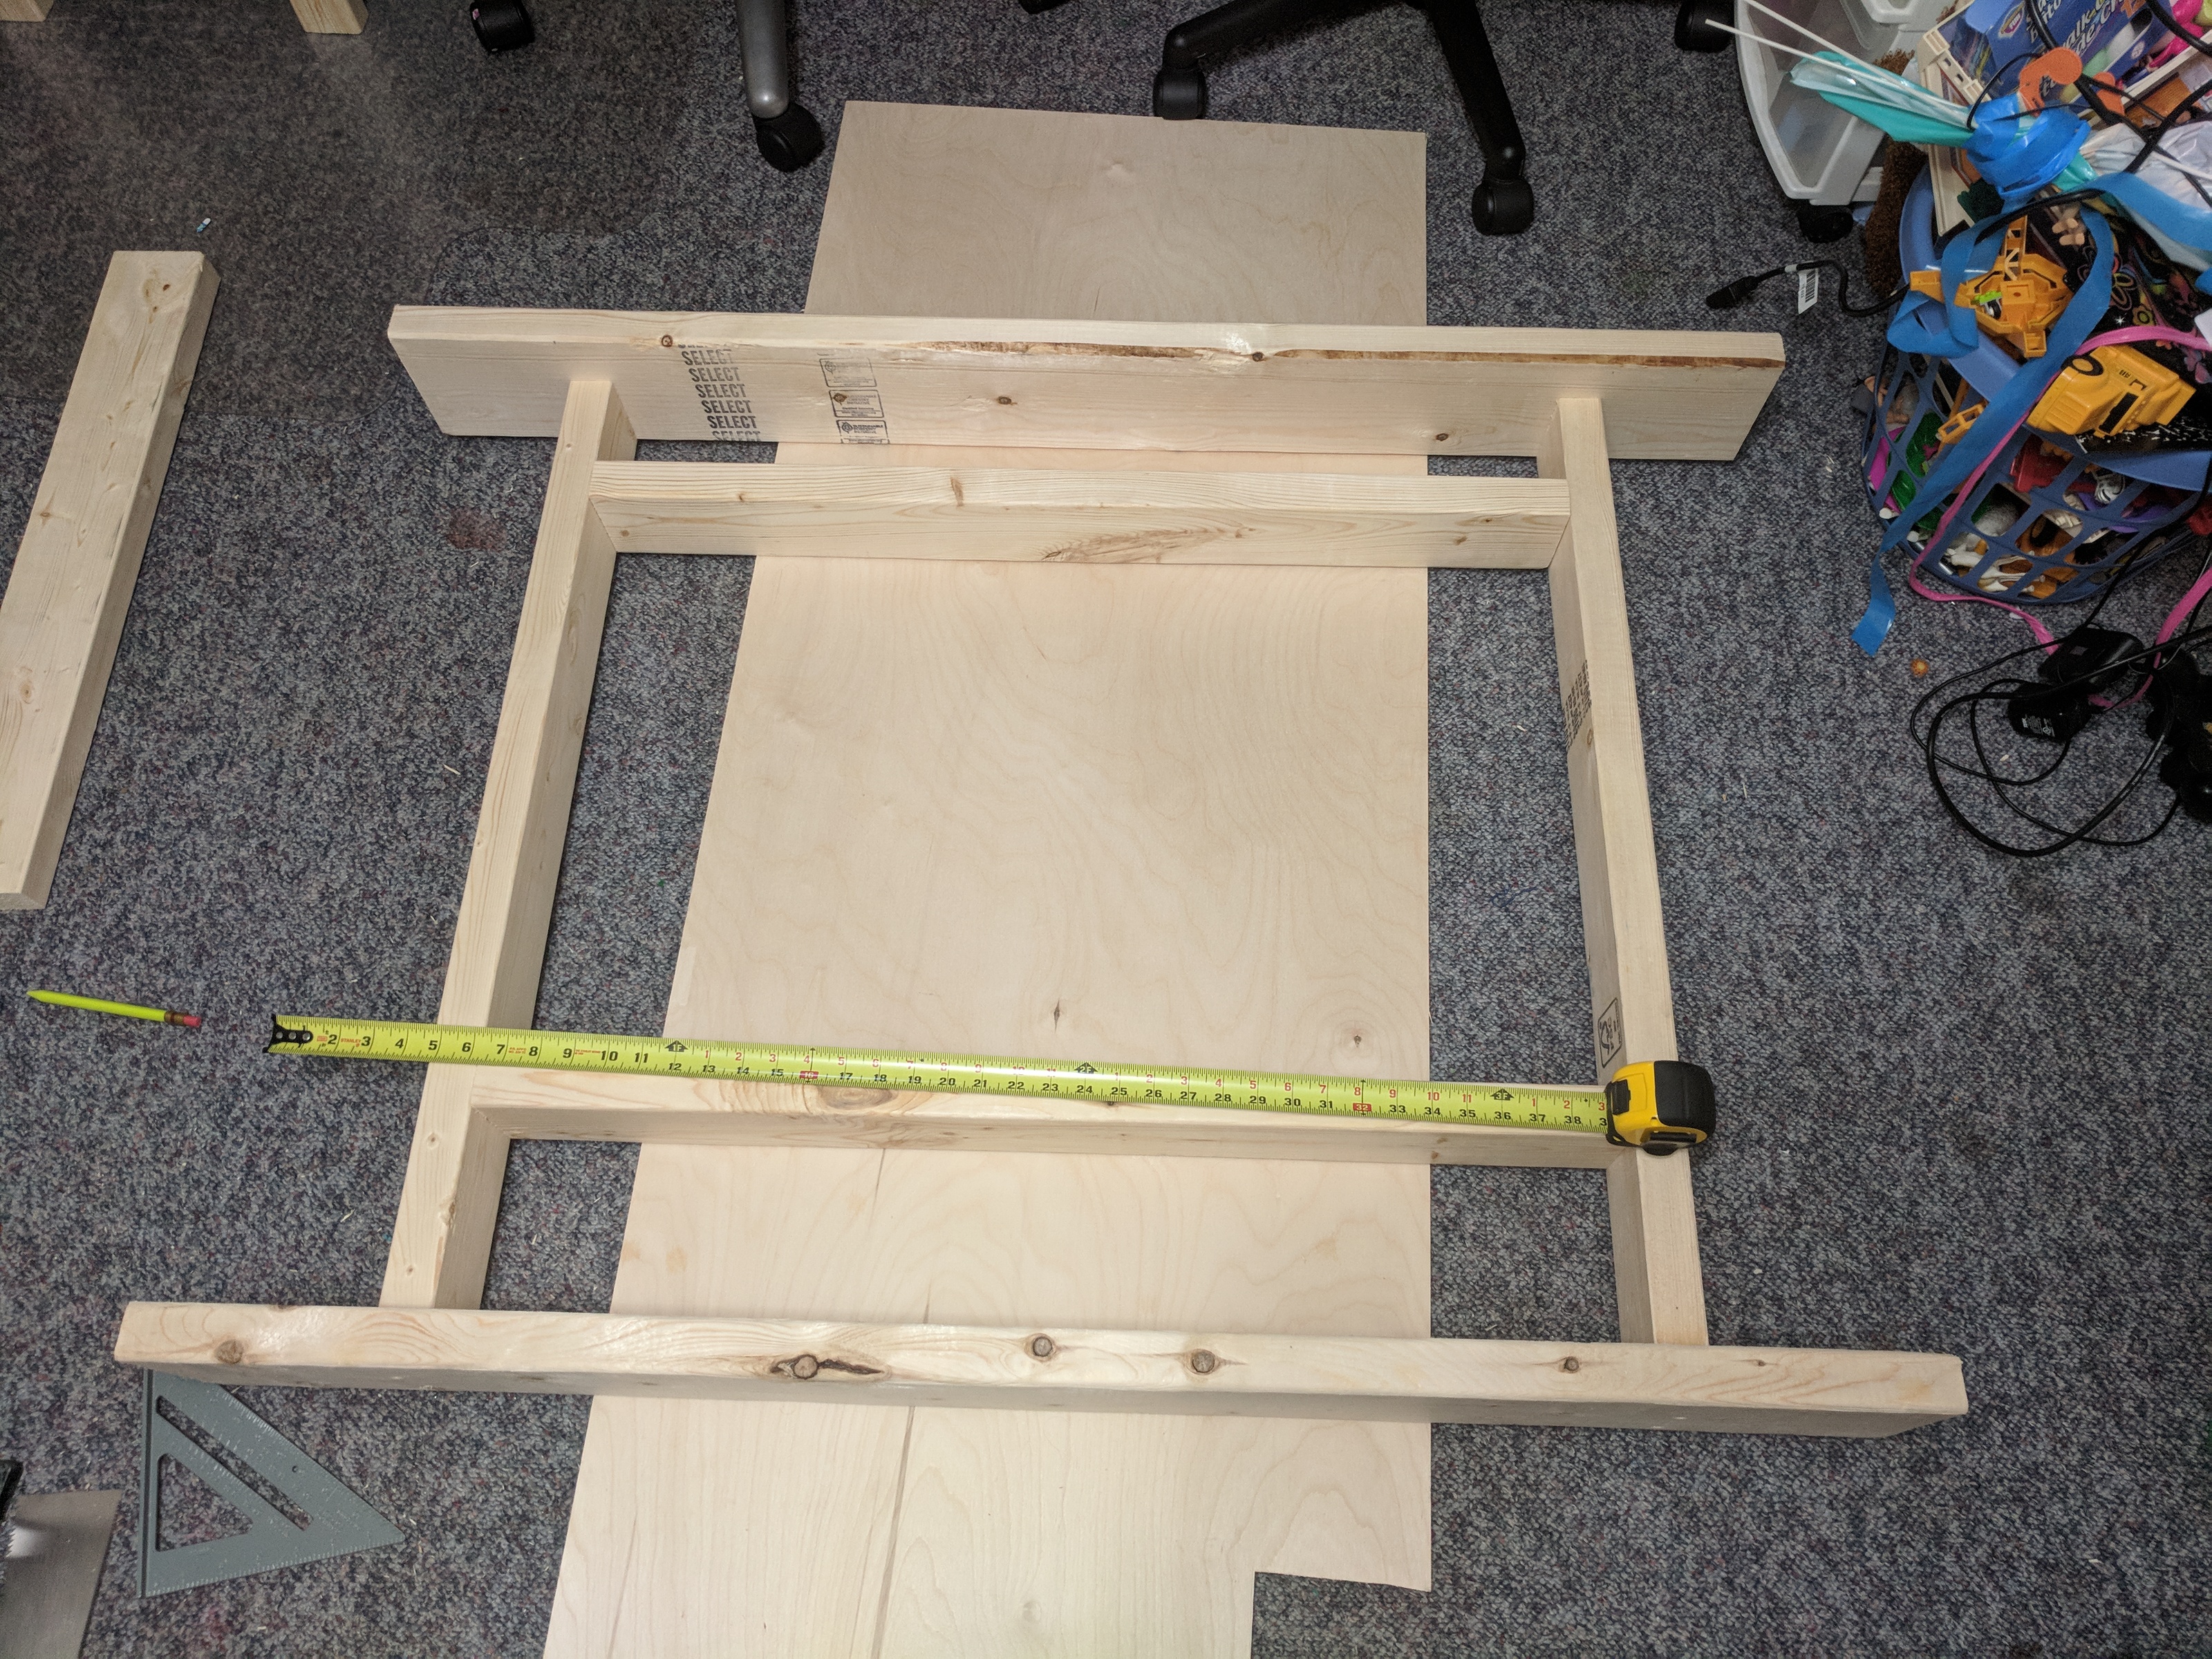
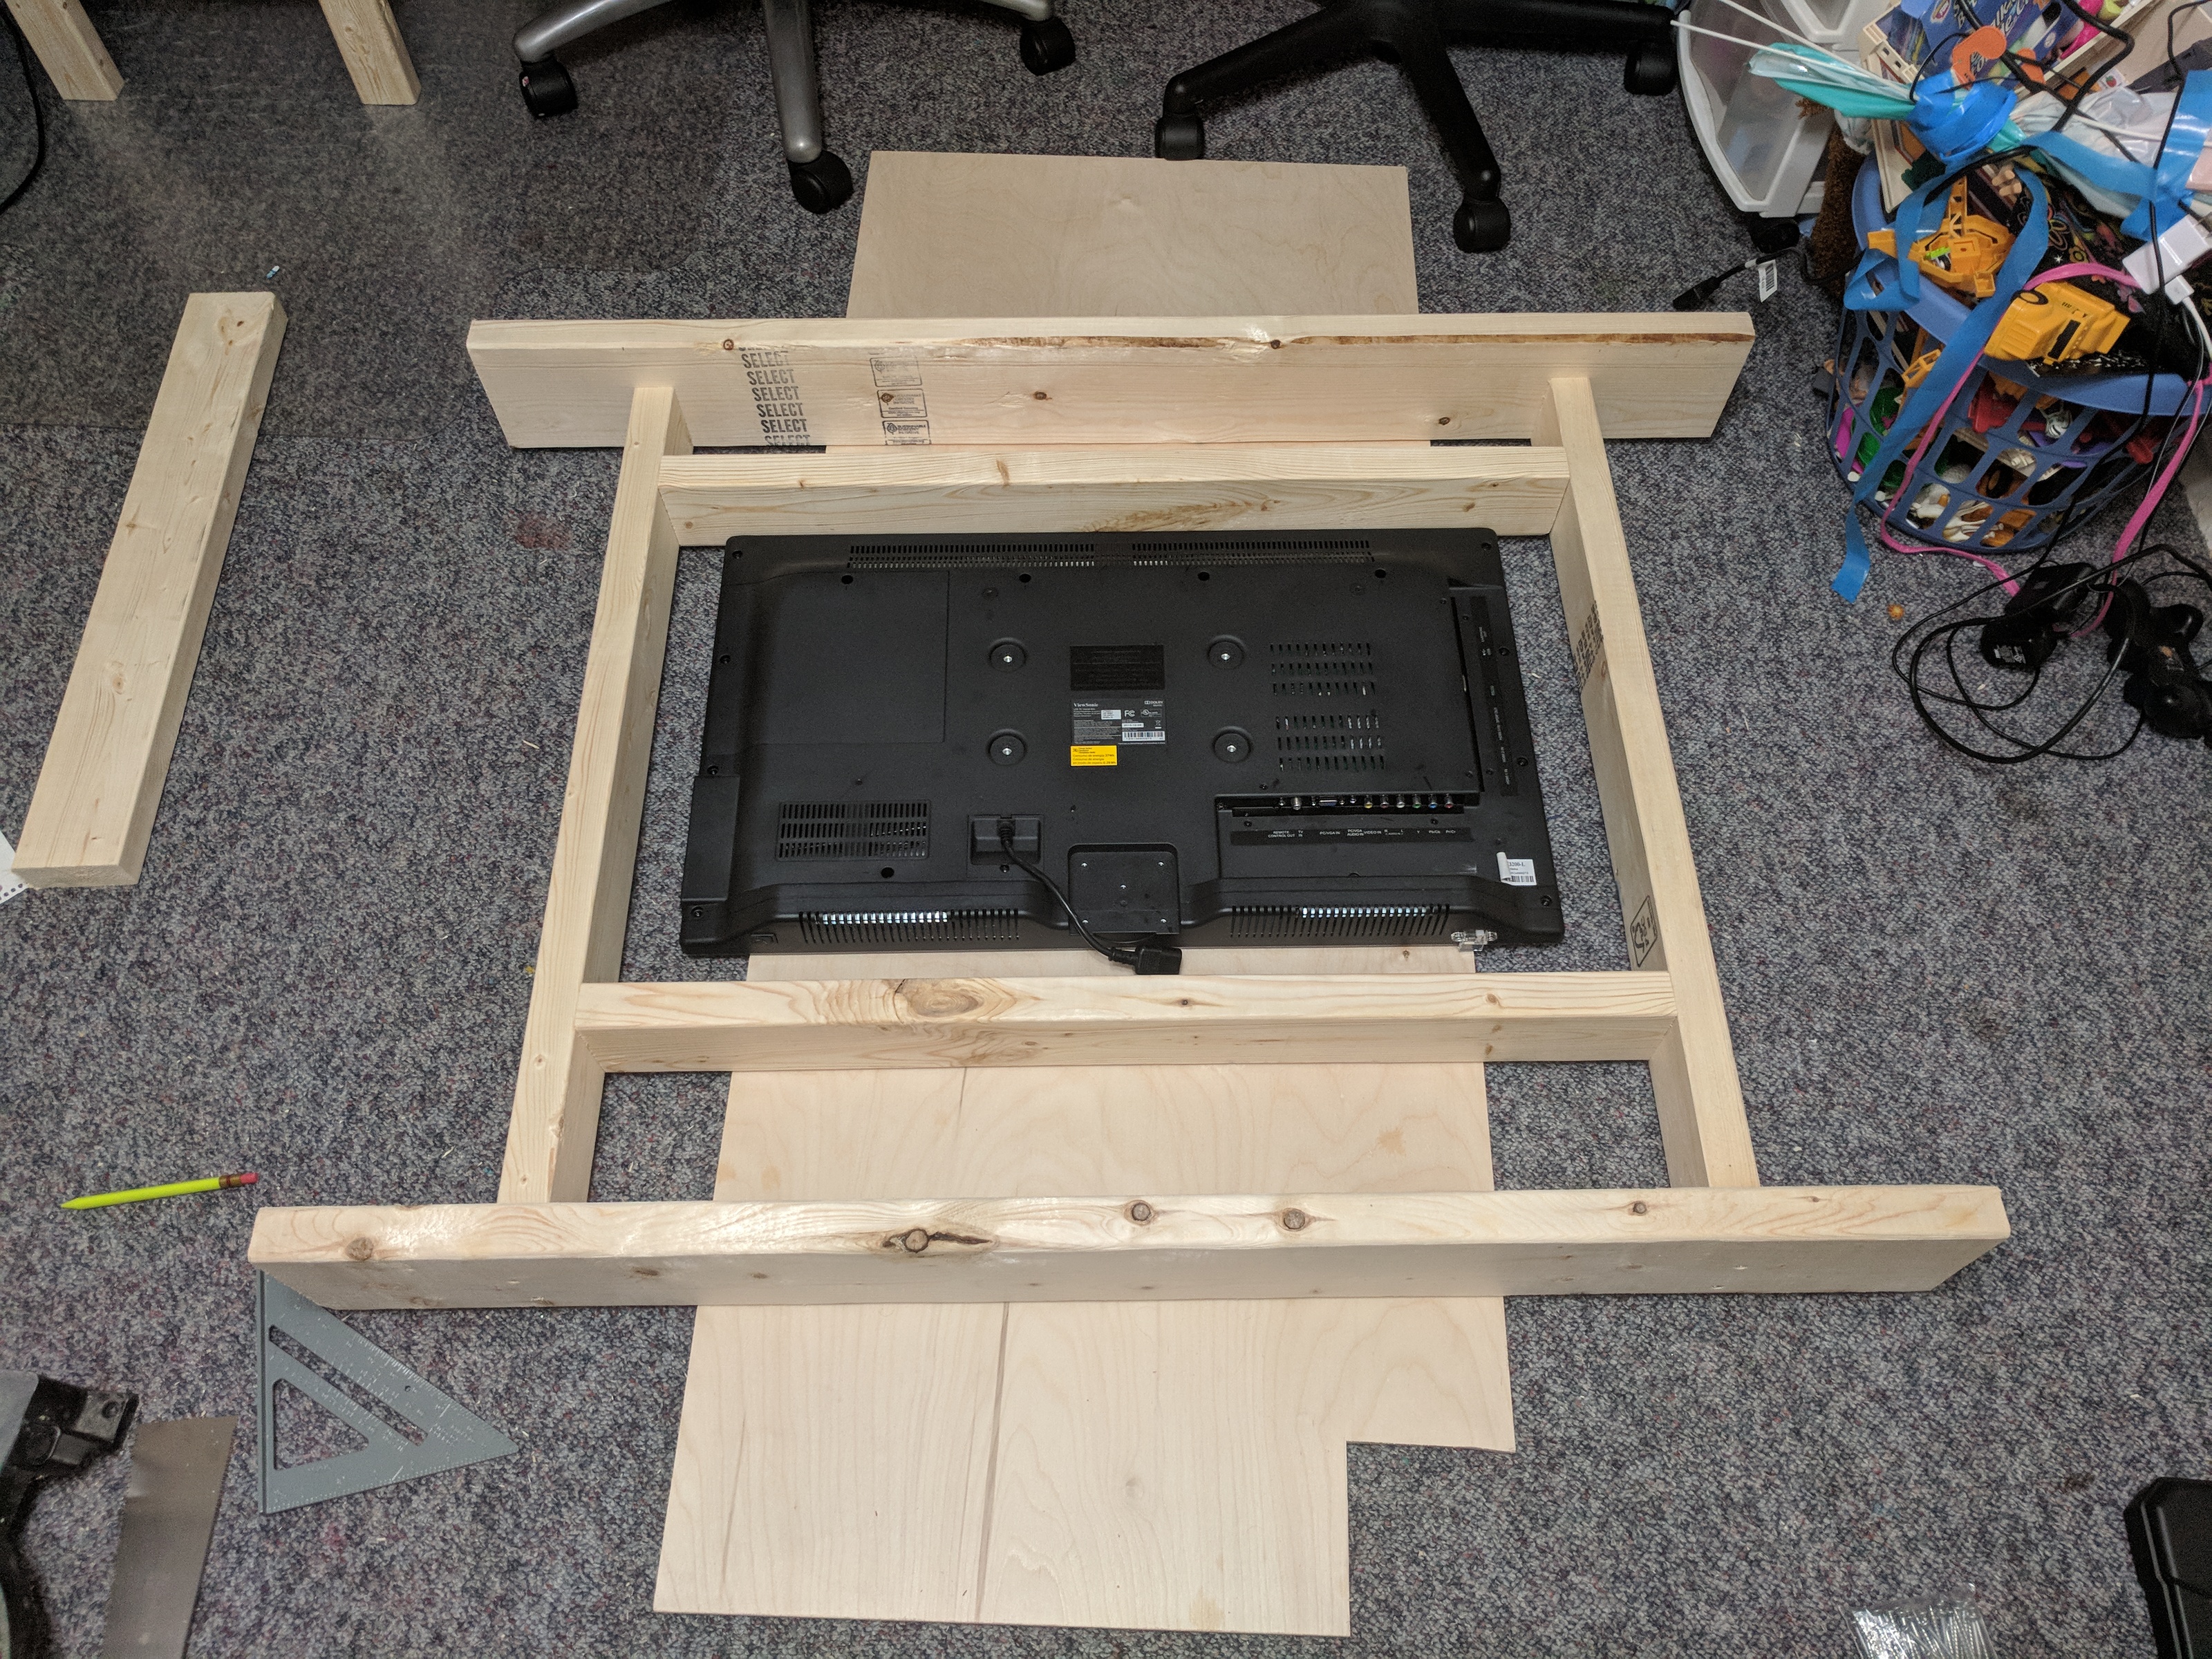
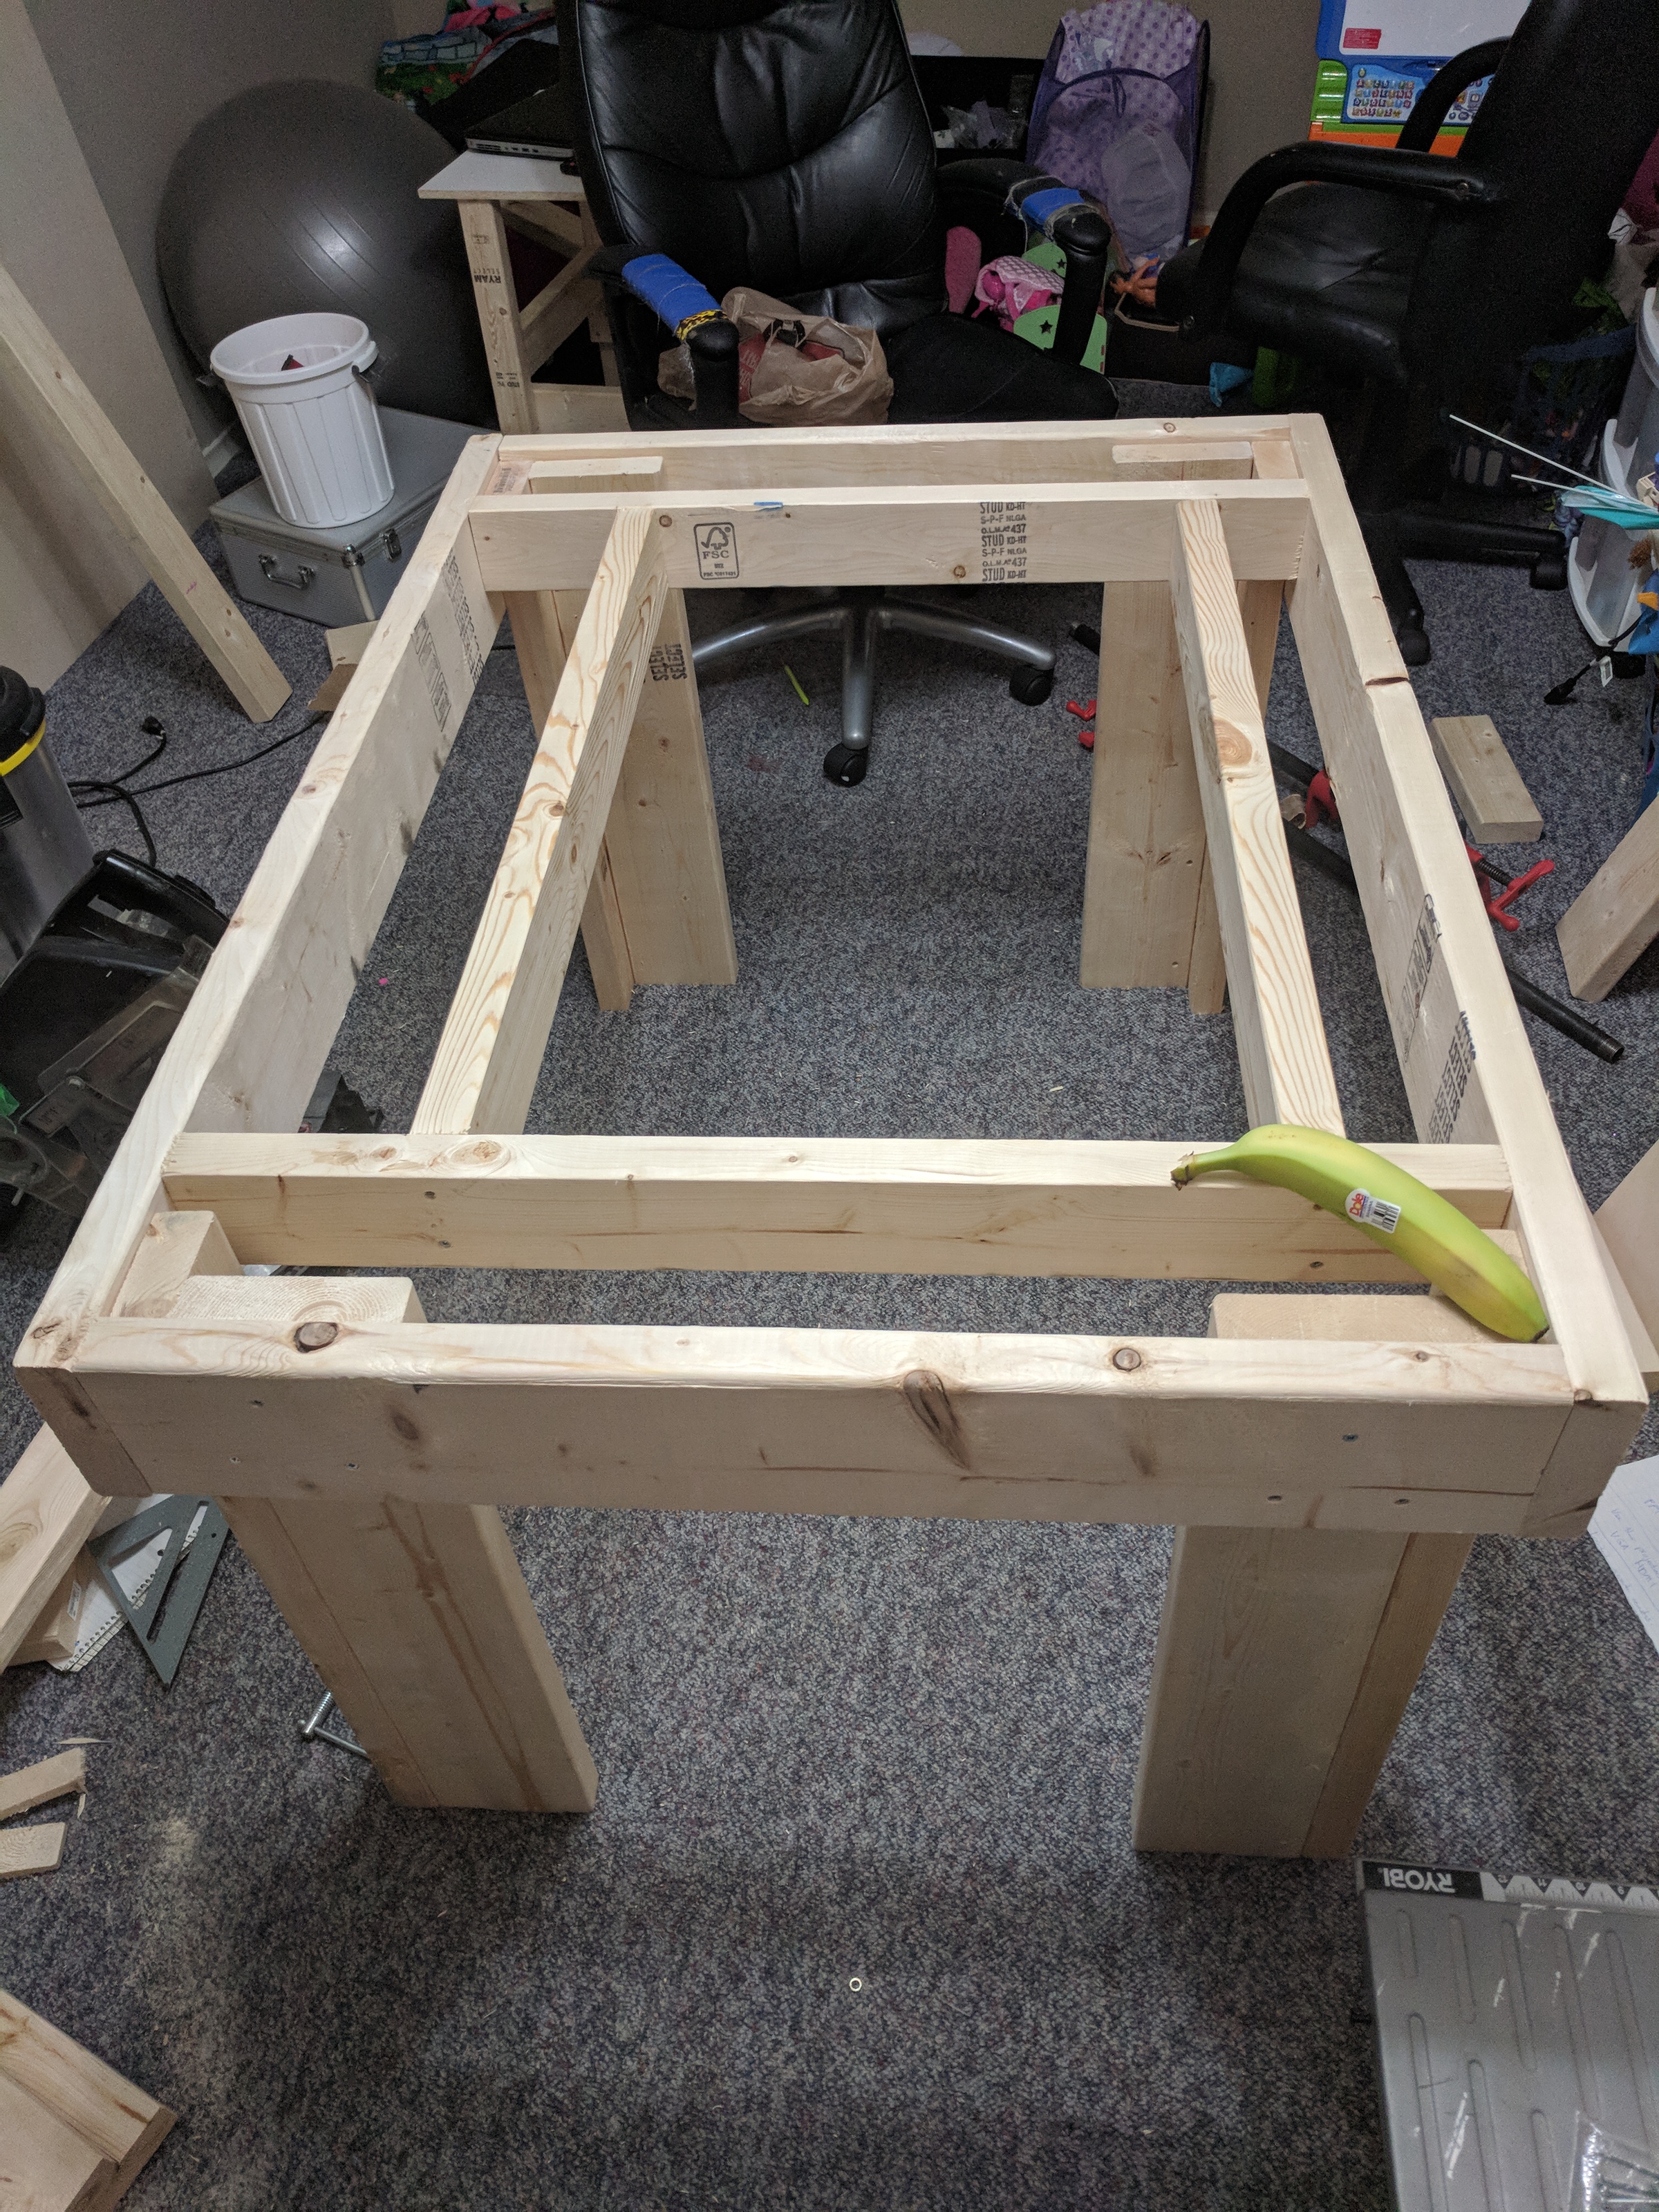
Top Frame
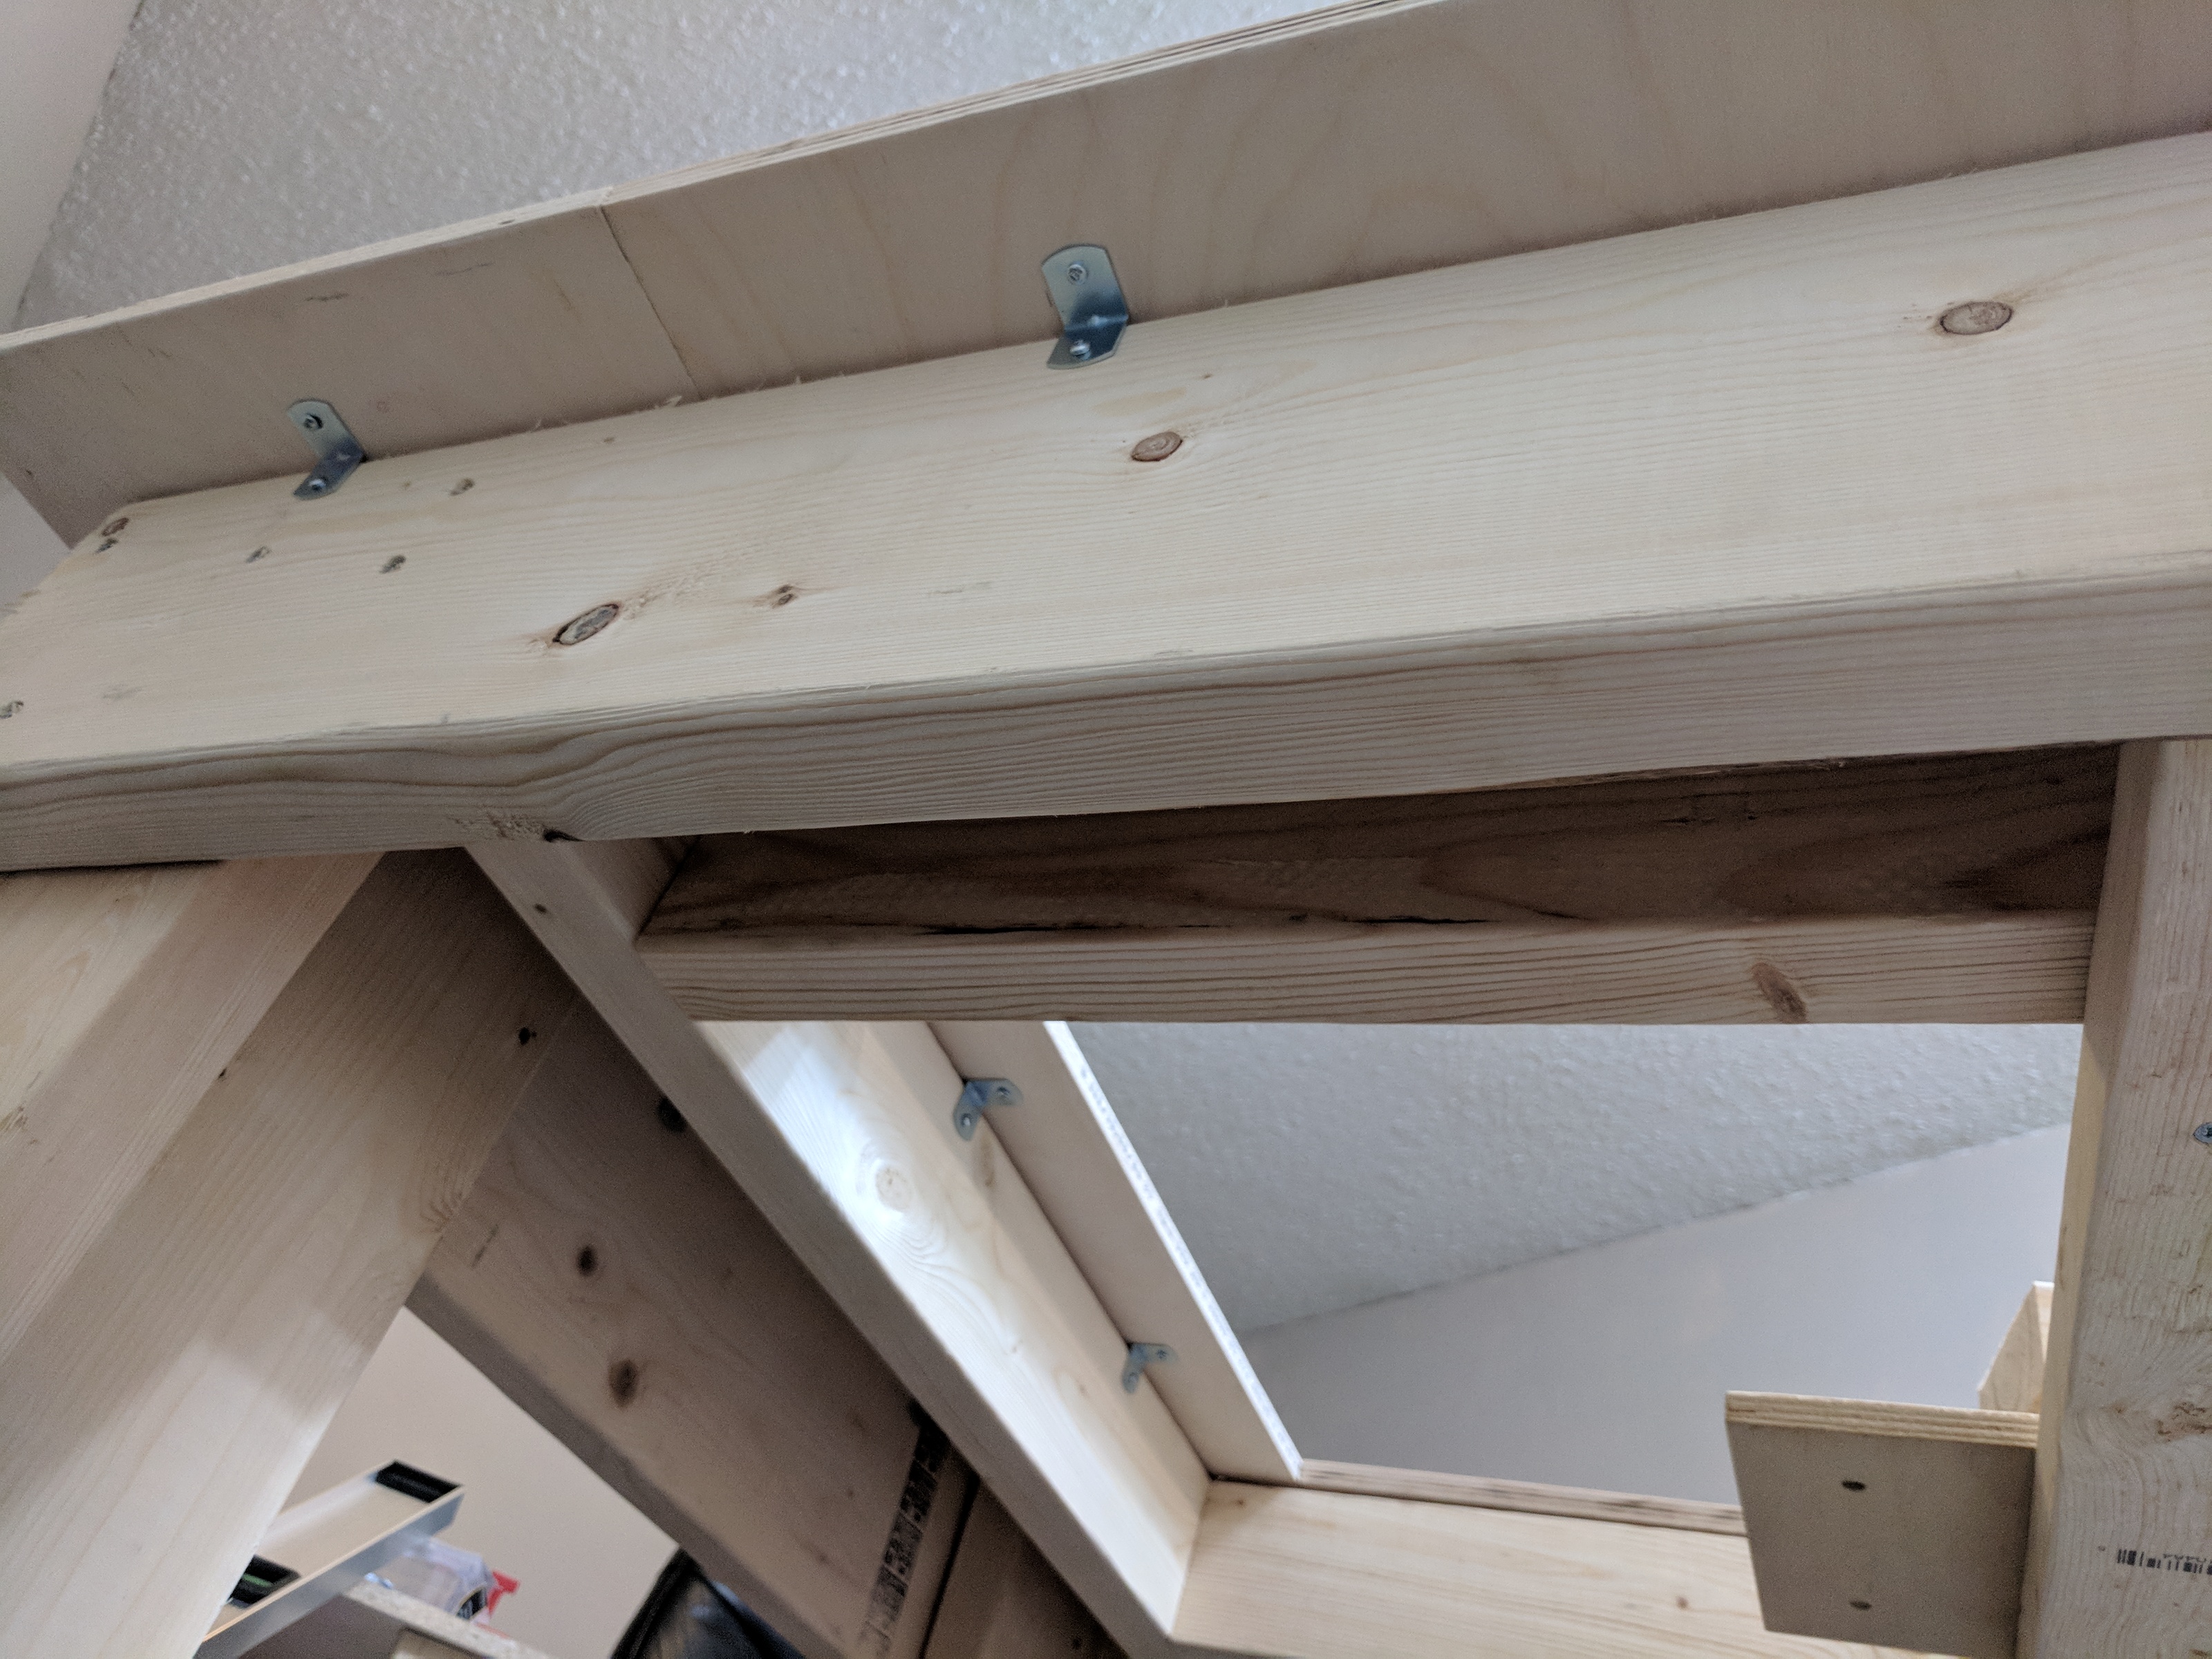
The frame uses 2x4s surrounding the TV, and 2x6 for the sides of the table. This makes sure there’s plenty of room for the TV mount that will be added later.
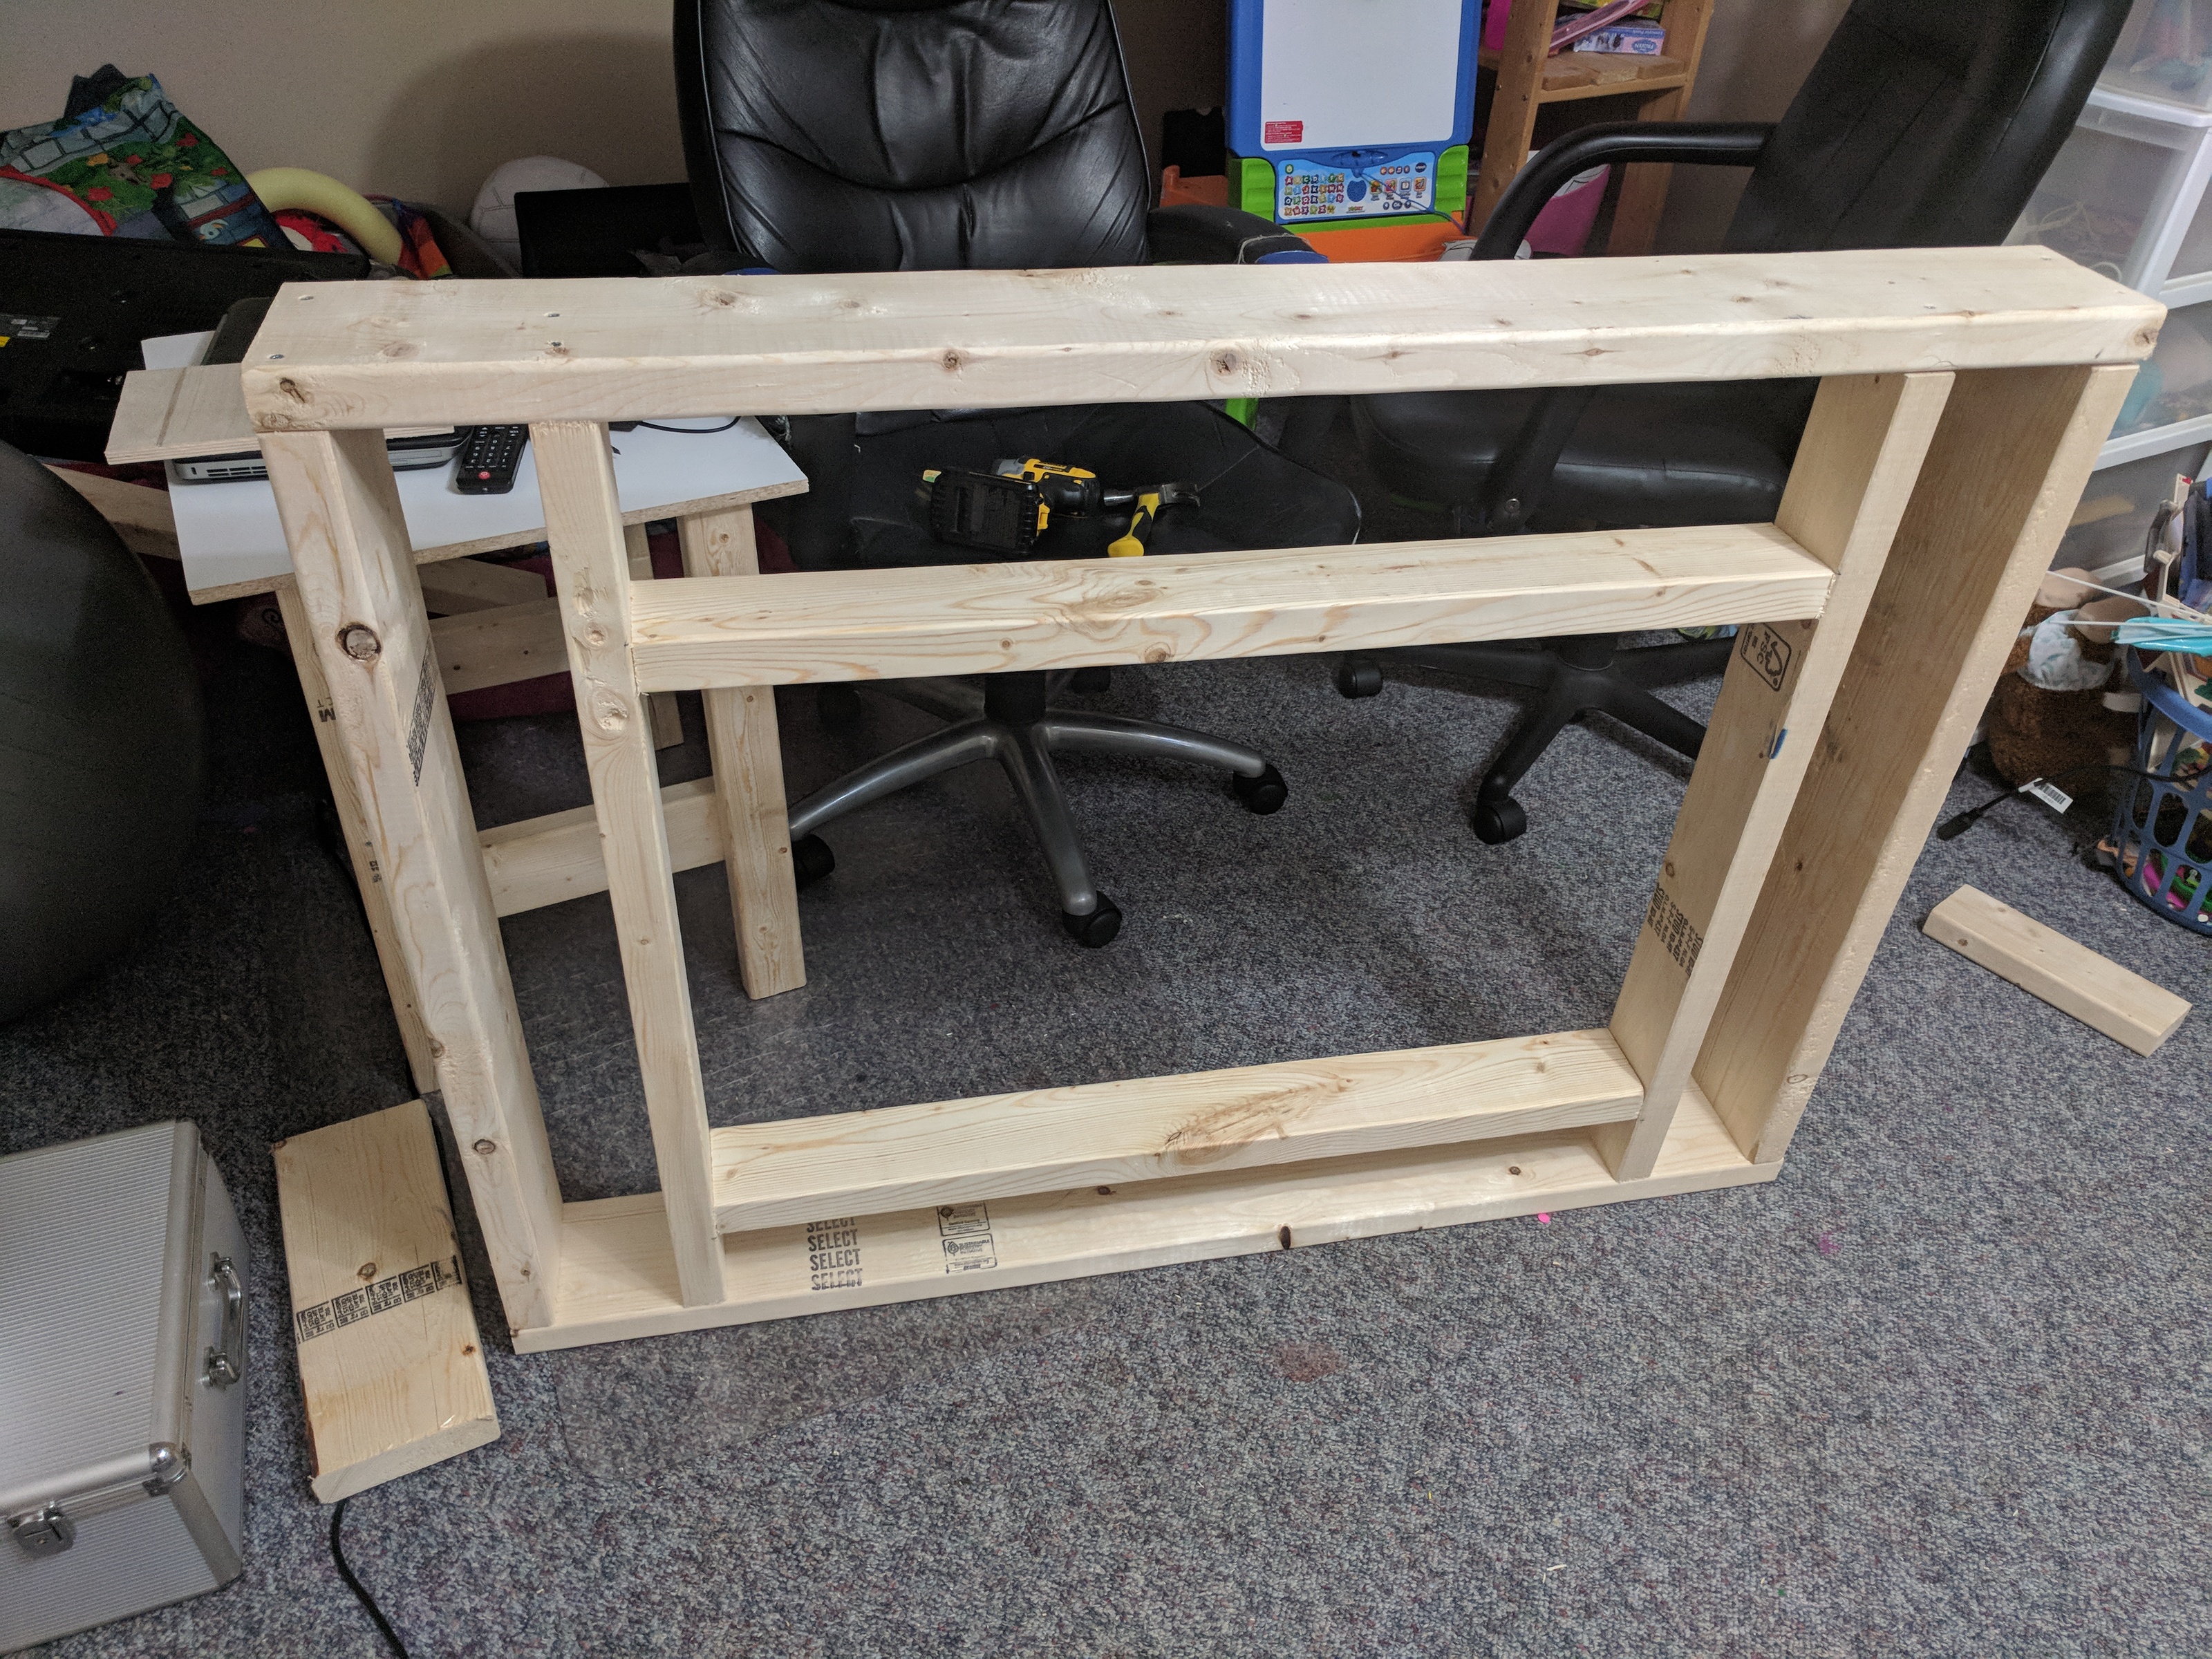
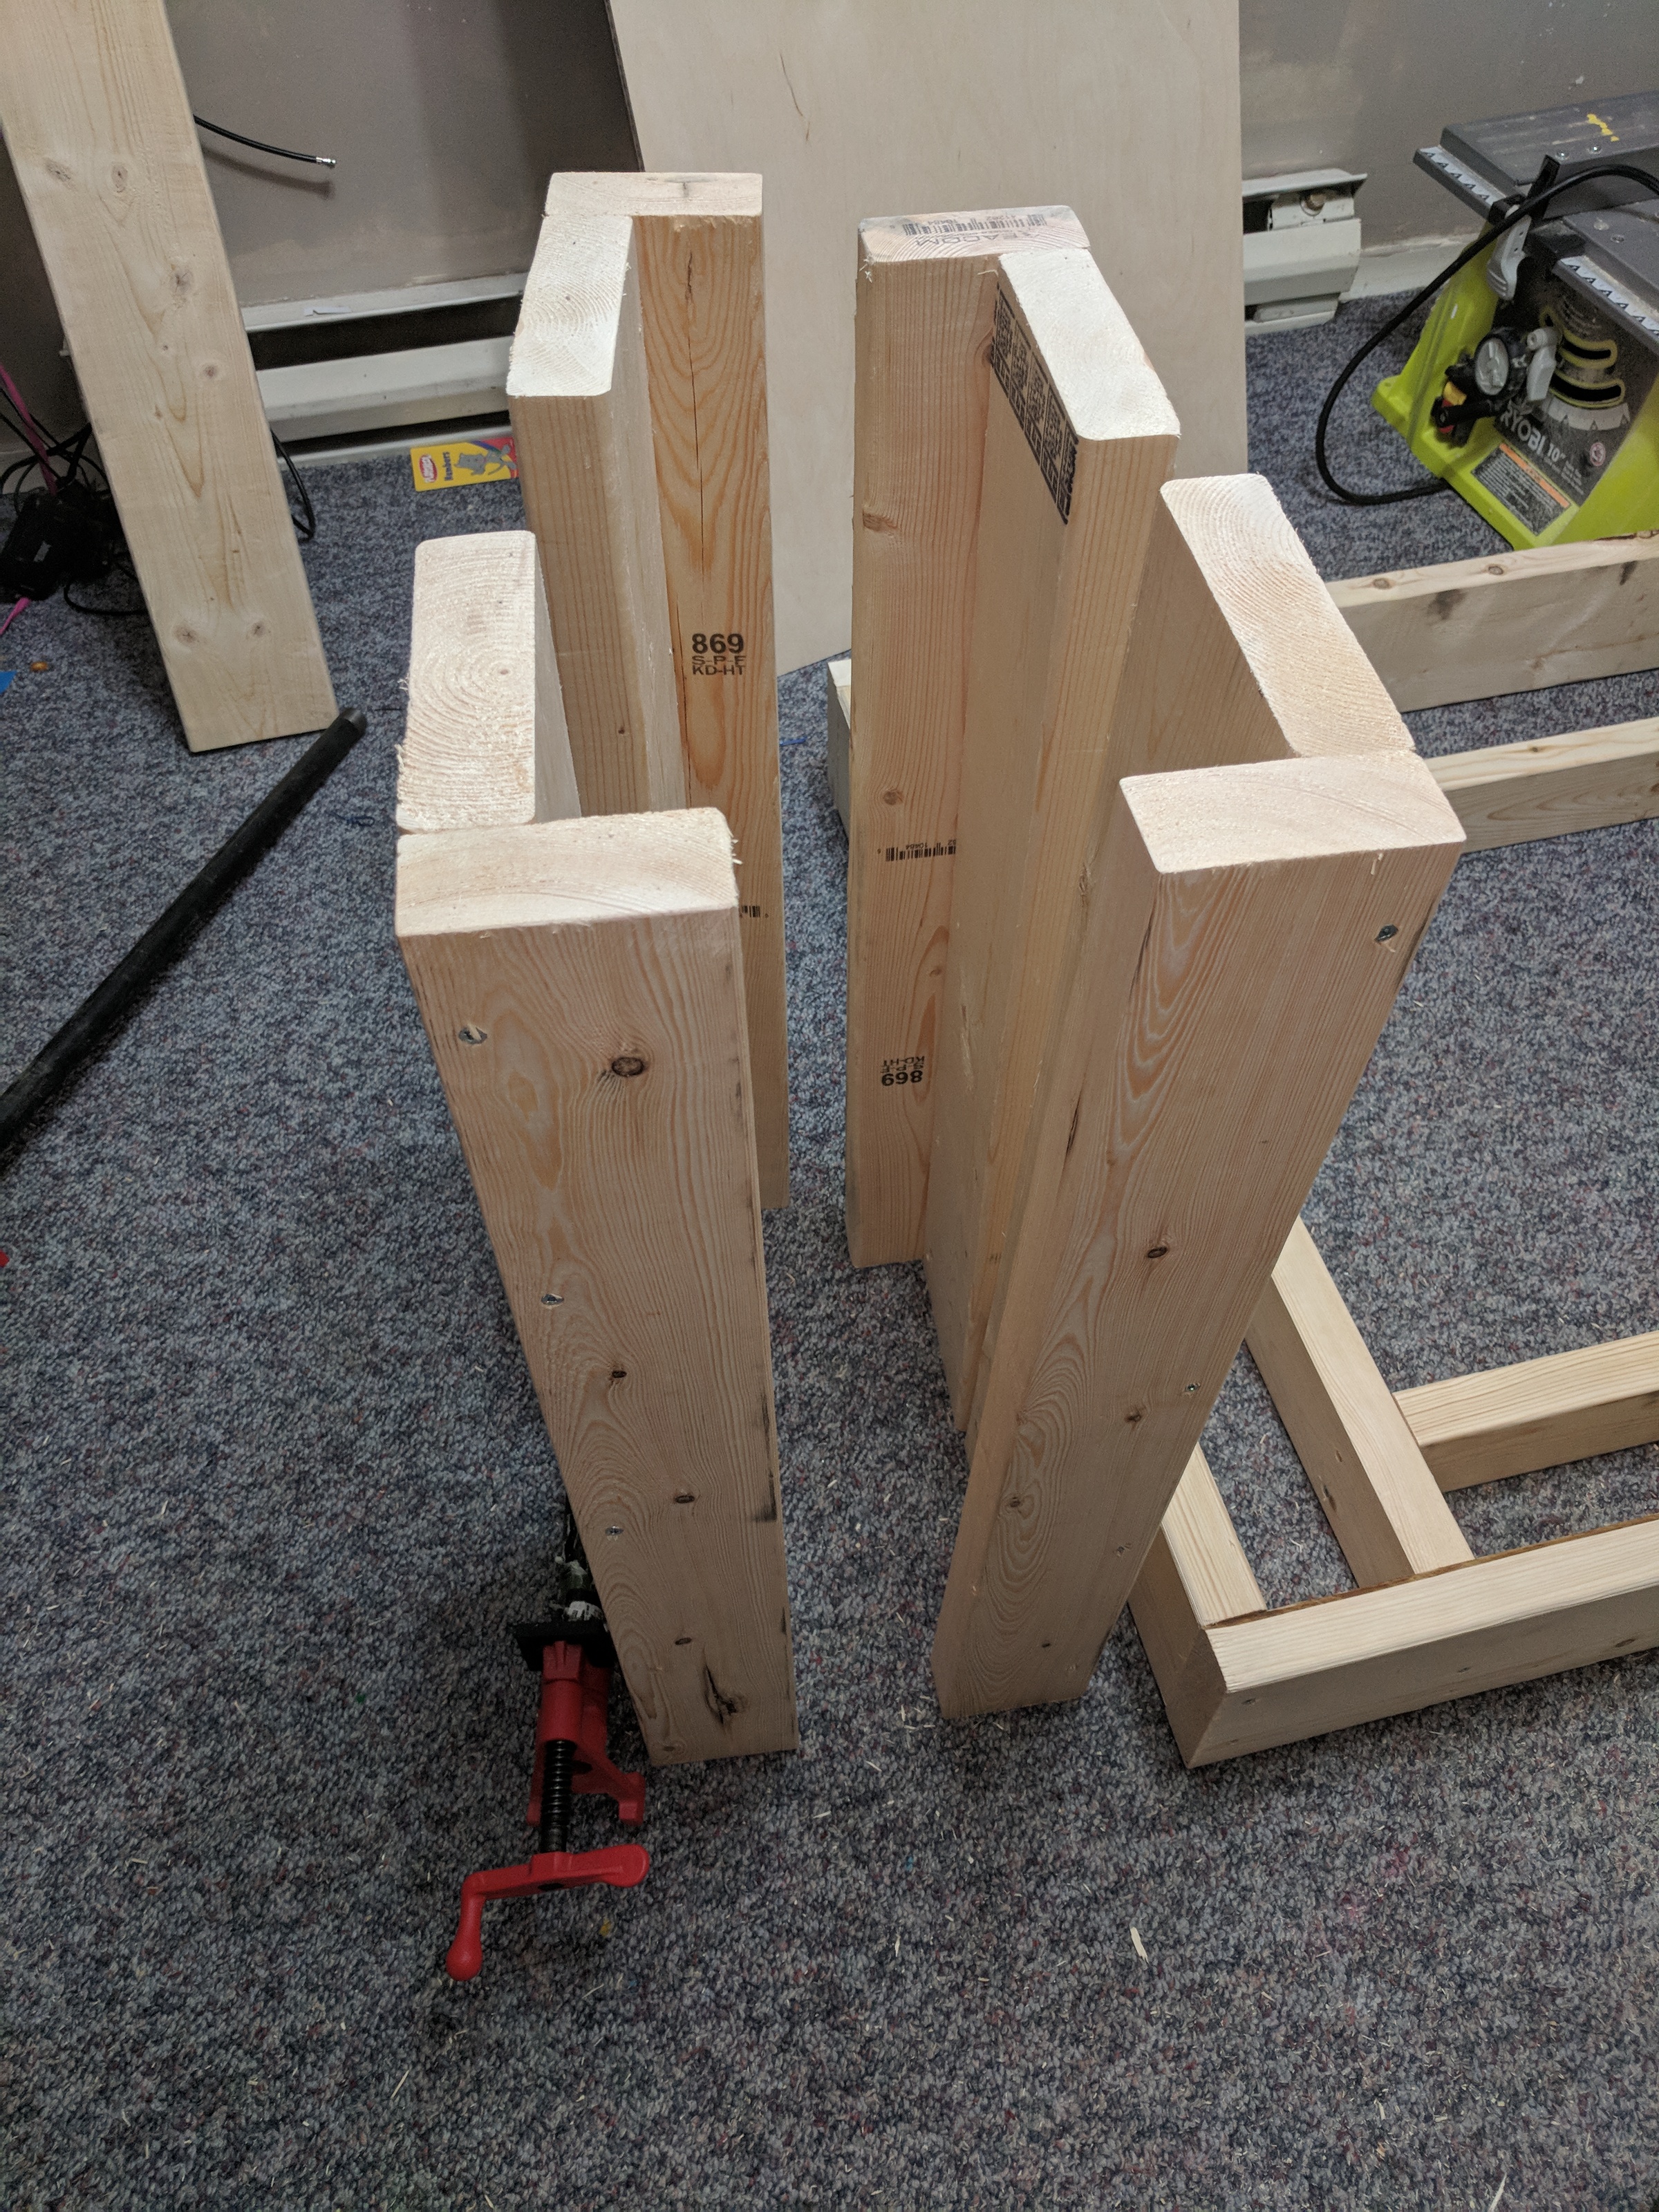
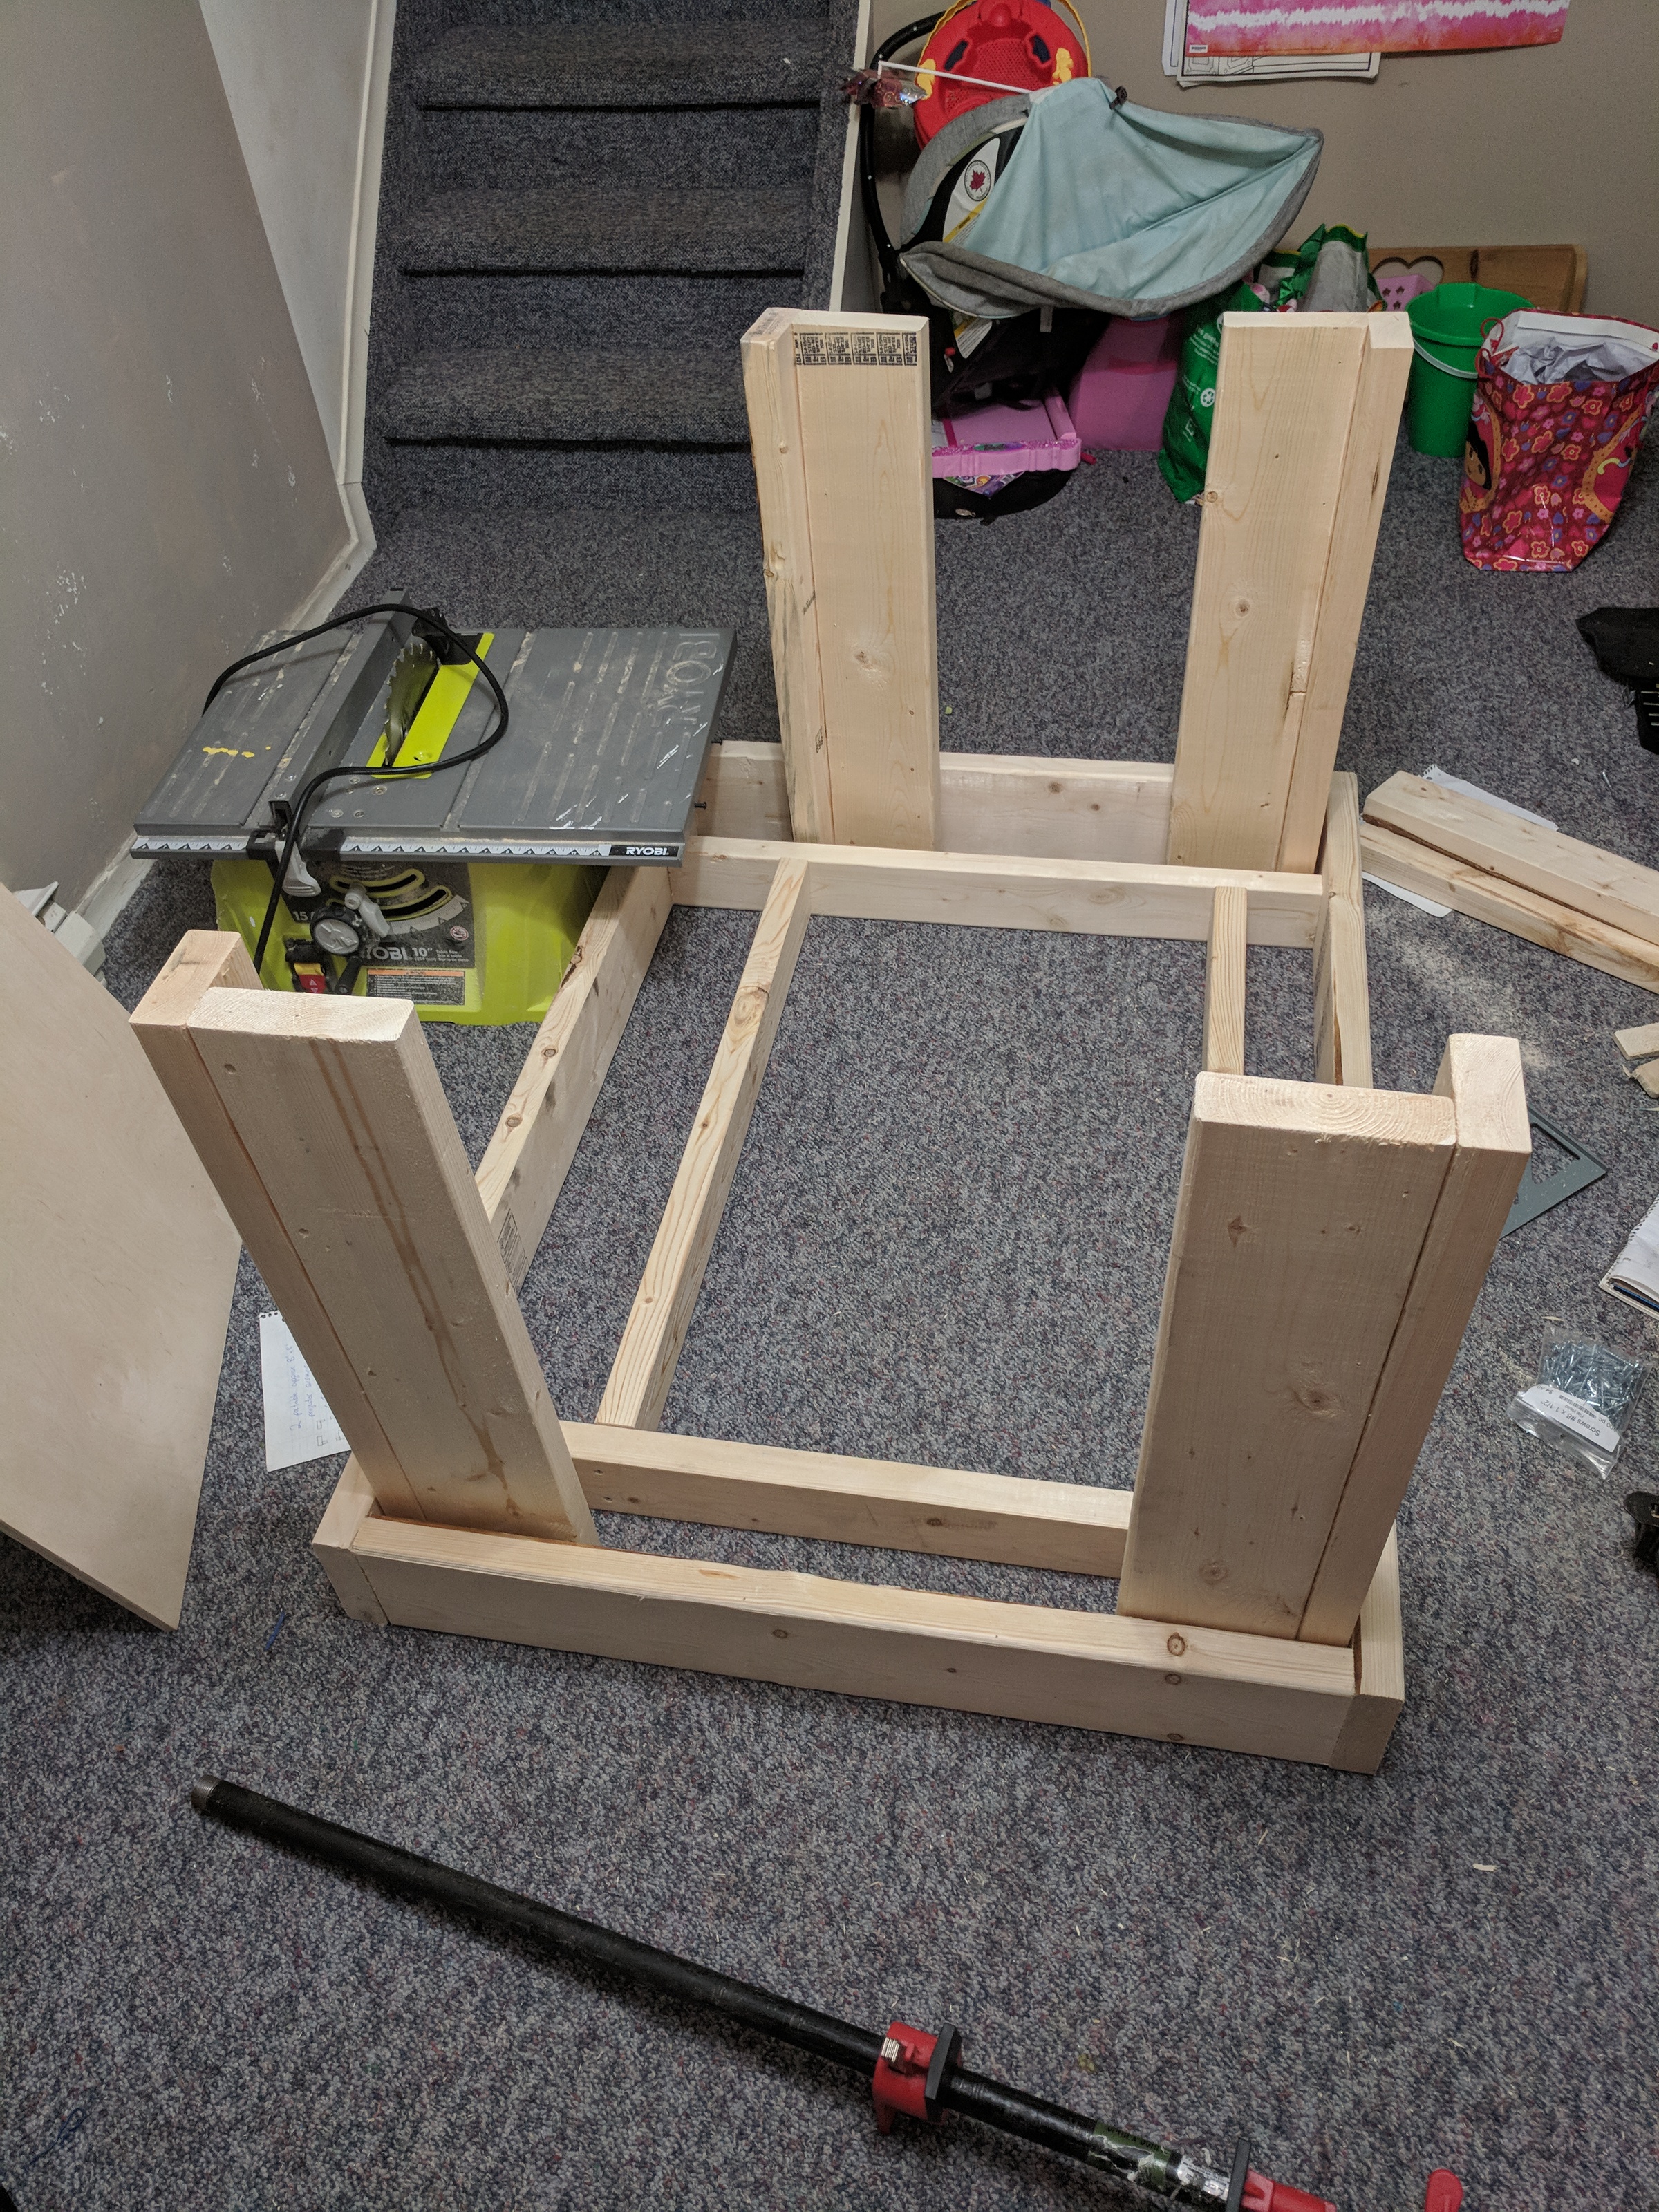
Legs
The legs are simply a 2x4 and a 2x6 screwed together. These legs are rock solid. The first time I screwed them the wrong way around, with the 2x4 screwed to the wide part of the 2x6. That made them not fit properly and I had to do it all over again. You can make the legs whatever height you want. The finished table top will be about 1 inch higher than the length of the legs.
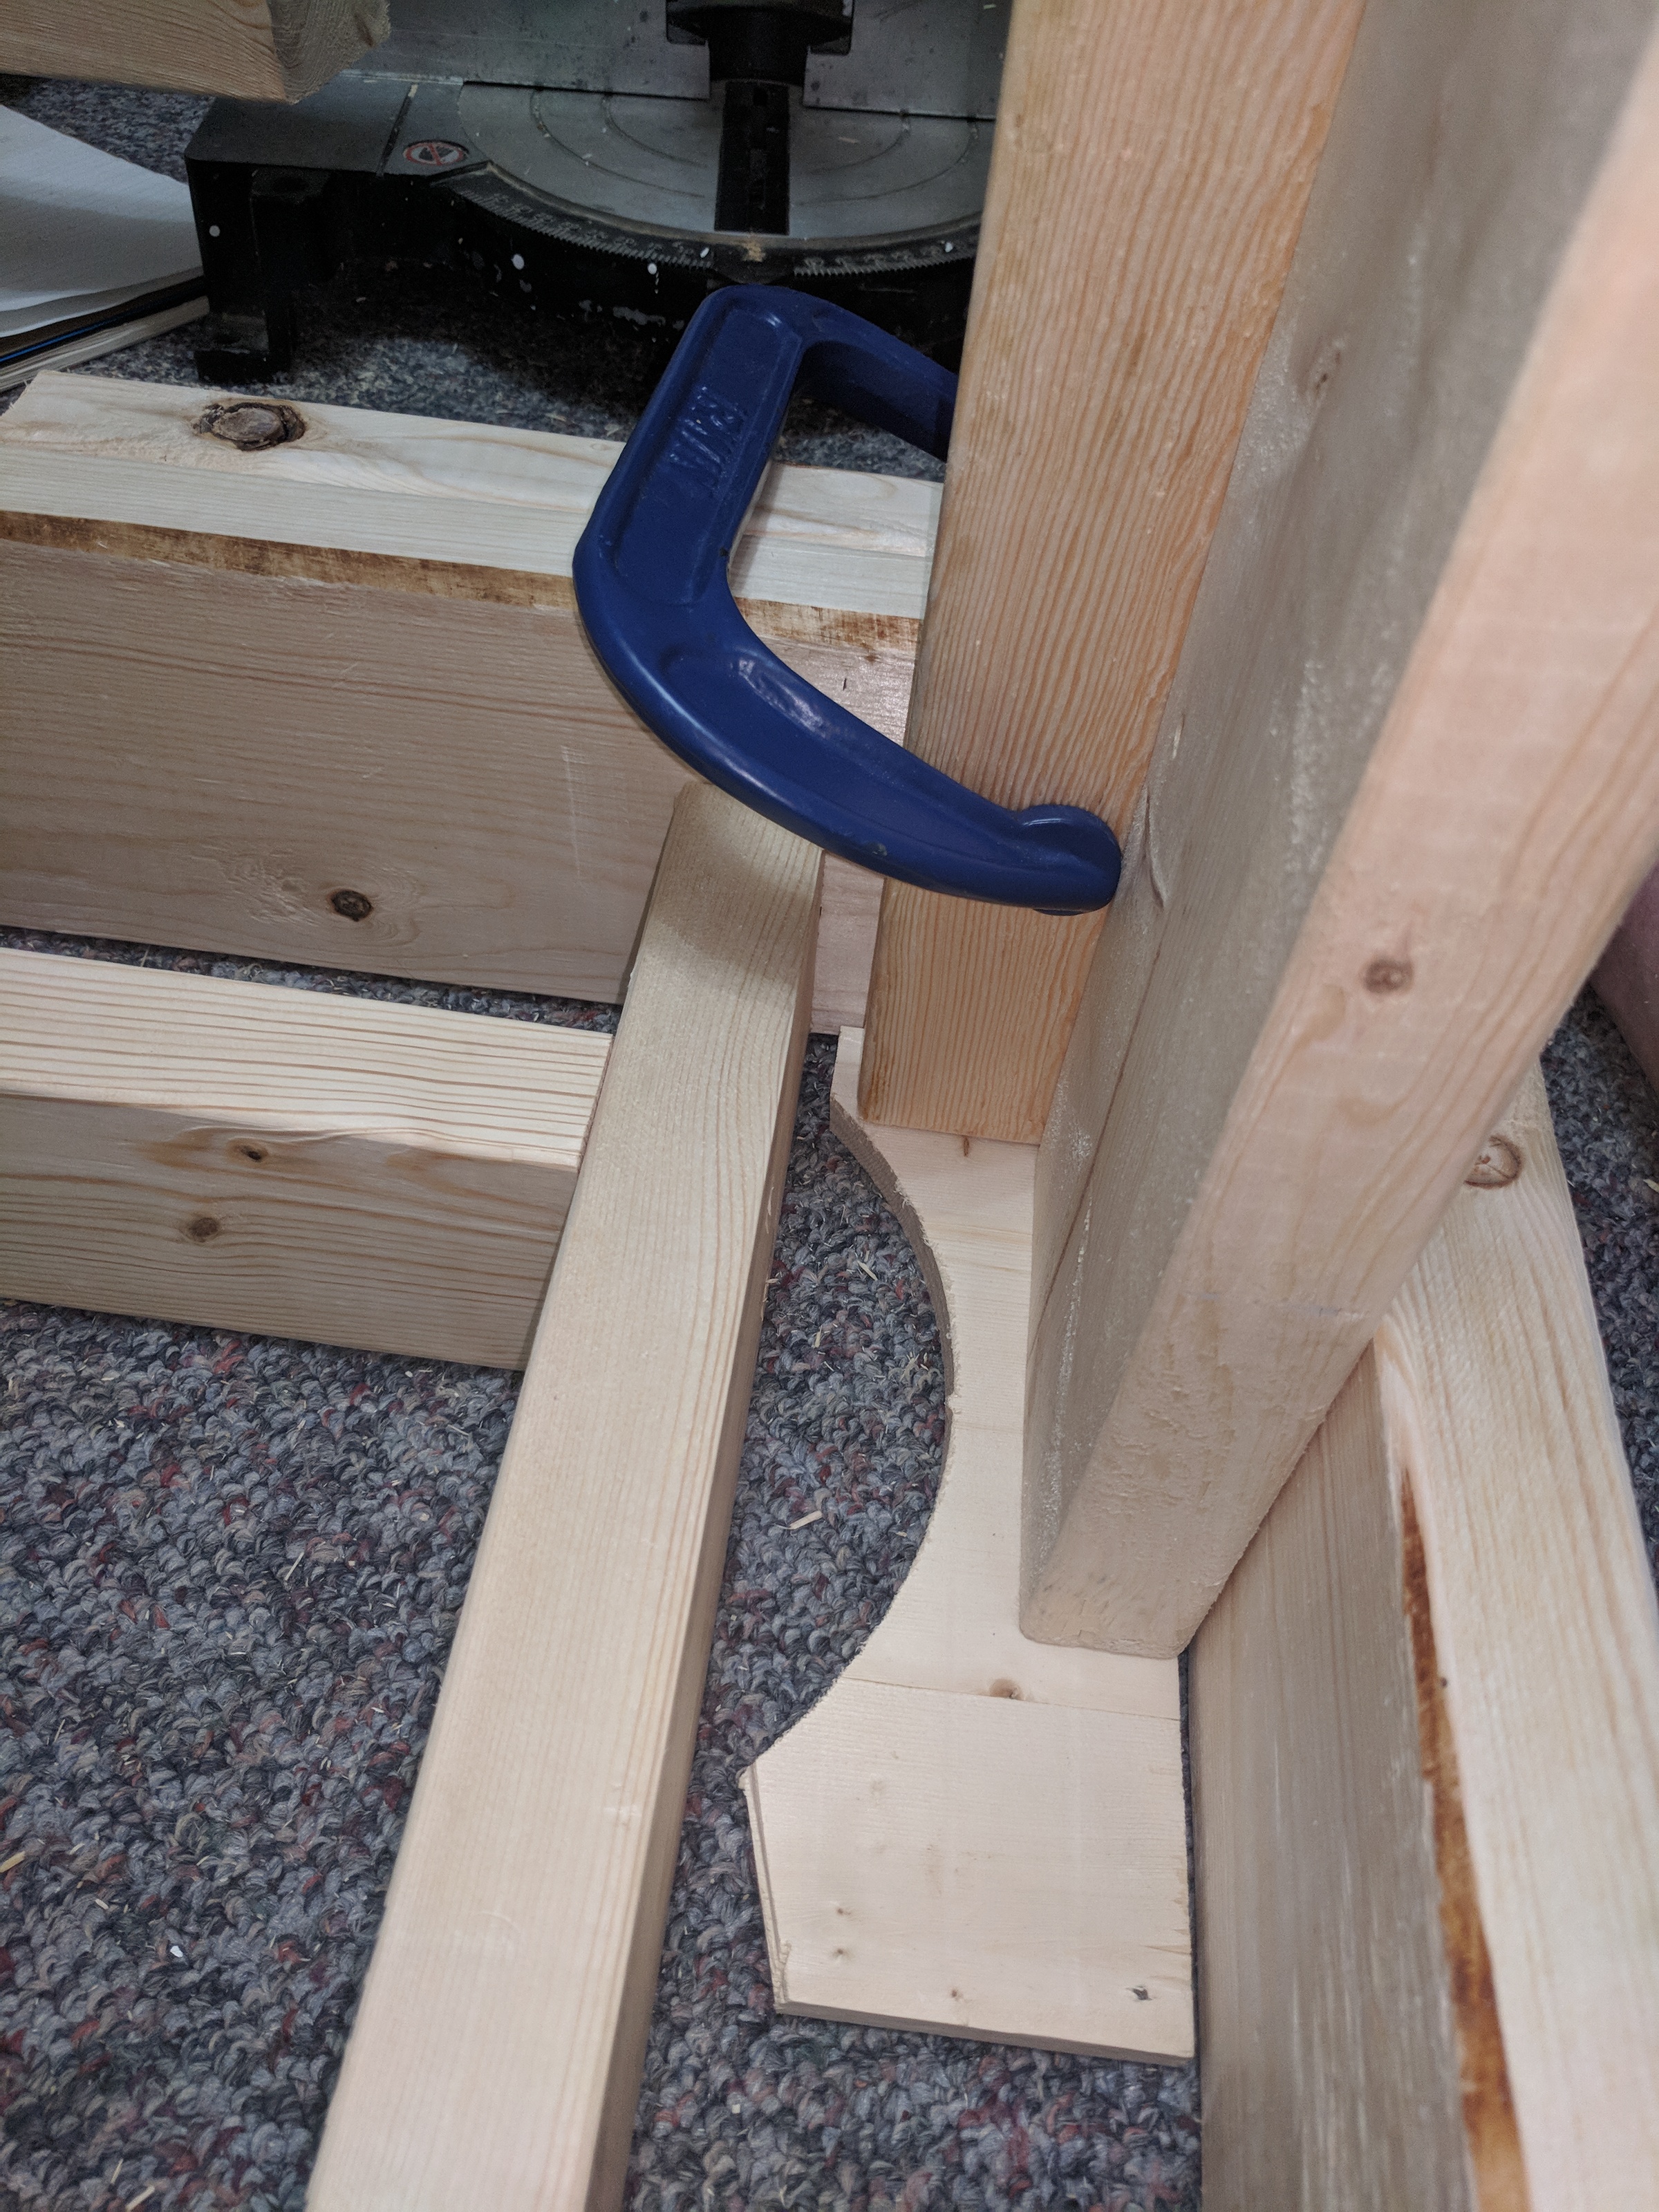
I put the base upside down on the floor, put a piece of scrap plywood under the leg and clamp it into position, then used 3” screws to secure it in place. I didn’t bother with pilot holes since it’s soft wood and my impact driver has plenty of power.
The reason for putting the plywood under the legs is to make them a bit lower than the frame, so the table top won’t rest on them. The idea being that it’ll be easier to get a nice smooth top if it’s only touching the sides of frame, not the ends of the legs.

Mounting the TV
I went through a few ideas on how to mount the TV. I knew I wanted to use the VESA mounting holes - that would ensure I could easily replace it if this one ever dies. I also wanted to be able to raise and lower the TV easily so I could align it perfectly with the tabletop, even if I ended up with a different TV that was a different thickness. To accomodate that, I used some threaded rod and nuts to allow fine control over the position of the TV.
First I printed out a template for the VESA mounting pattern, and drilled holes into a small piece of plywood that becomes the mount for the TV. Then I cut some threaded rod that would go into the mounting holes in the TV.
That plywood gets screwed into a 2x4 that goes along the bottom of the base. This was the reason for using 2x6s on the outside - it let me screw this center 2x4 into the 2x4s that surround the TV, and also screw the ends into the sides of the table, so it’s nice and stable. I attached the TV to the plywood, lined everything up nicely, then clamped down the plywood and removed the TV. Then screwed it in place. It’s nice and sturdy.
The threaded rod allows for lots of adjustment - the whole thing goes:
- TV
- Nut
- Fender washer
- Plywood base
- Fender washer
- Nut
That lets me easily adjust how far each rod sticks above the base to get the TV right up to the table top, and to adjust each of the 4 posts to level it properly.
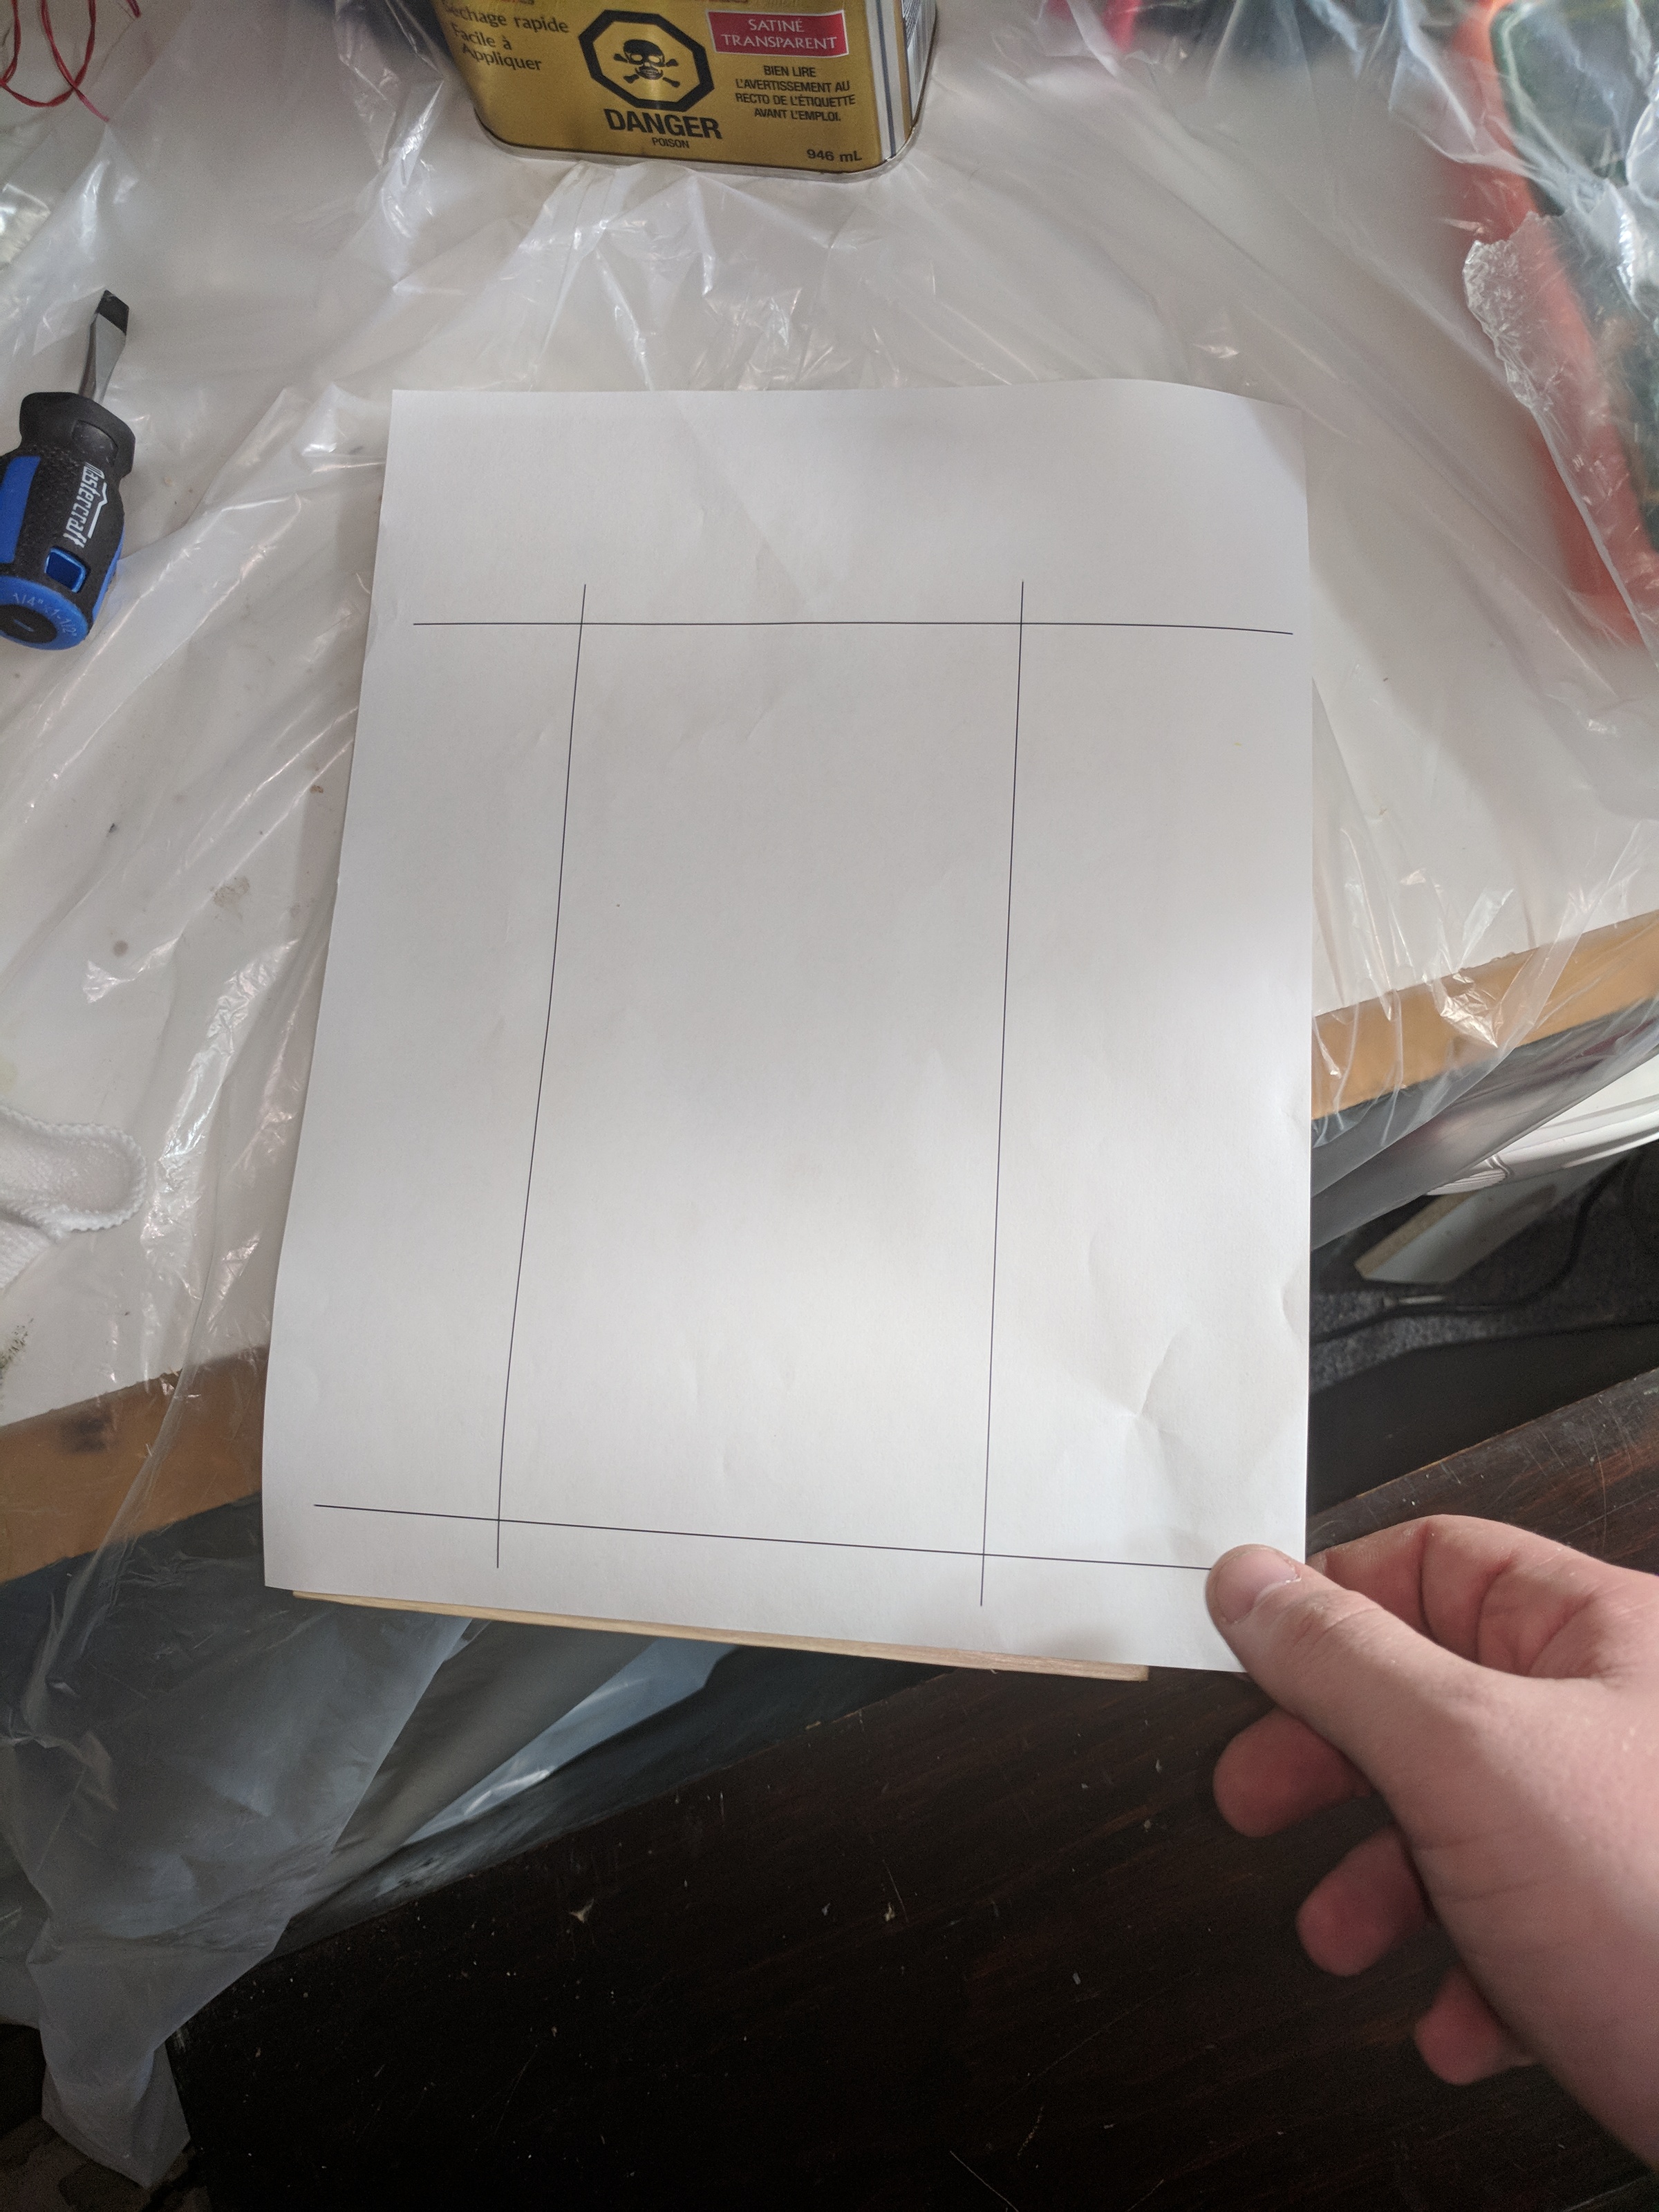

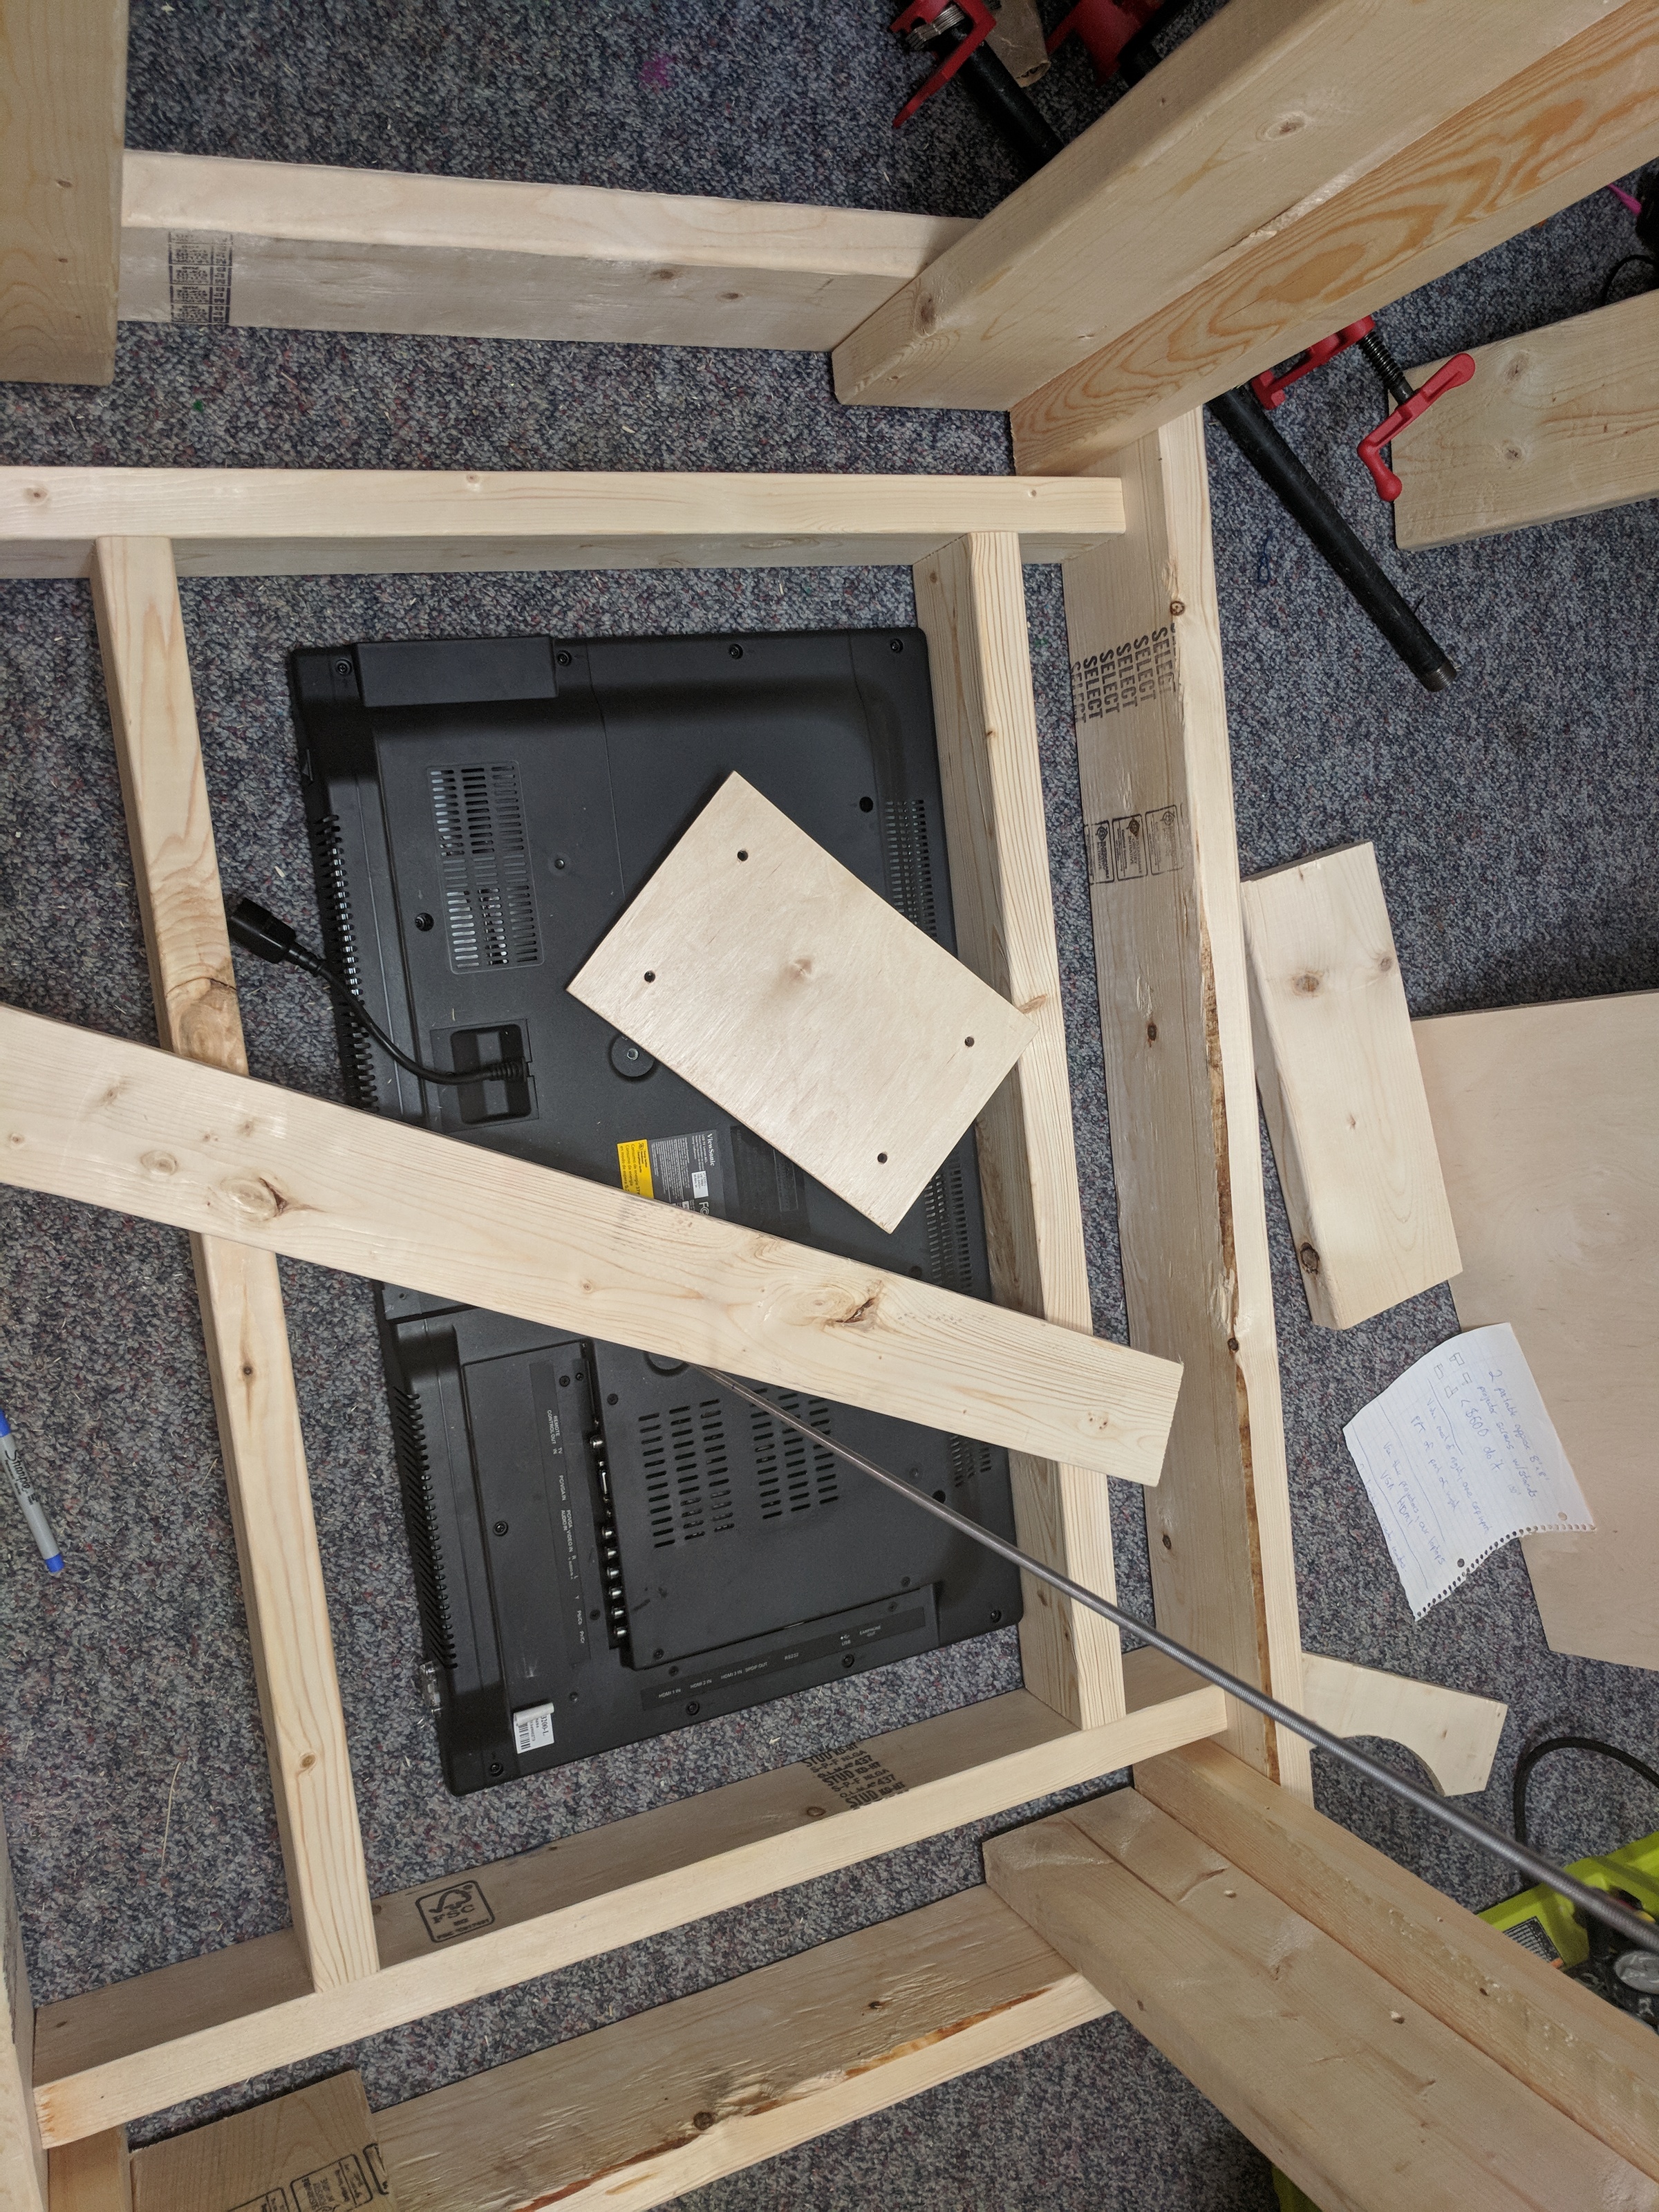
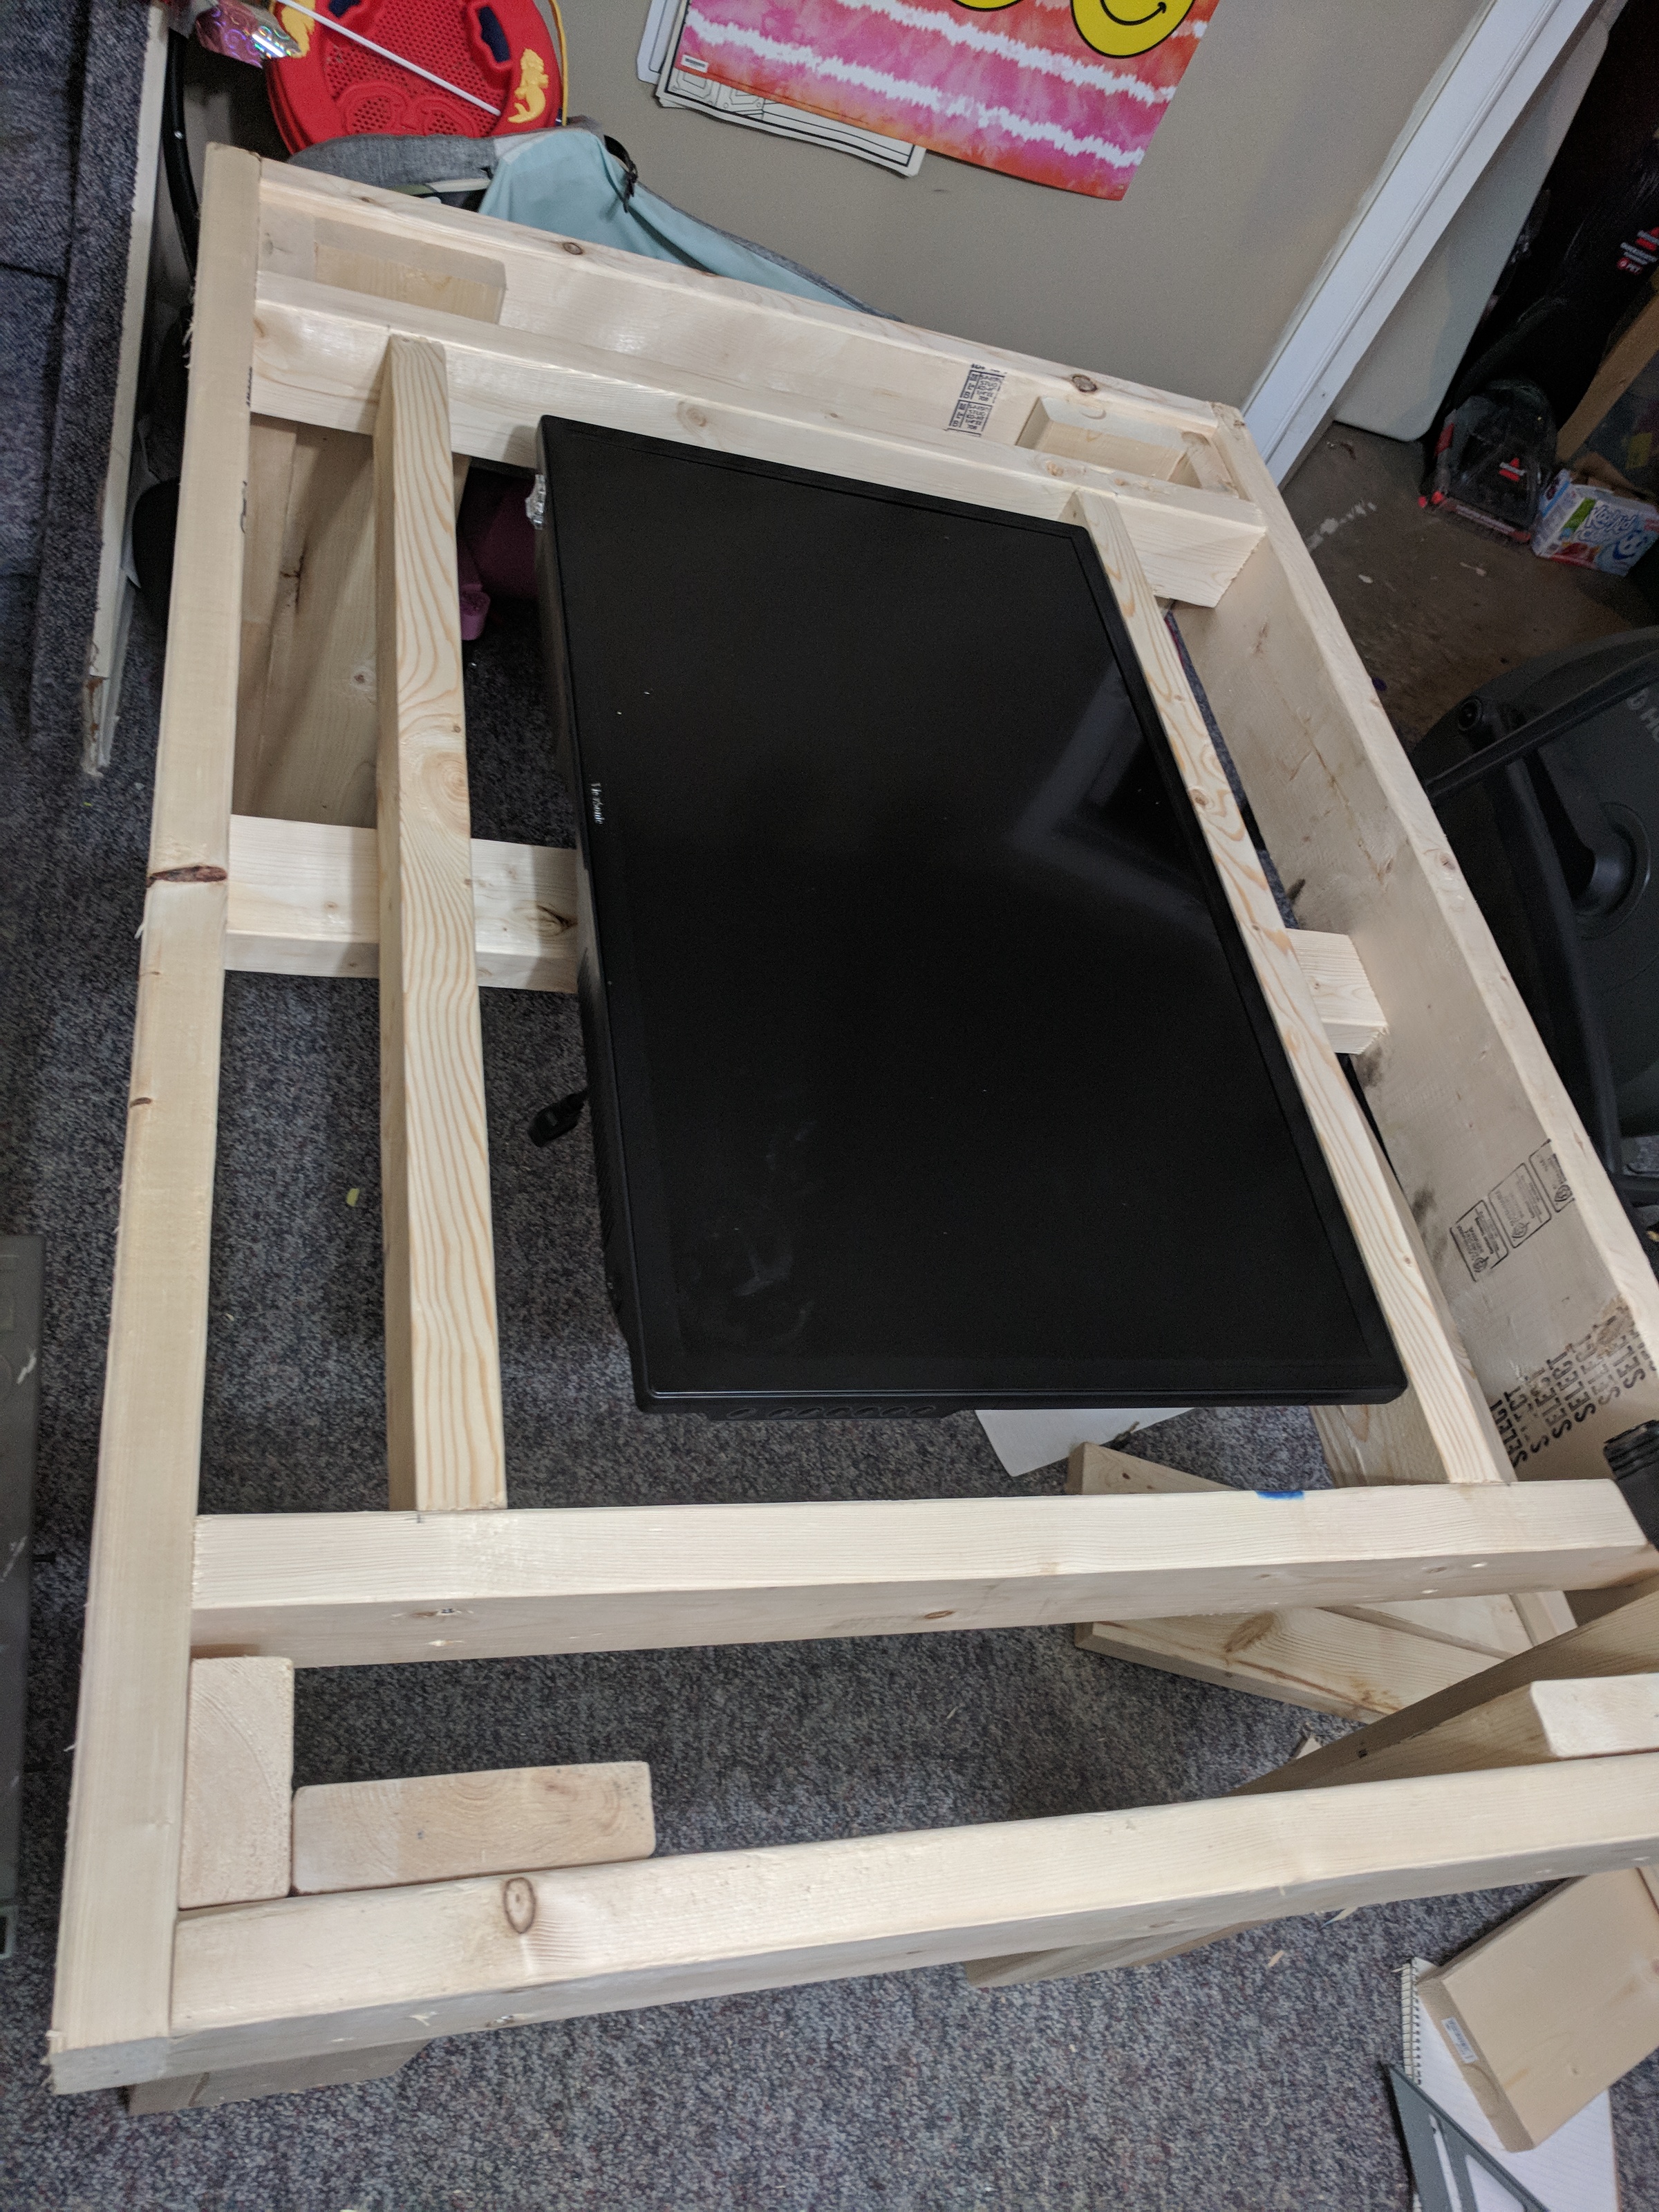
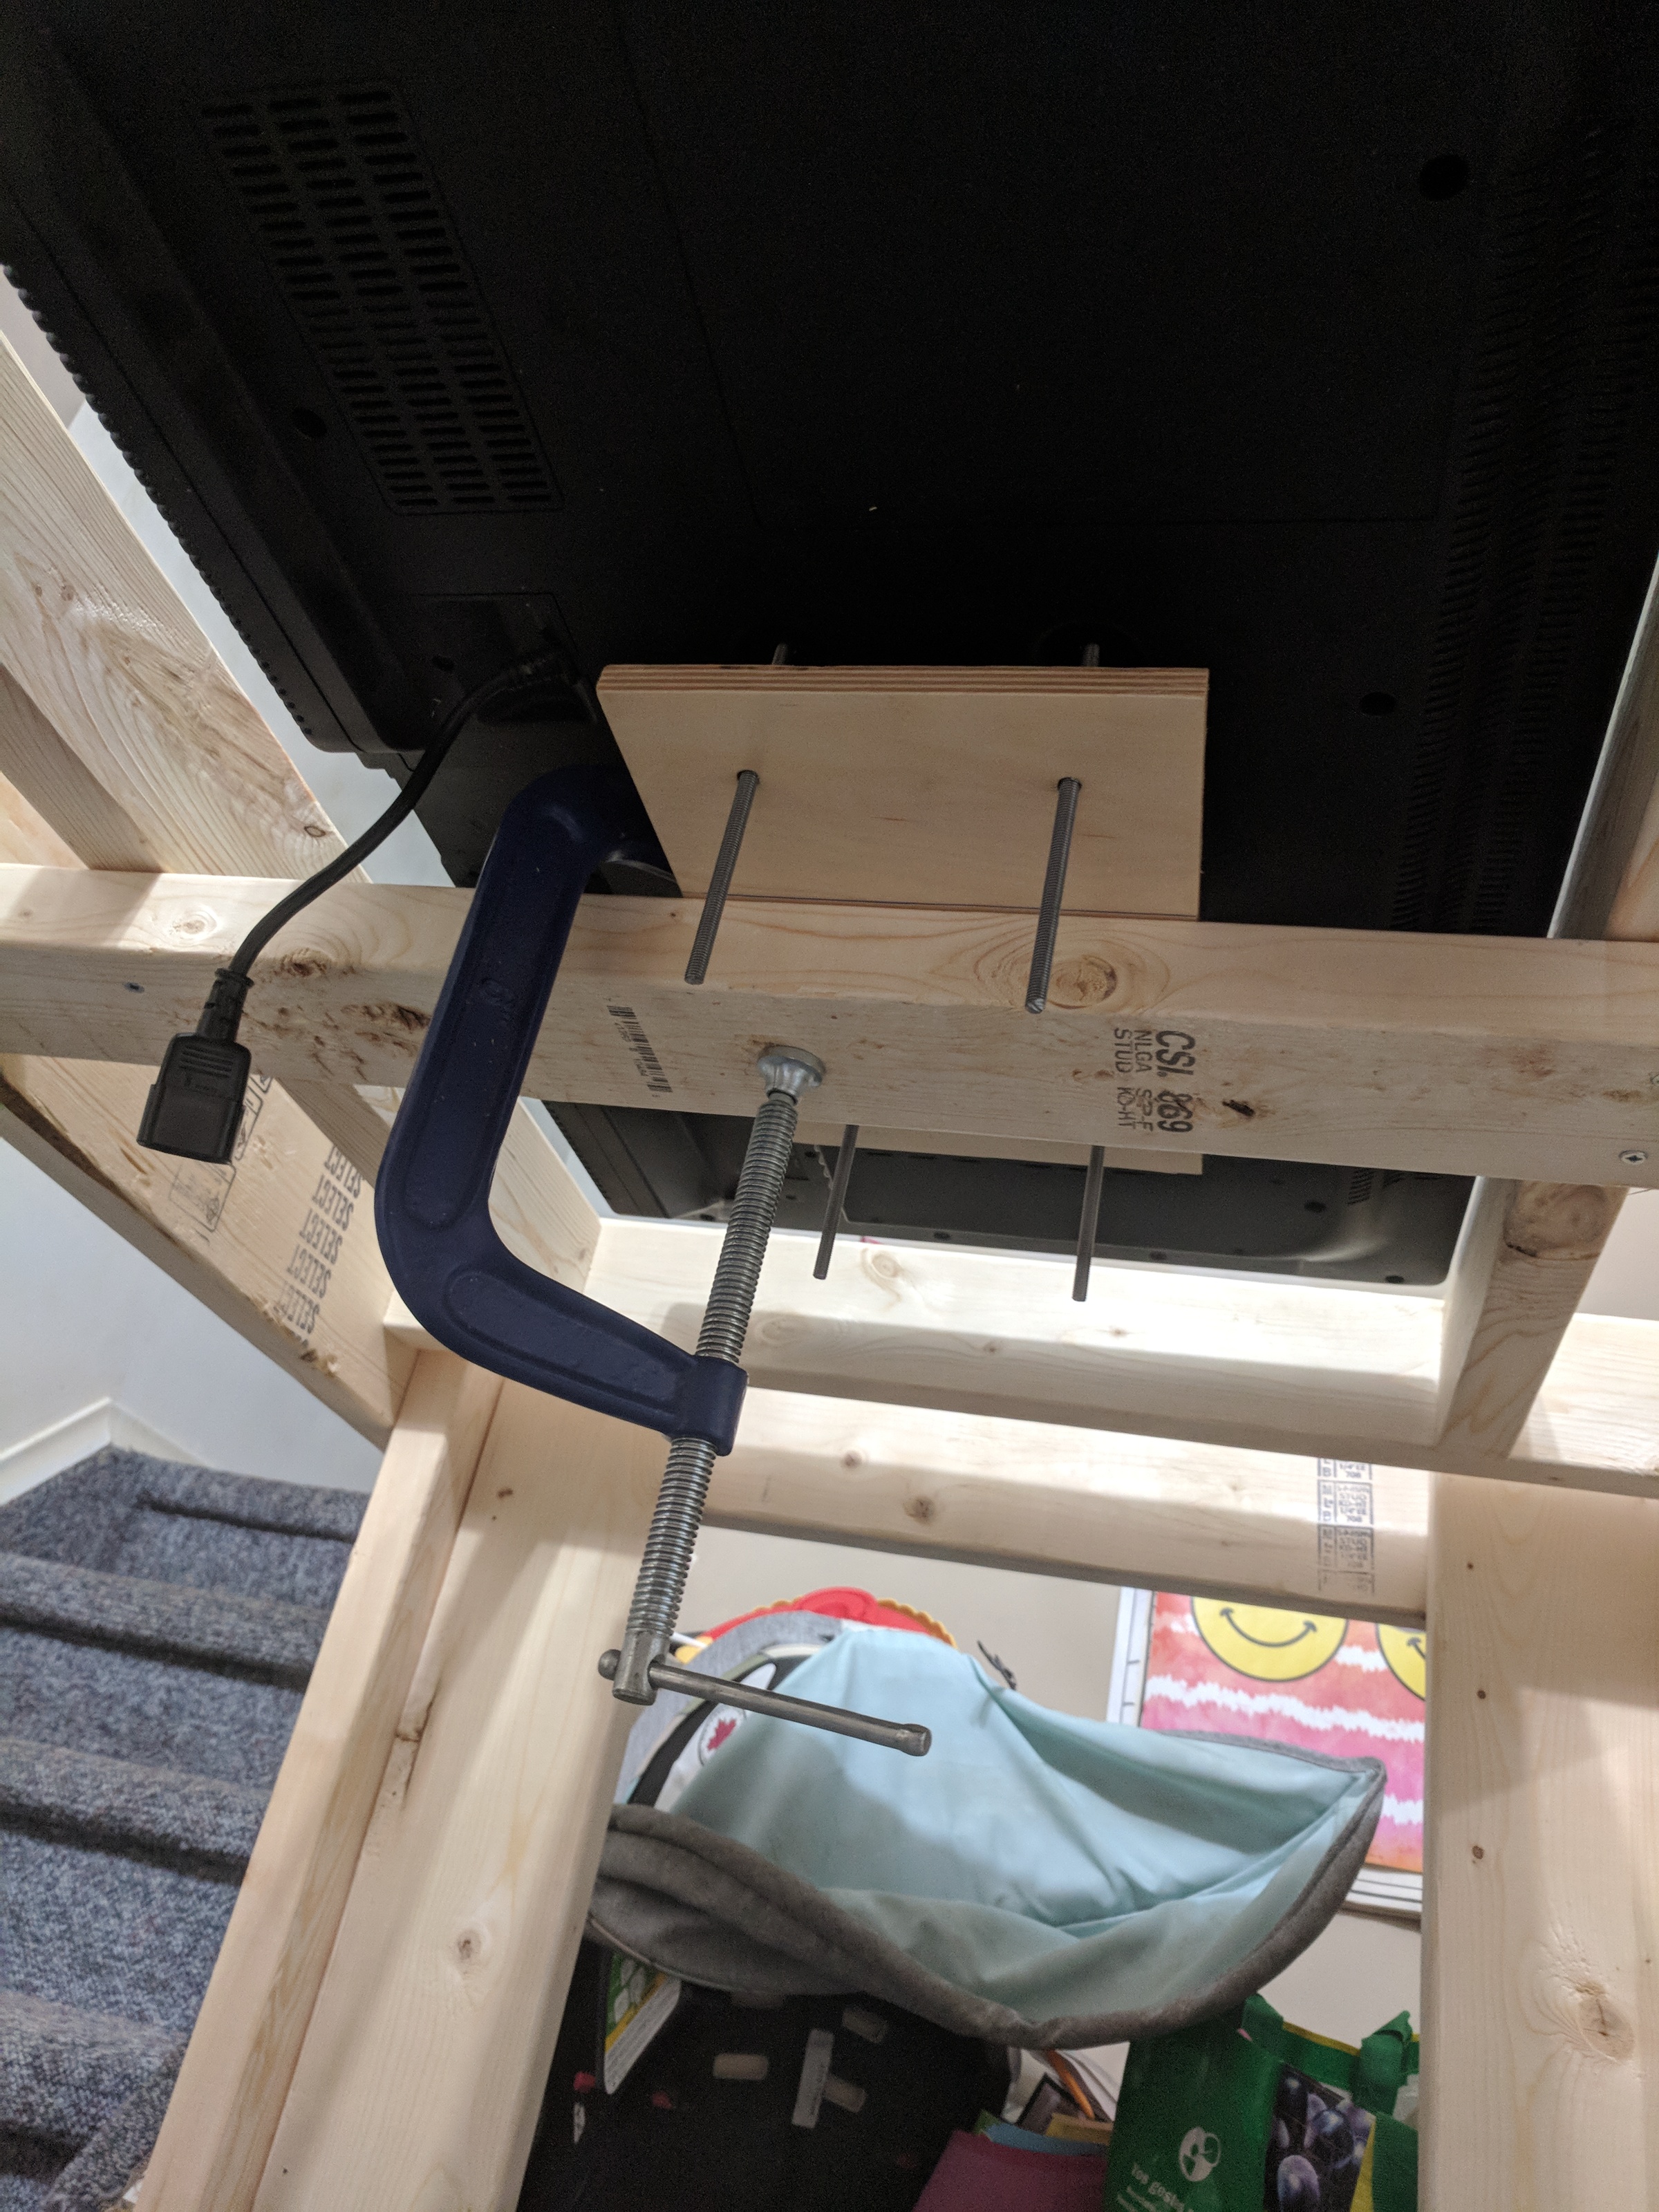
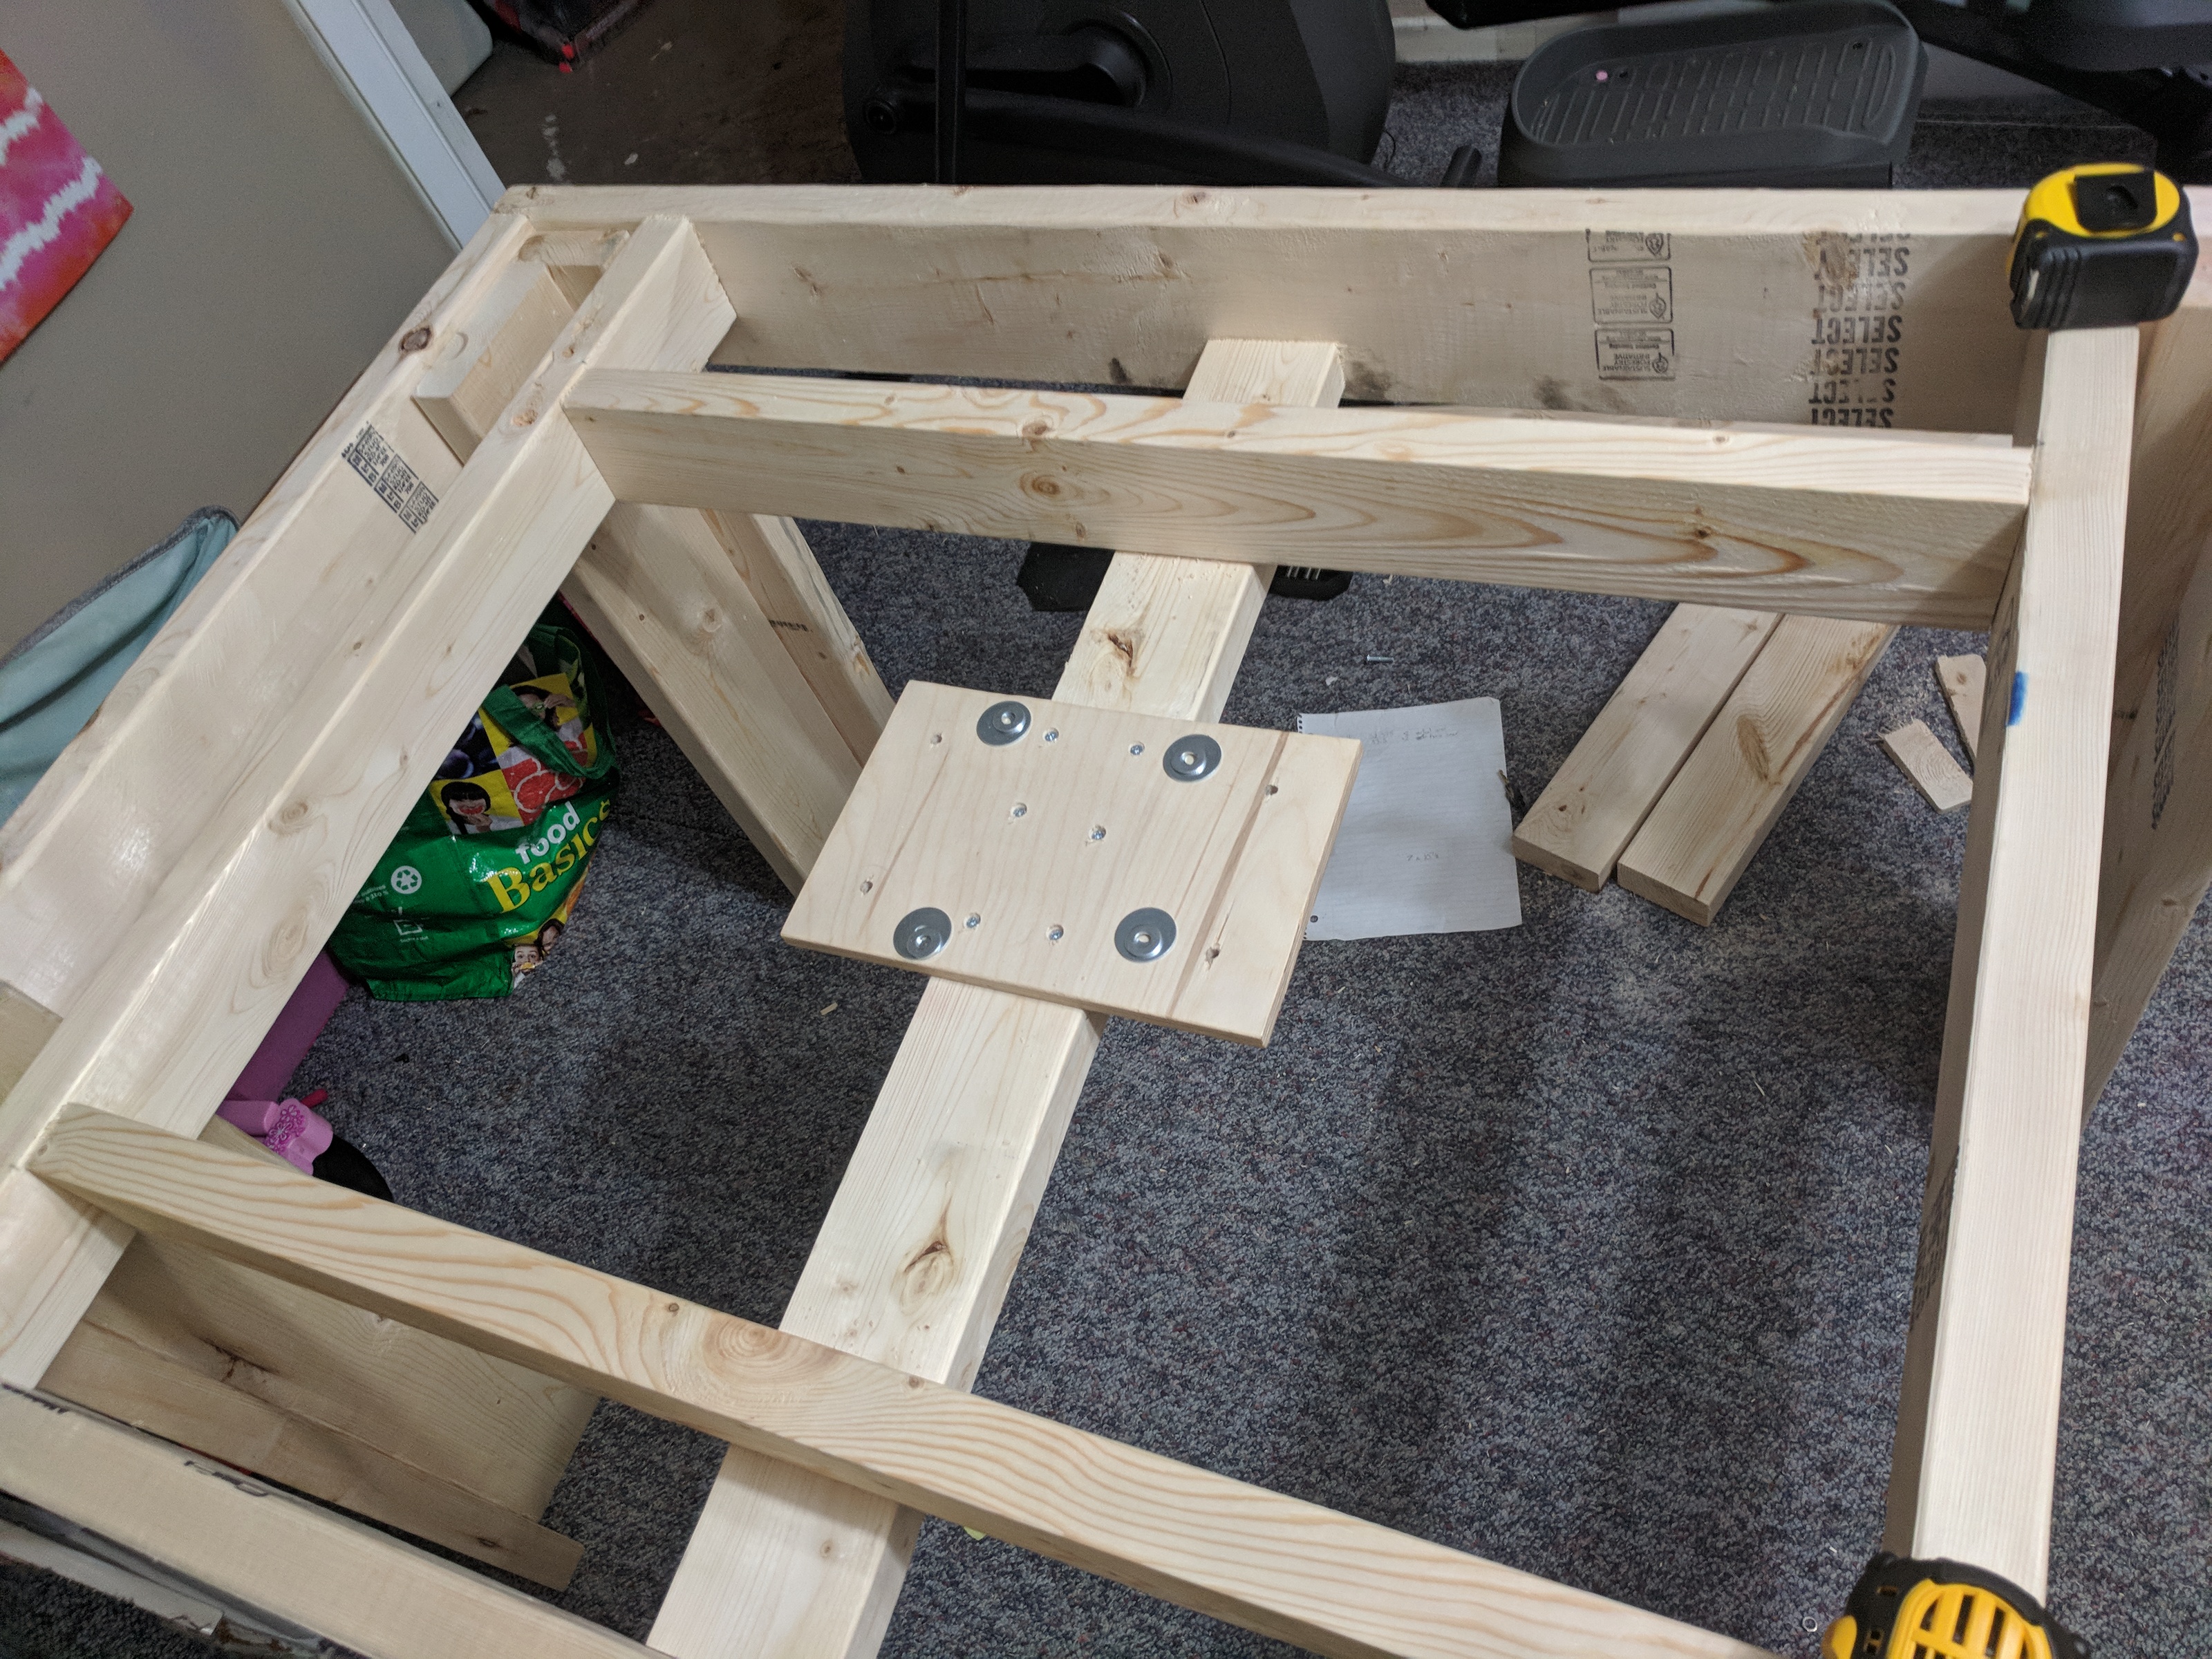
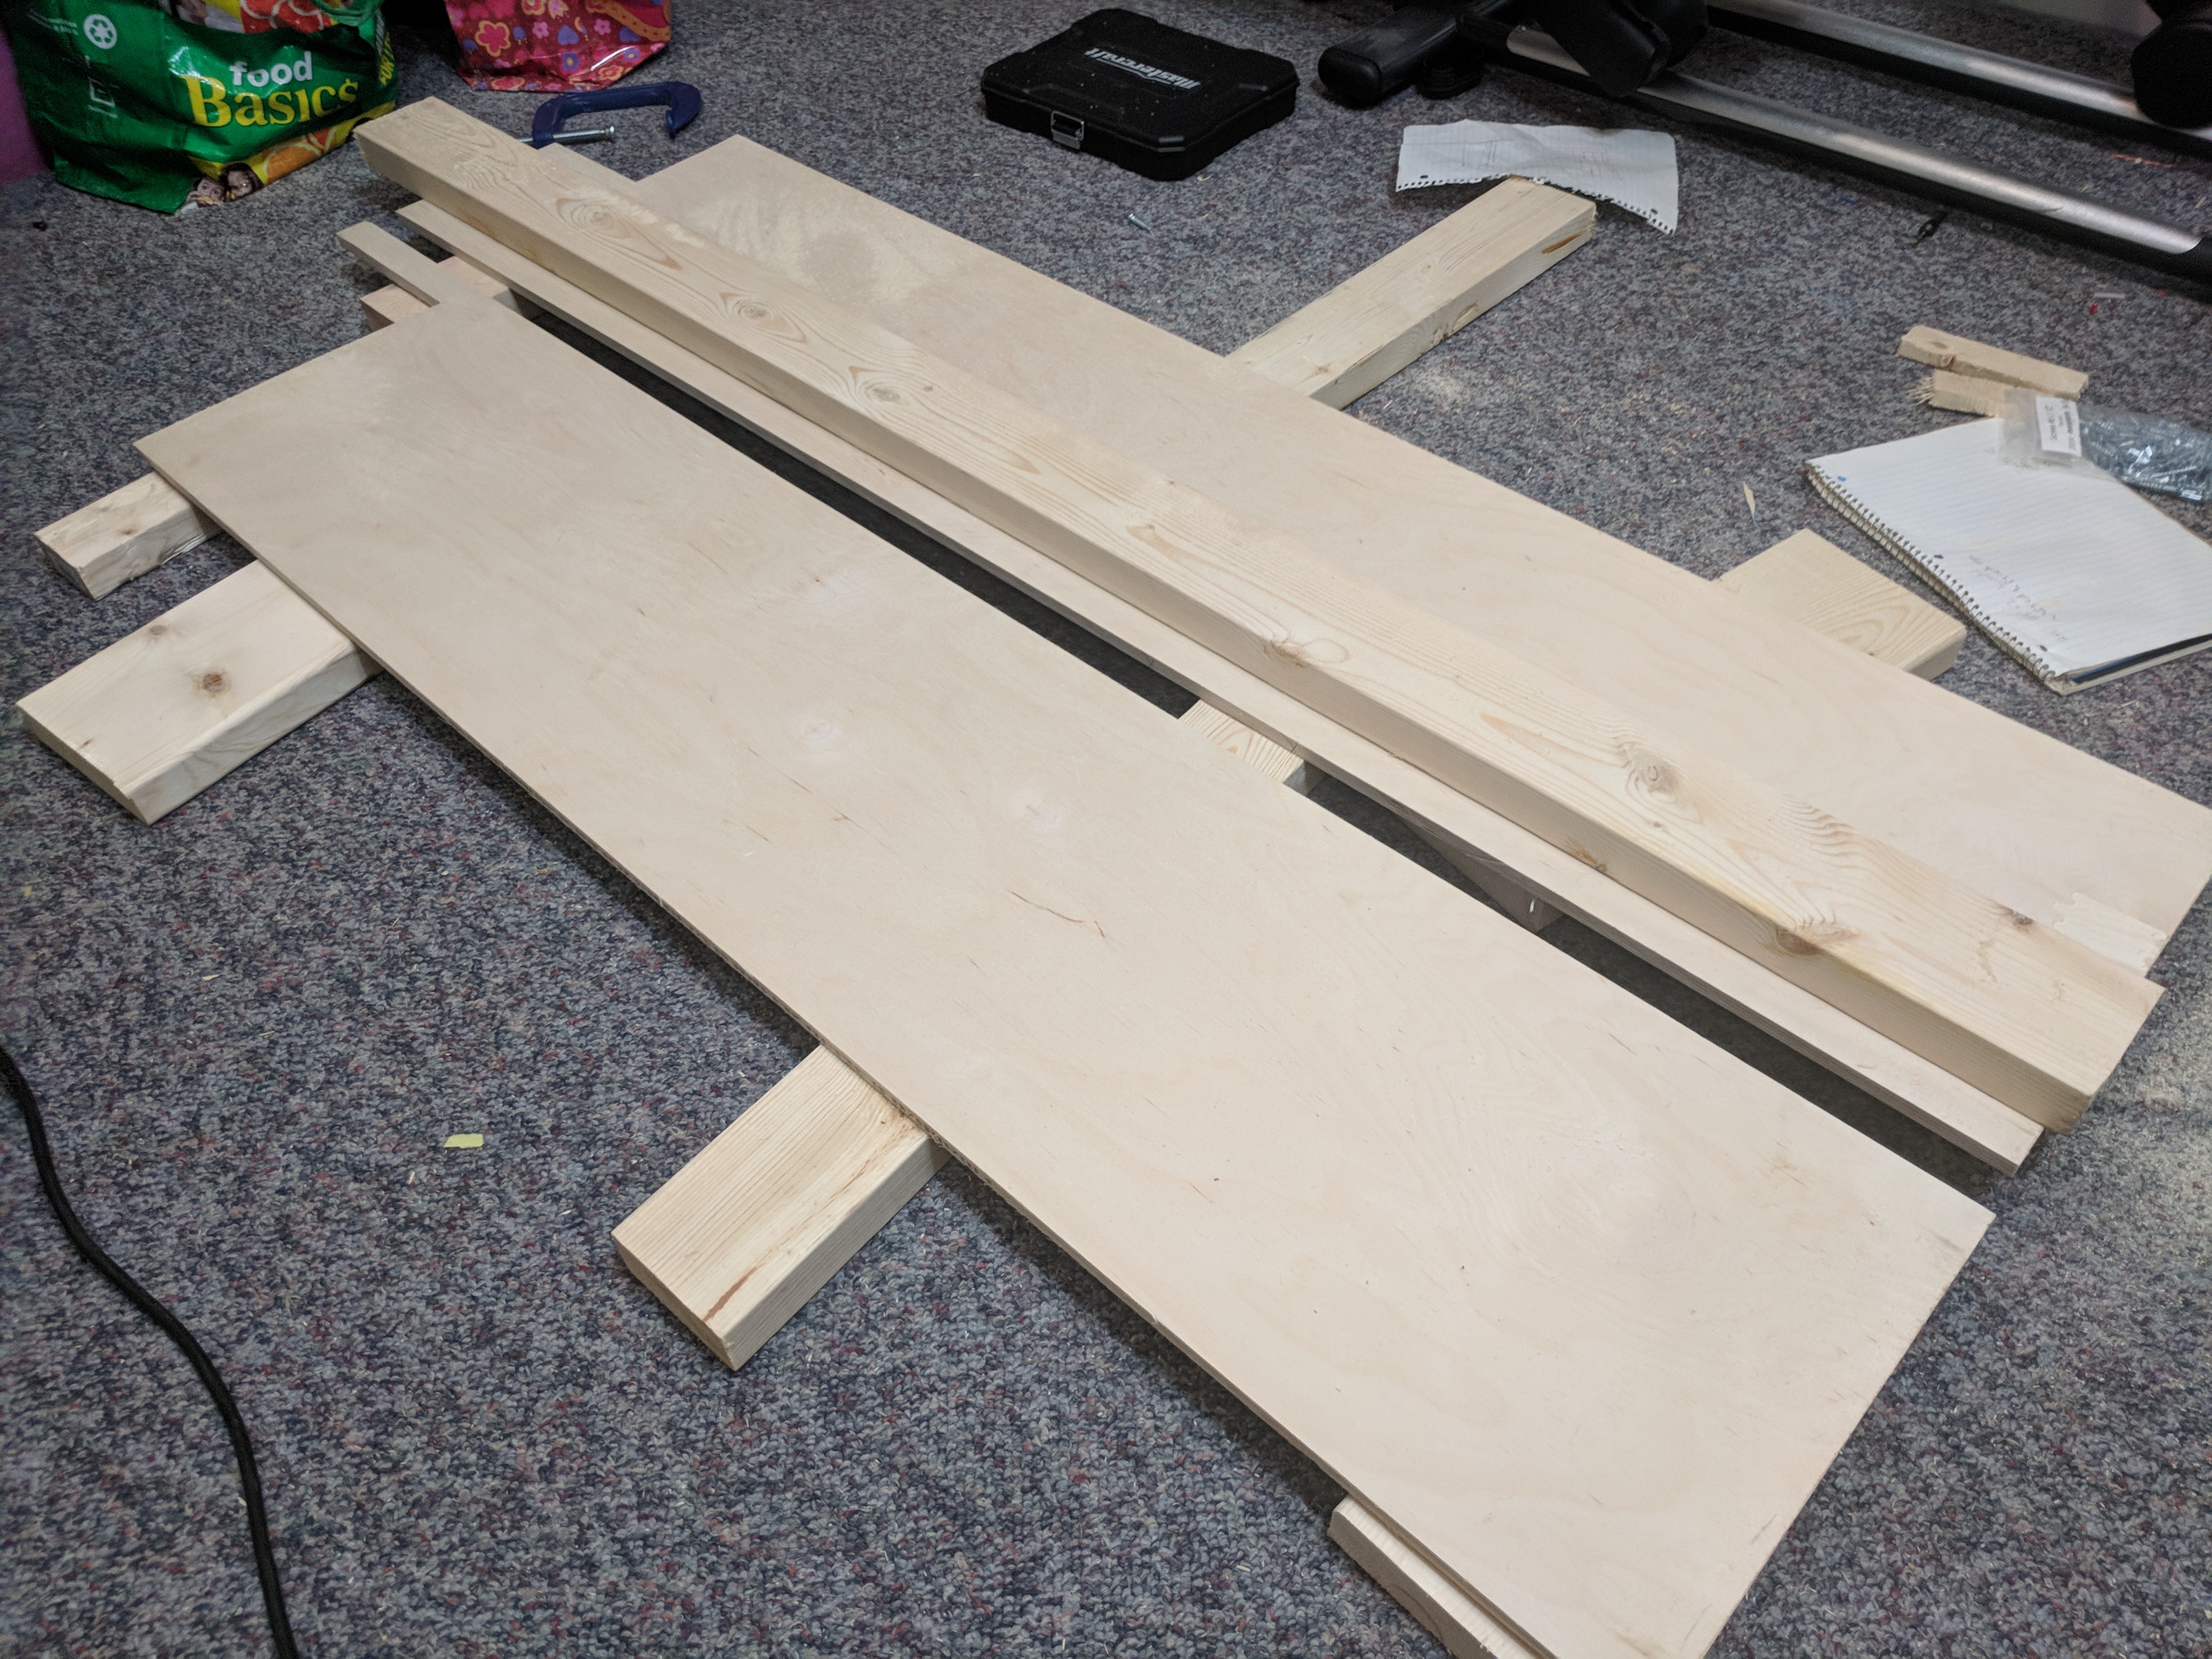
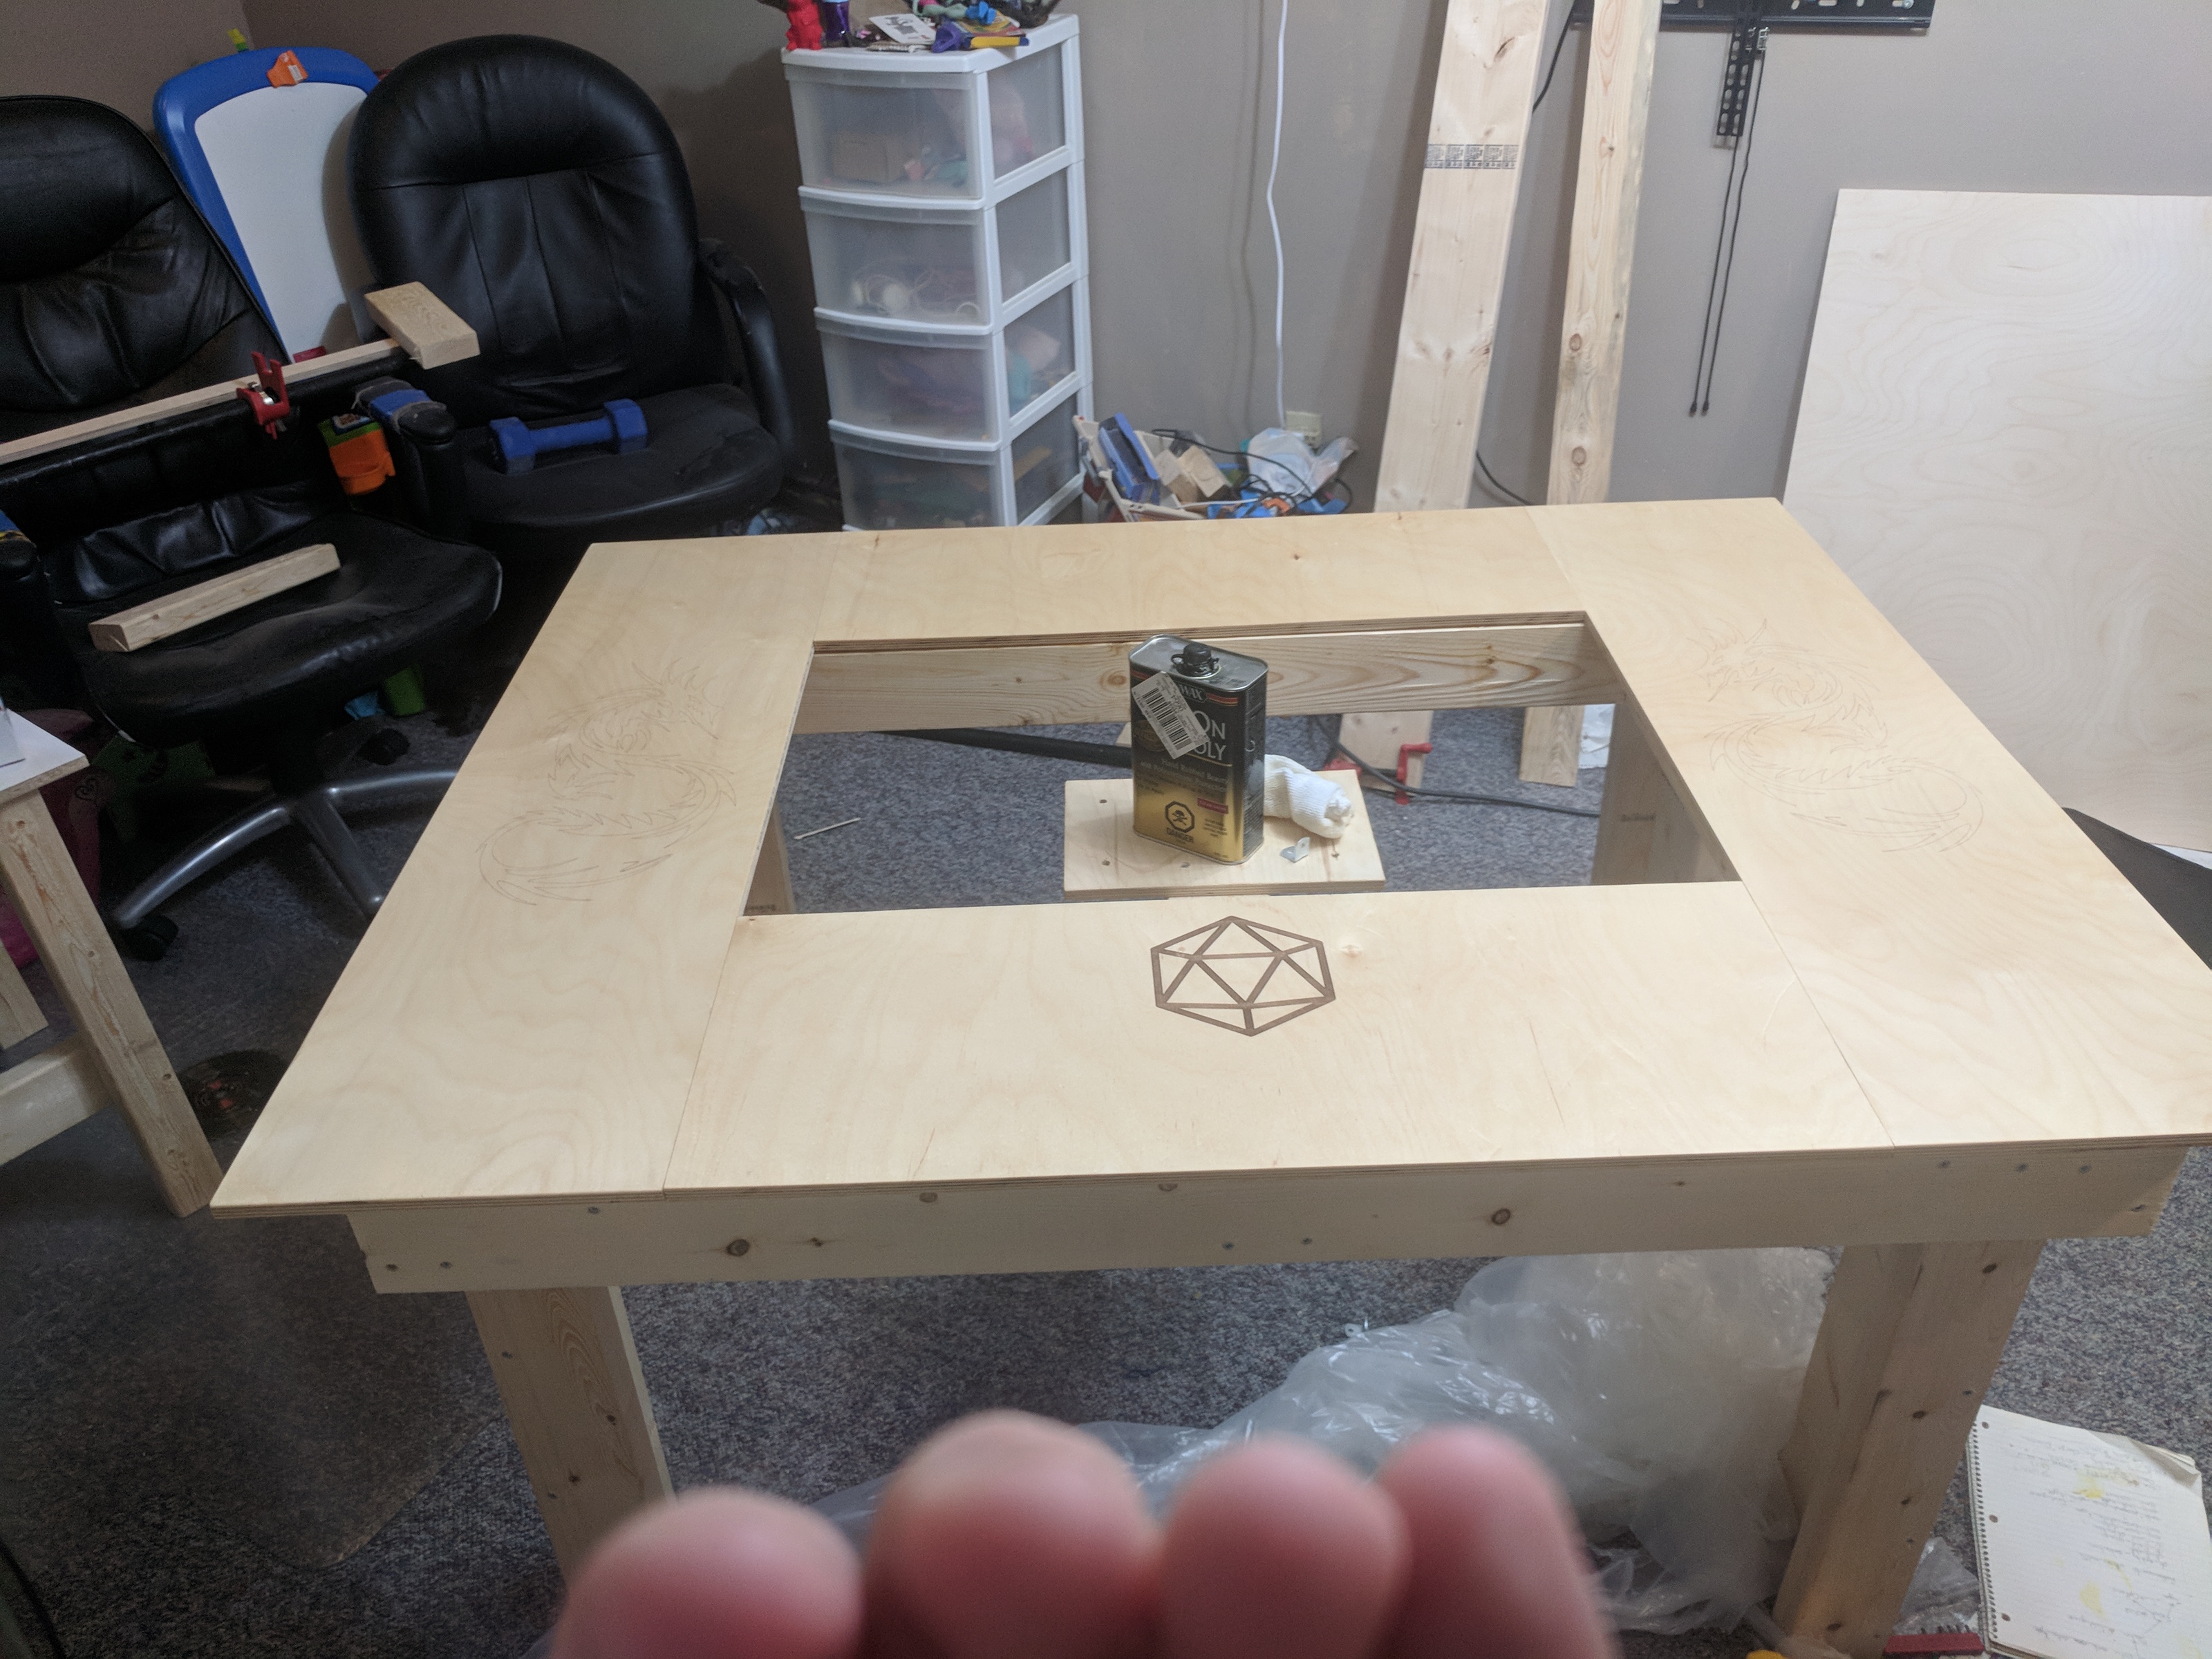
Table Top
If I were doing this again, I’d probably try to make the top out of a single piece of material. But I simply didn’t have the tools to make that happen, and the results I got are still pretty nice.
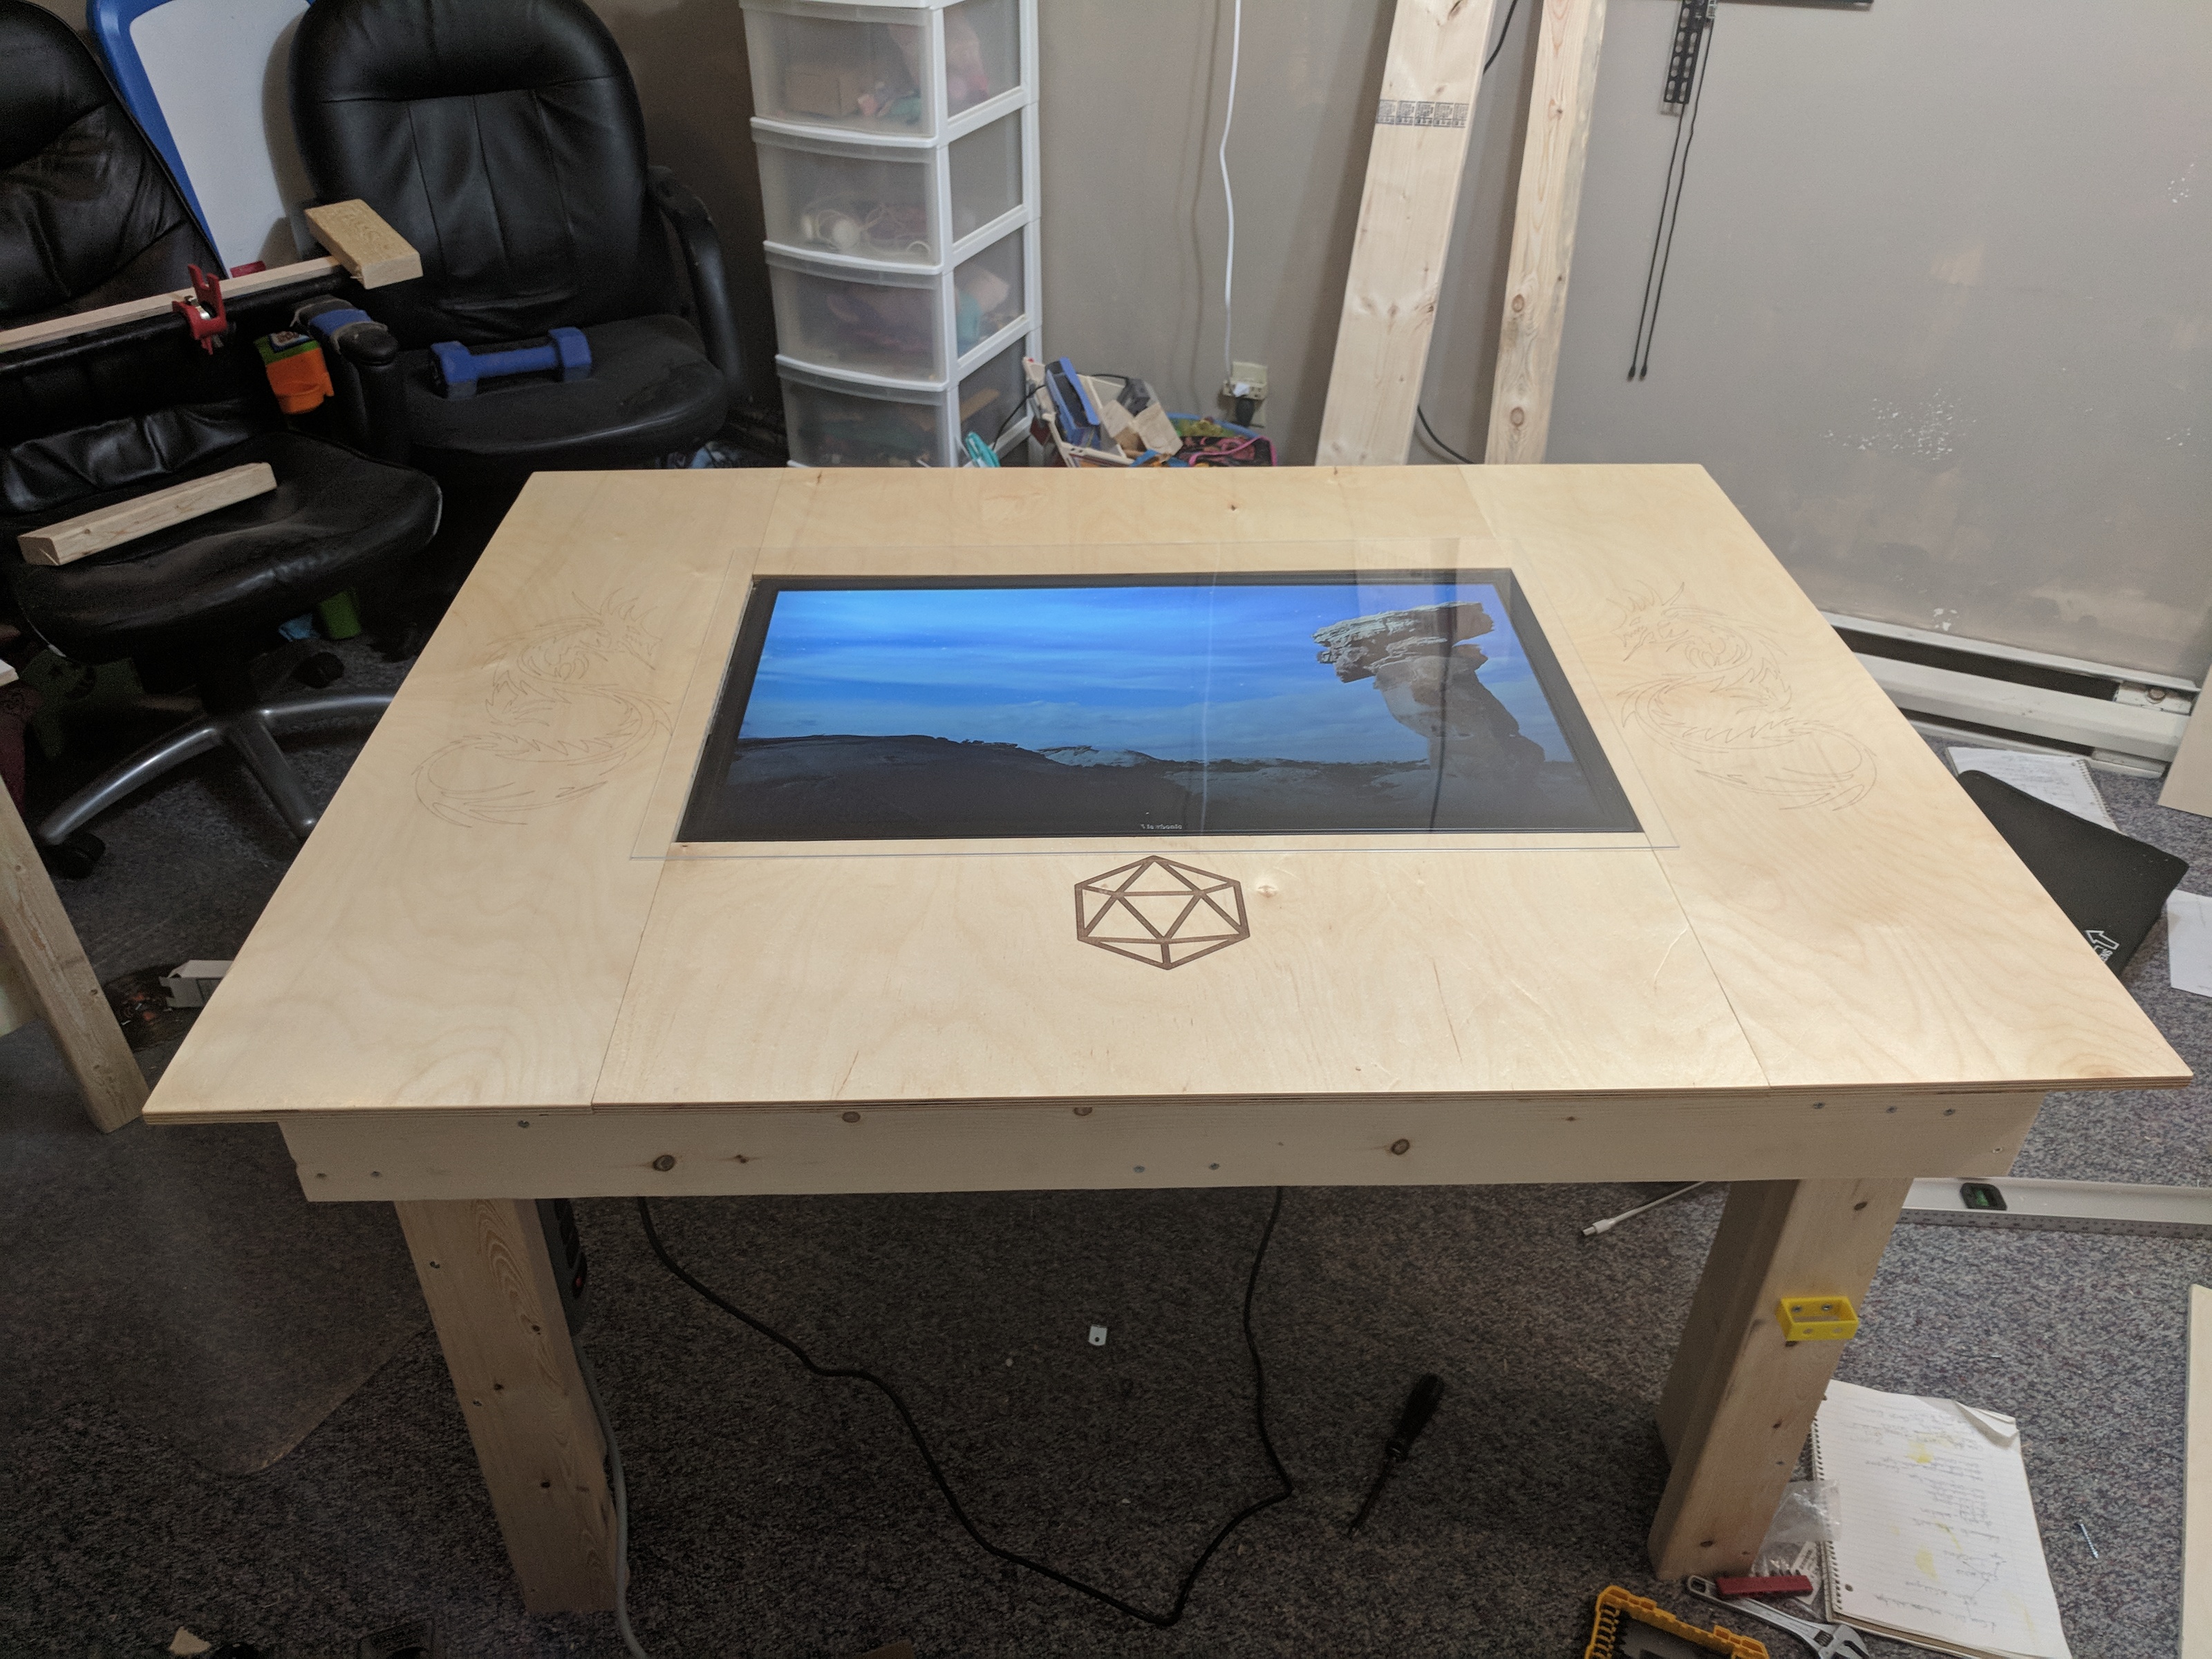
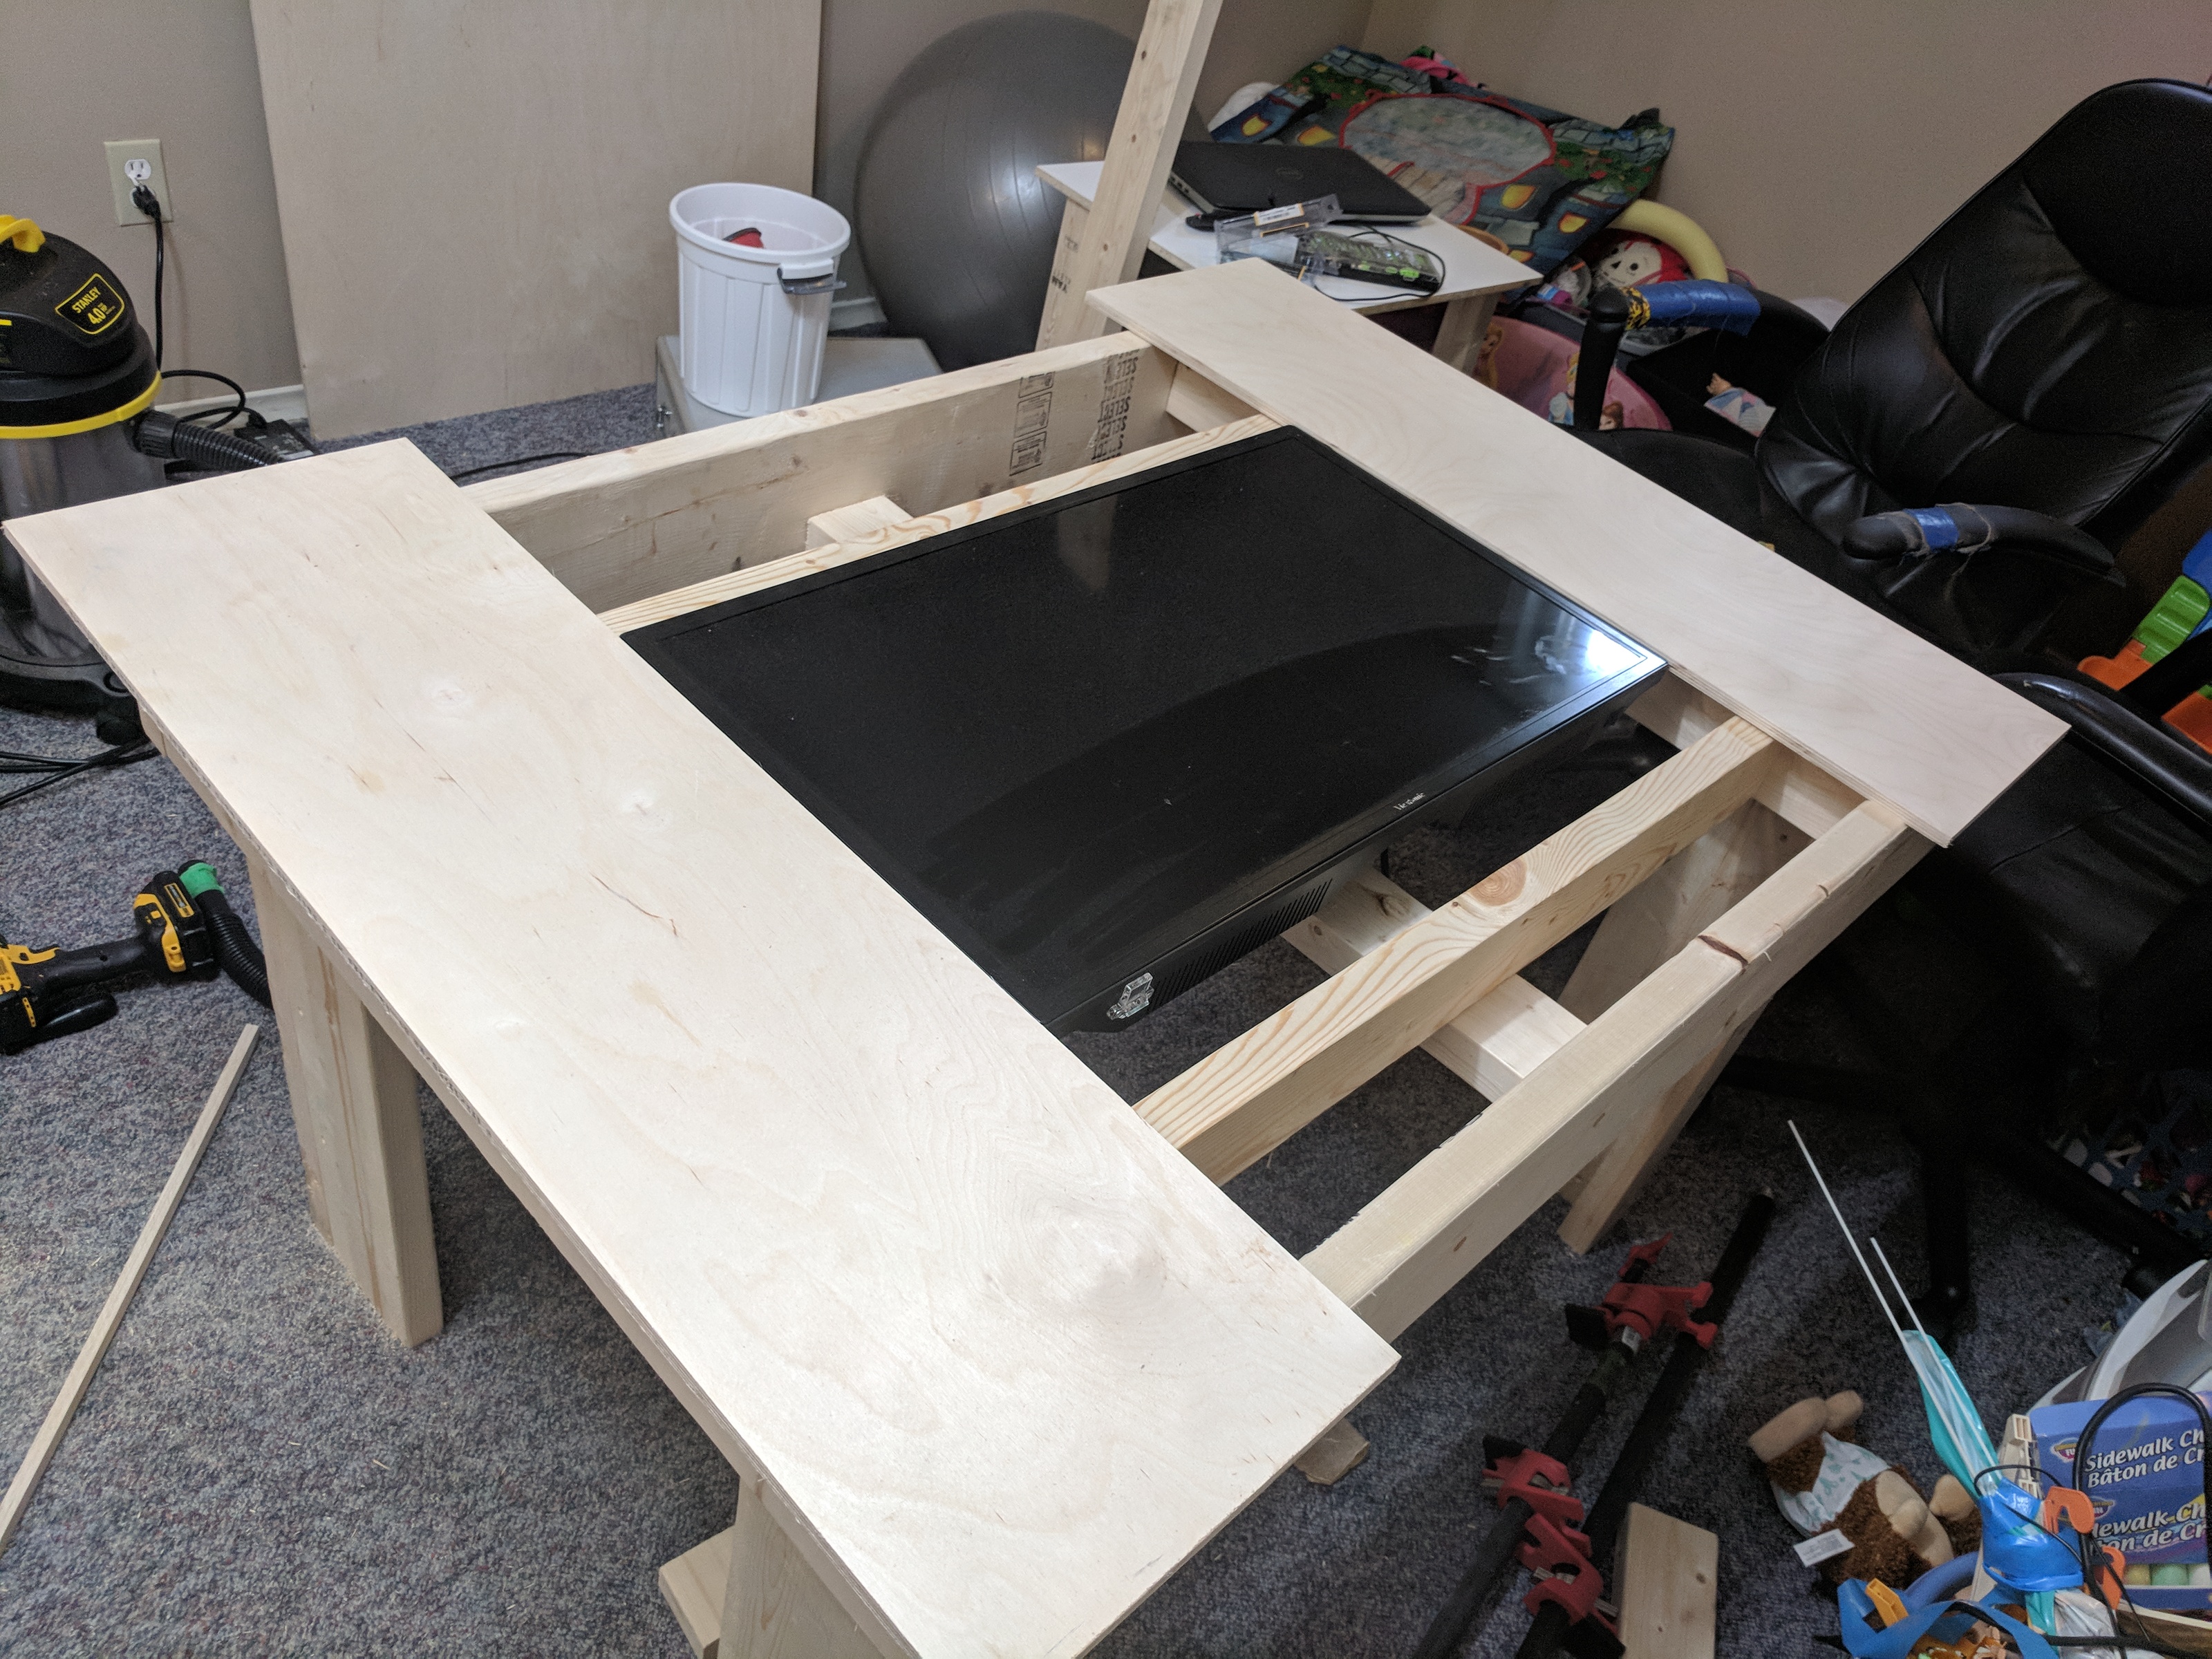
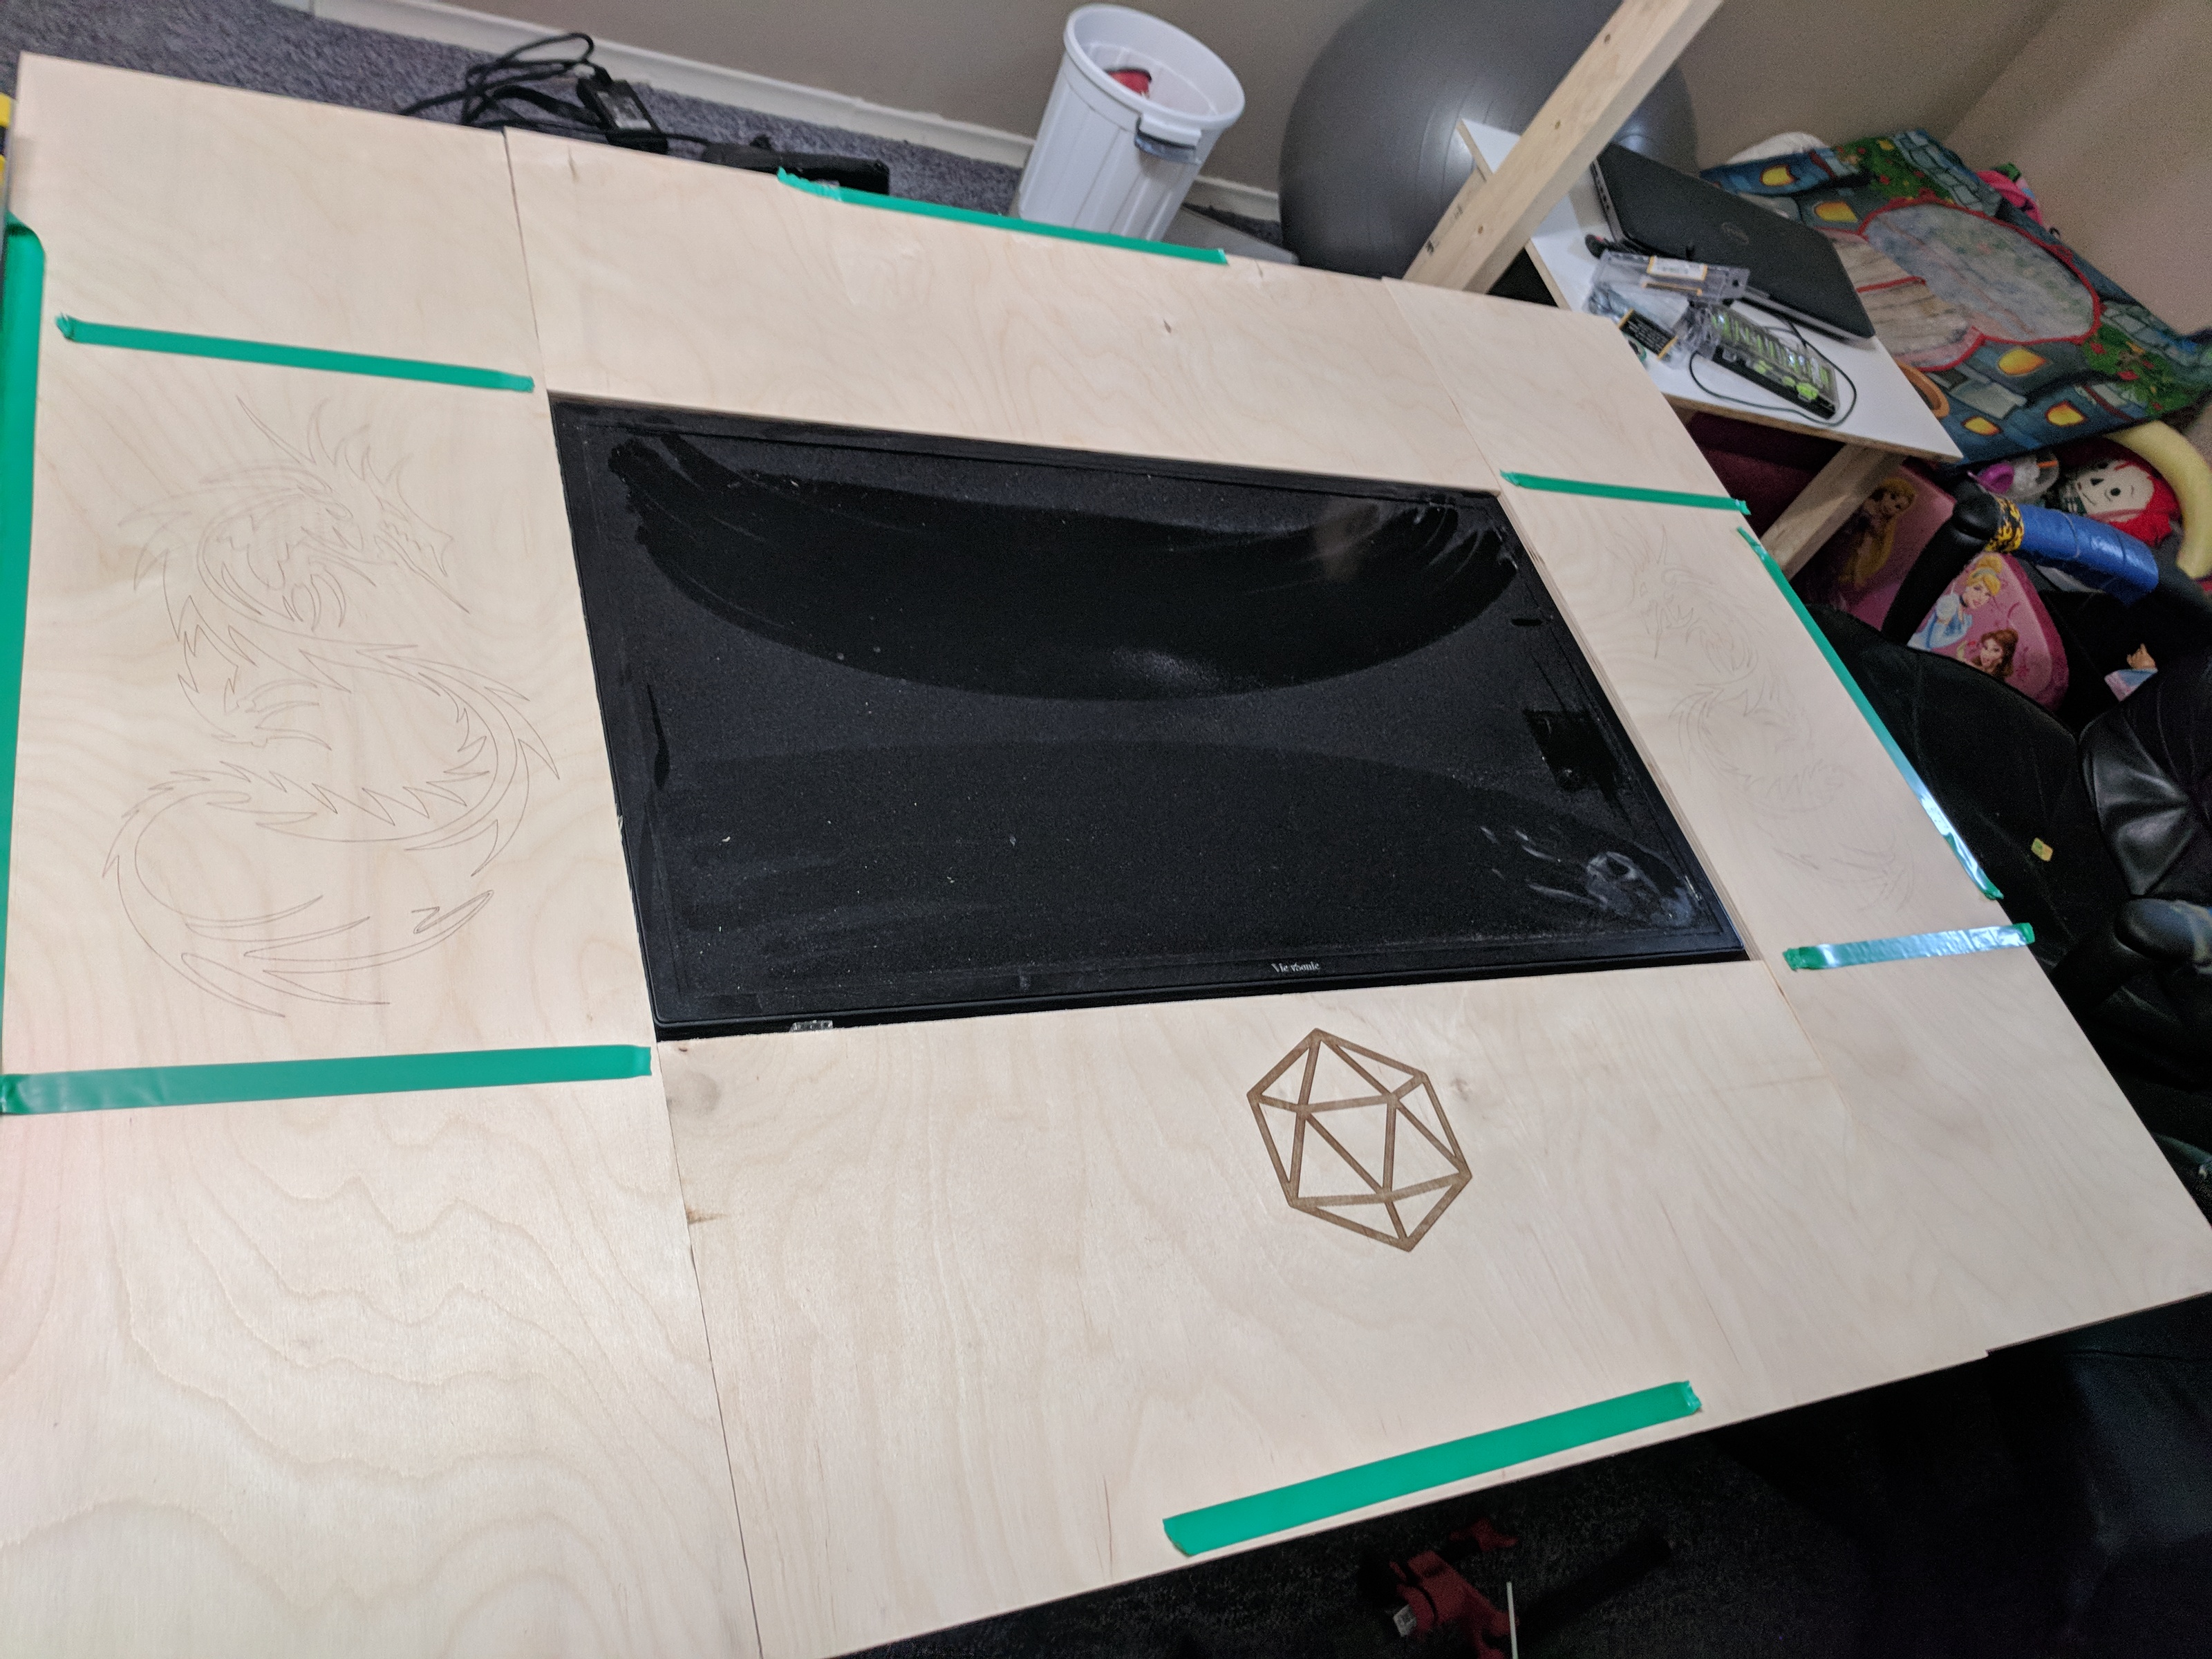
The top was cut out of 4 strips of the plywood on my circular saw, since my little table saw can’t safely handle large sheets with one person operating it. I measured and cut them to fit nicely around the TV, with just a little gap around each edge so that if someone spills a drink on the table, it’s more likely to roll down the edge than to continue into the TV itself.
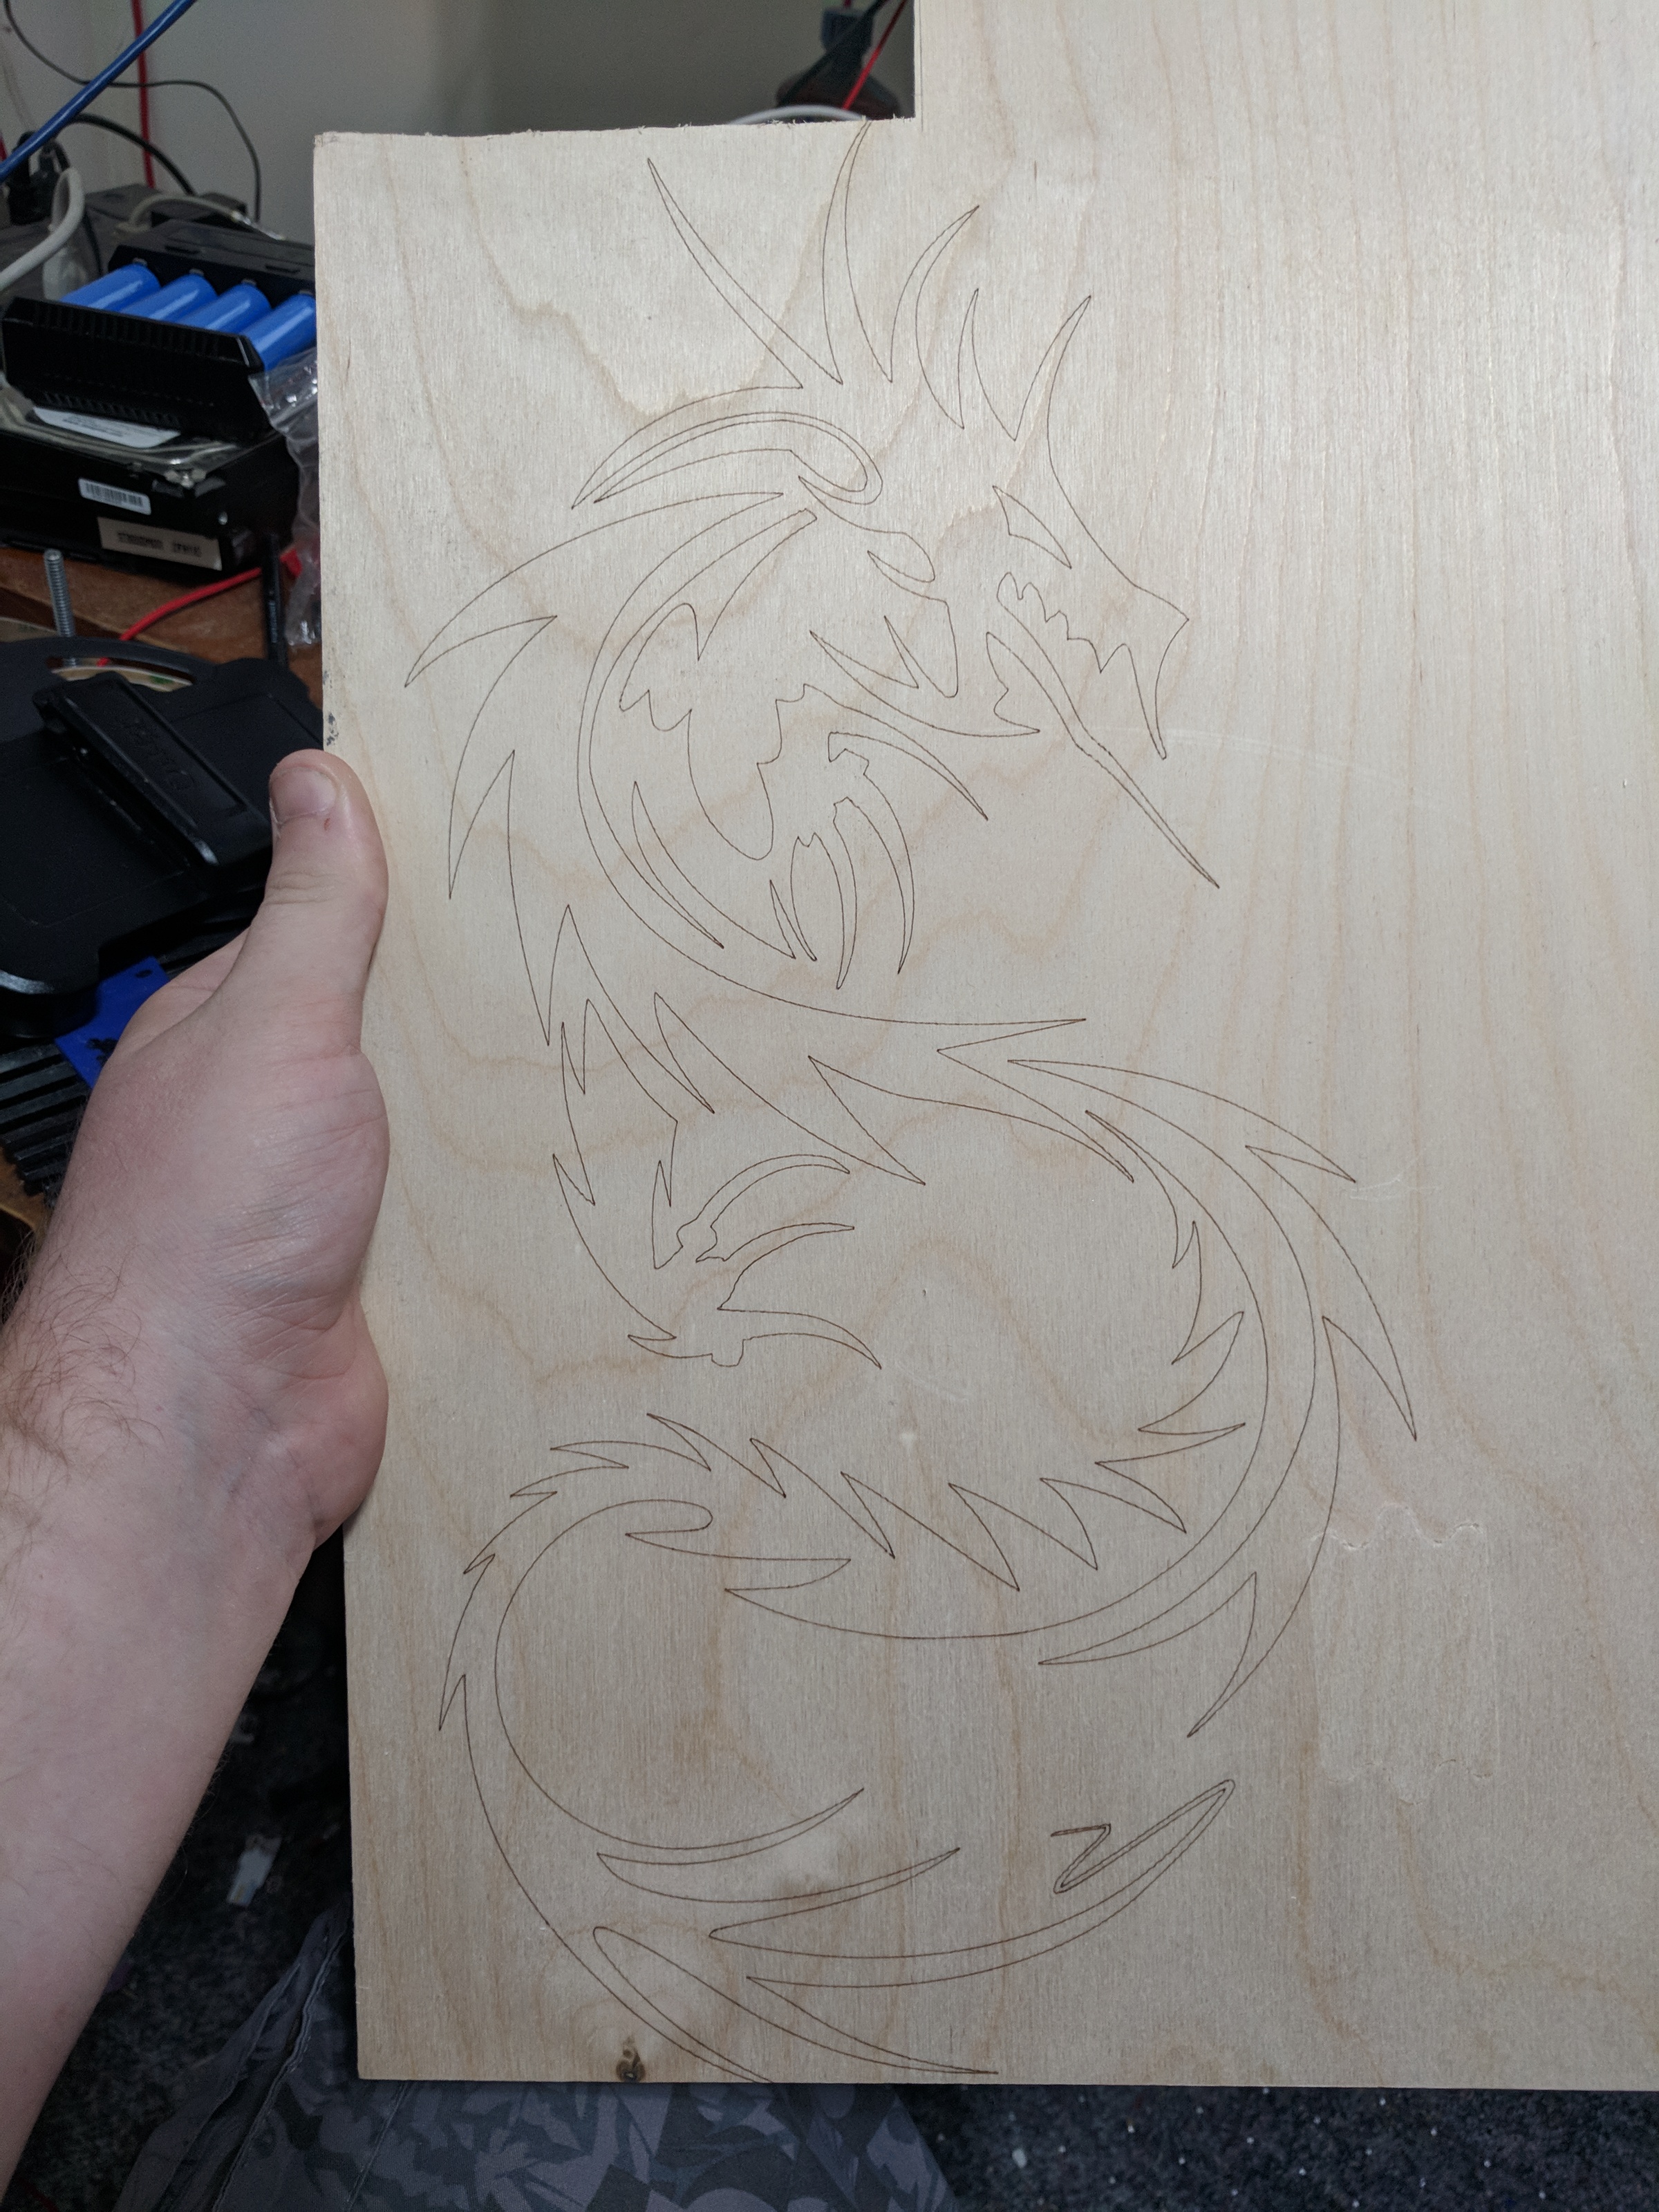
I also used my CNC machine to engrave some dragons and a D20 symbol into the pieces. The tape in one of the photos was just there to help me line them up in the machine exactly where I wanted the engraving. Those turned out beautifully.
The hardest part of this was getting all 4 pieces level and square with no gaps between them. I probably should have cut them a bit big with the circular saw and used the table saw for more accurate final cuts. I used dowels to help keep them lined up, but those didn’t work all that well.
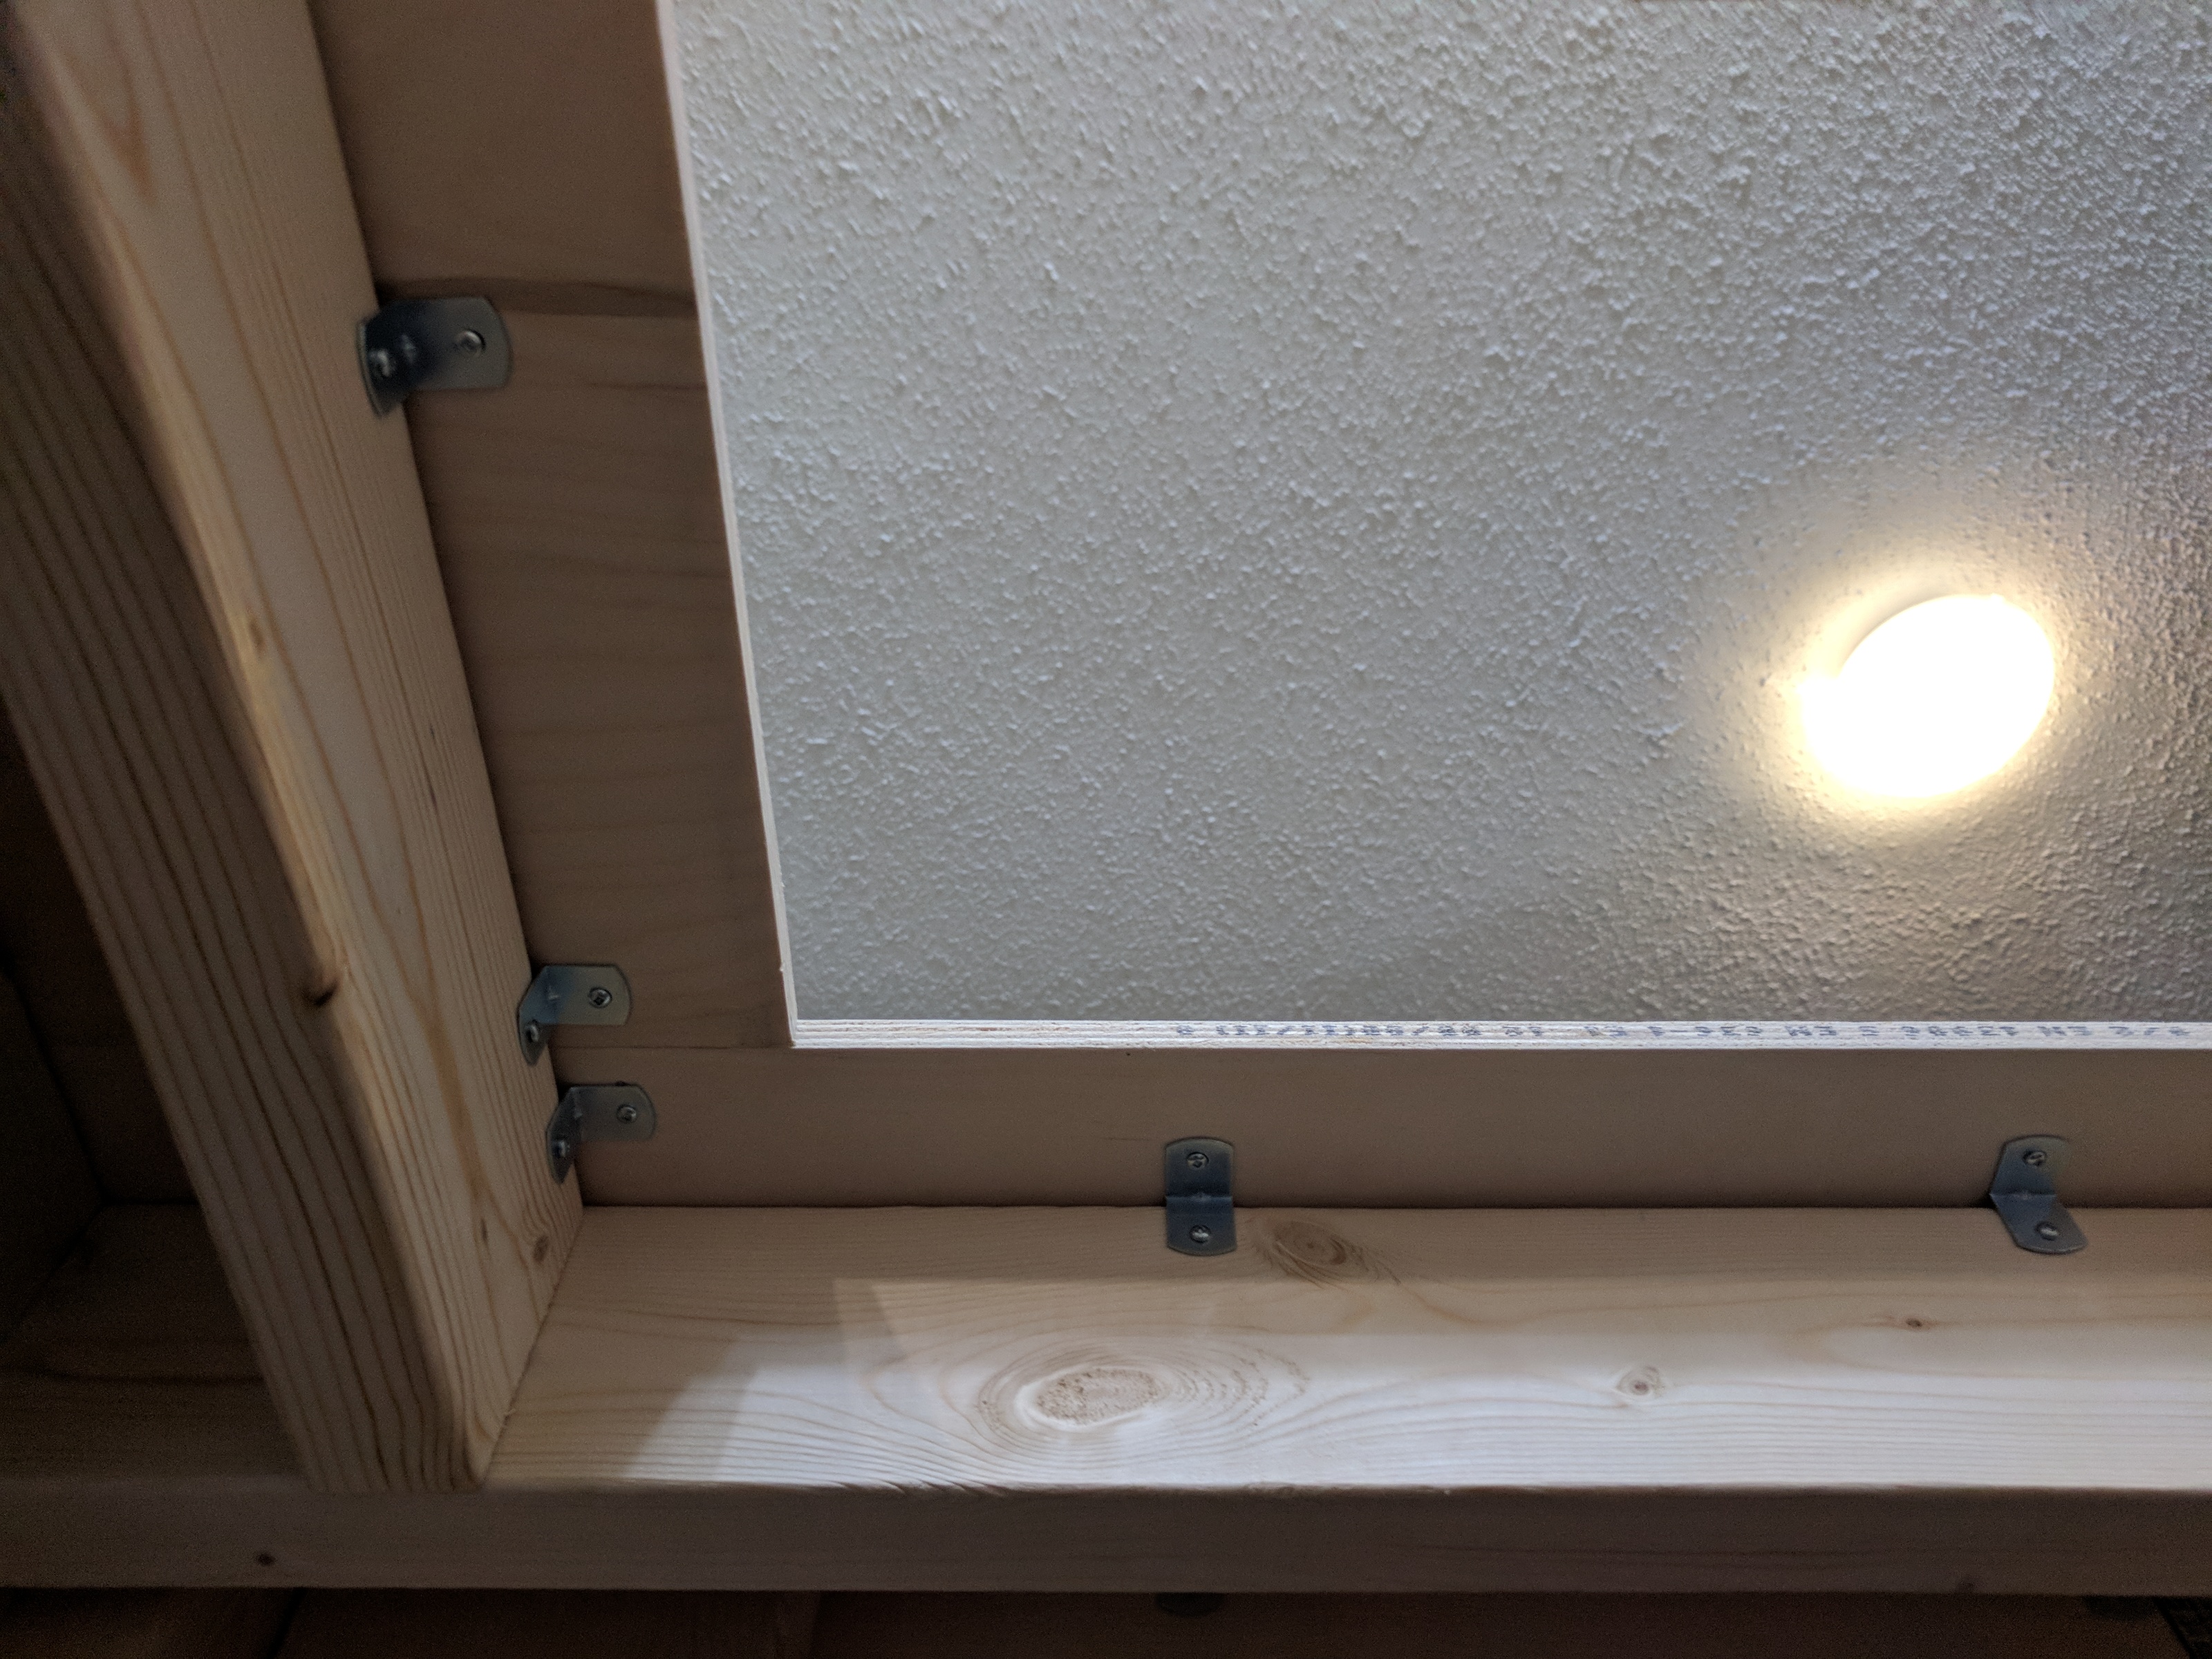
I used a bunch of those angled metal pieces and tiny screws to secure each piece, while trying to make sure each lined up with the others. Unfortunately, this meant using a hand screw driver since there isn’t enough room for my drill. And since my floor is carpeted and I didn’t have a large flat sheet to lay it on, the table had to be upright for me to be able to line everything up properly. Several hours were spent lying on the floor to drive screws above my head into the table. I had originally planned for all the brackets to be on the inside of the table, but I later realized there wasn’t enough room to get a screw driver in, so they ended up on the outside. There’s enough overhang that it didn’t really matter.
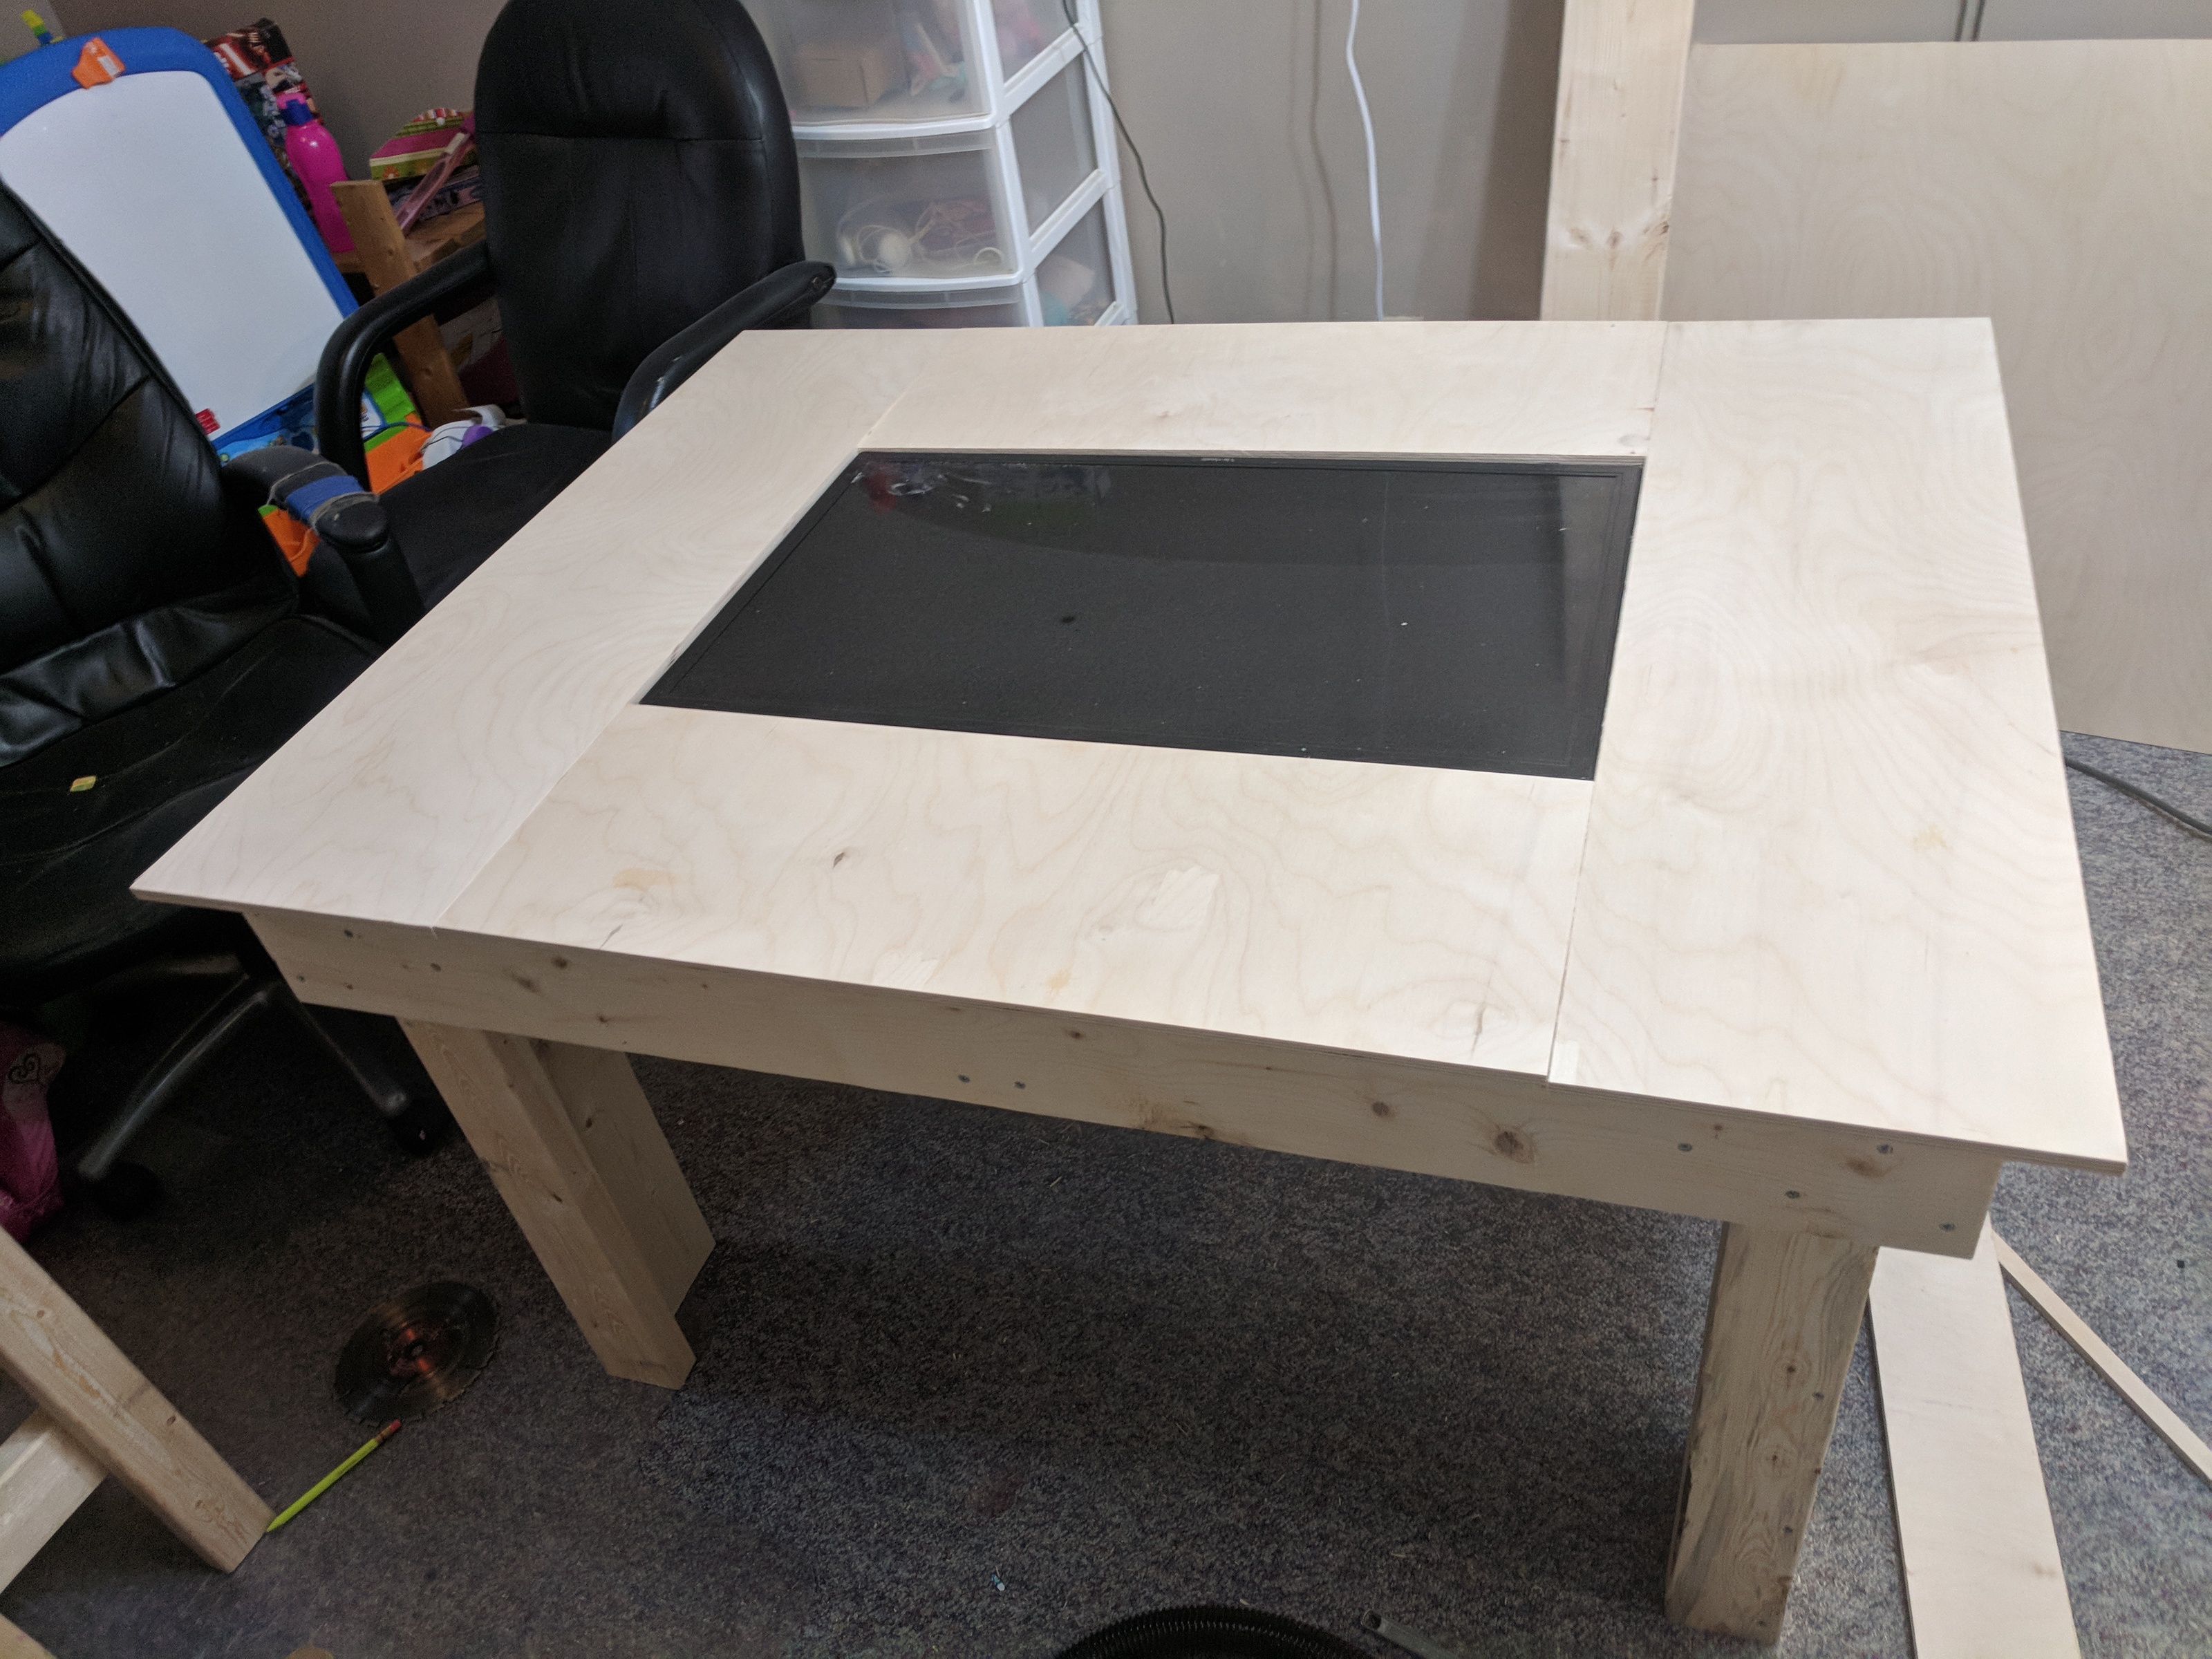
Then came a lot of sanding the edges of the table, followed by 4 or 5 coats of Minwax wipe on poly to give the top a bit of protection from being touched and drink spills.
Finishing Touches
Initially I went with a piece of plexiglass just loose over the table top. This worked, but we found that when we put minis on it, it would curve in a bit and touch the screen. Which meant we had to lower the TV so the plexi wouldn’t press on it. Having the TV lower increased the parallax and made it hard to see what square the mini was actually in - it would look different depending on where you sat at the table. In the end, I got a free broken pane of glass that had enough good section left to cut out a perfectly fitting top. The edges of the glass are wrapped in electrical tape since the glass cutter doesn’t always leave a perfectly smooth edge. The glass just sits right on top of the TV’s frame, and doesn’t flex at all so nothing touches the screen. Then I raised the TV back up so the glass surface is level with the tabletop.
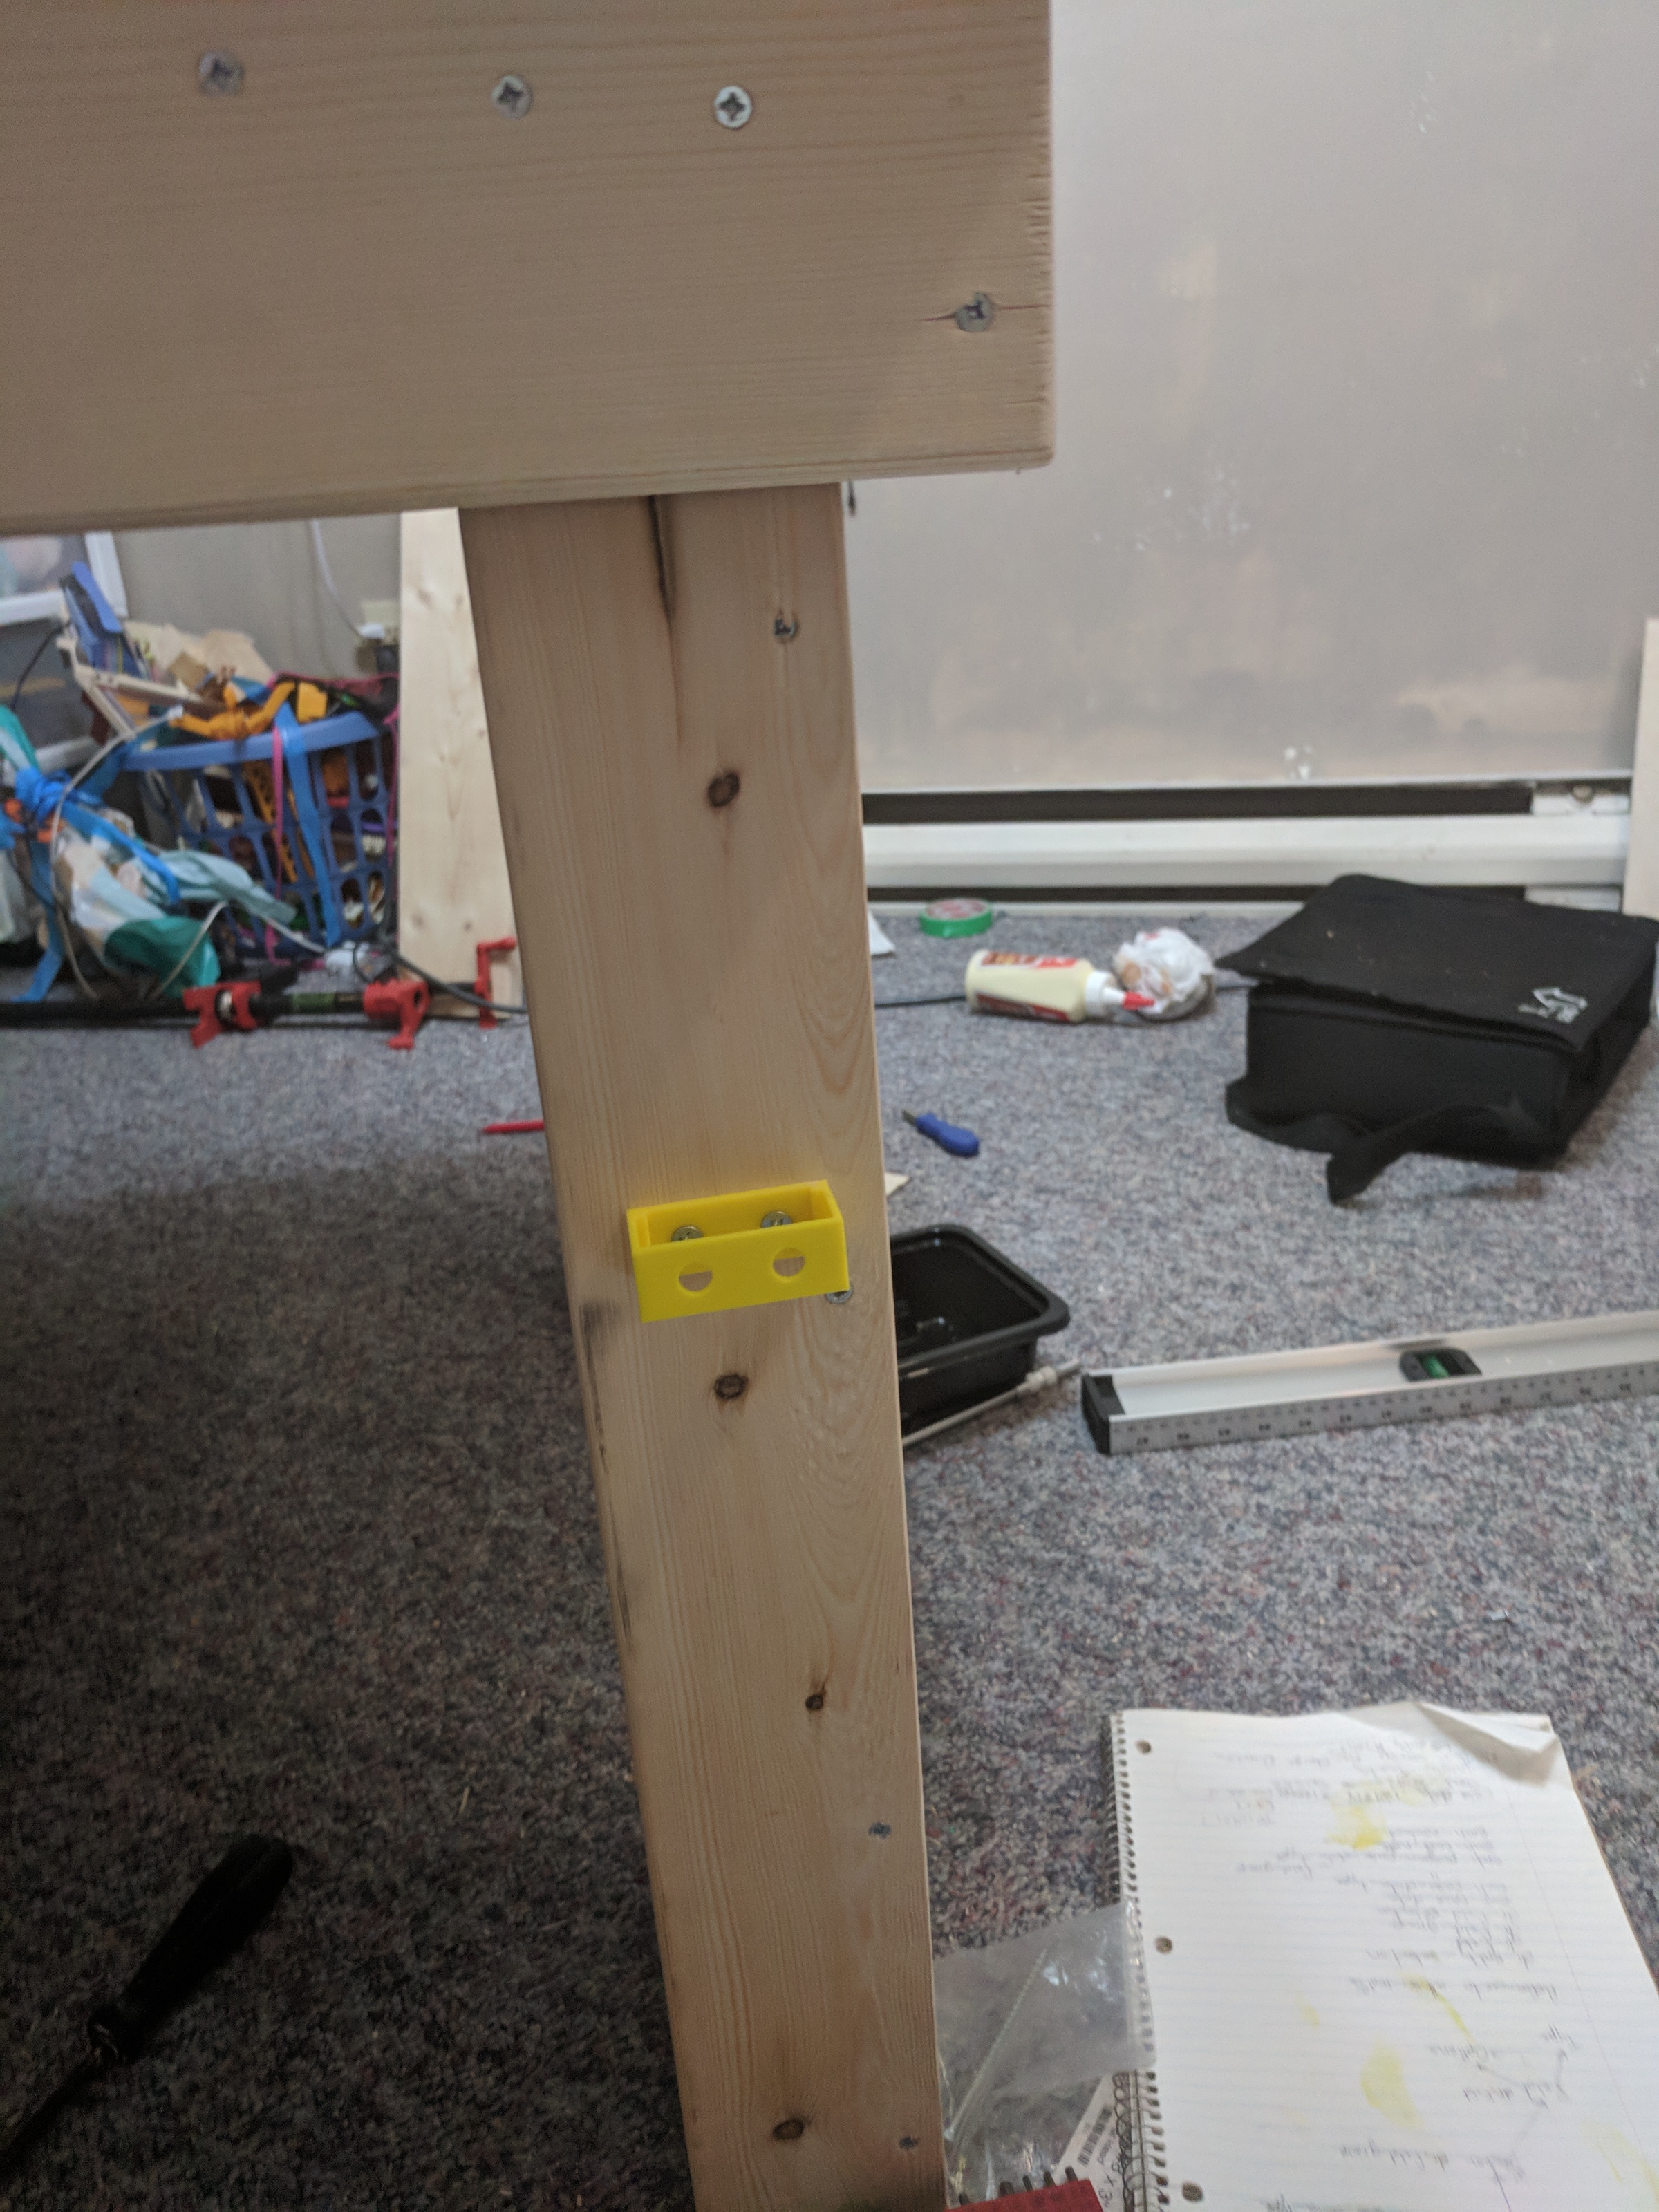
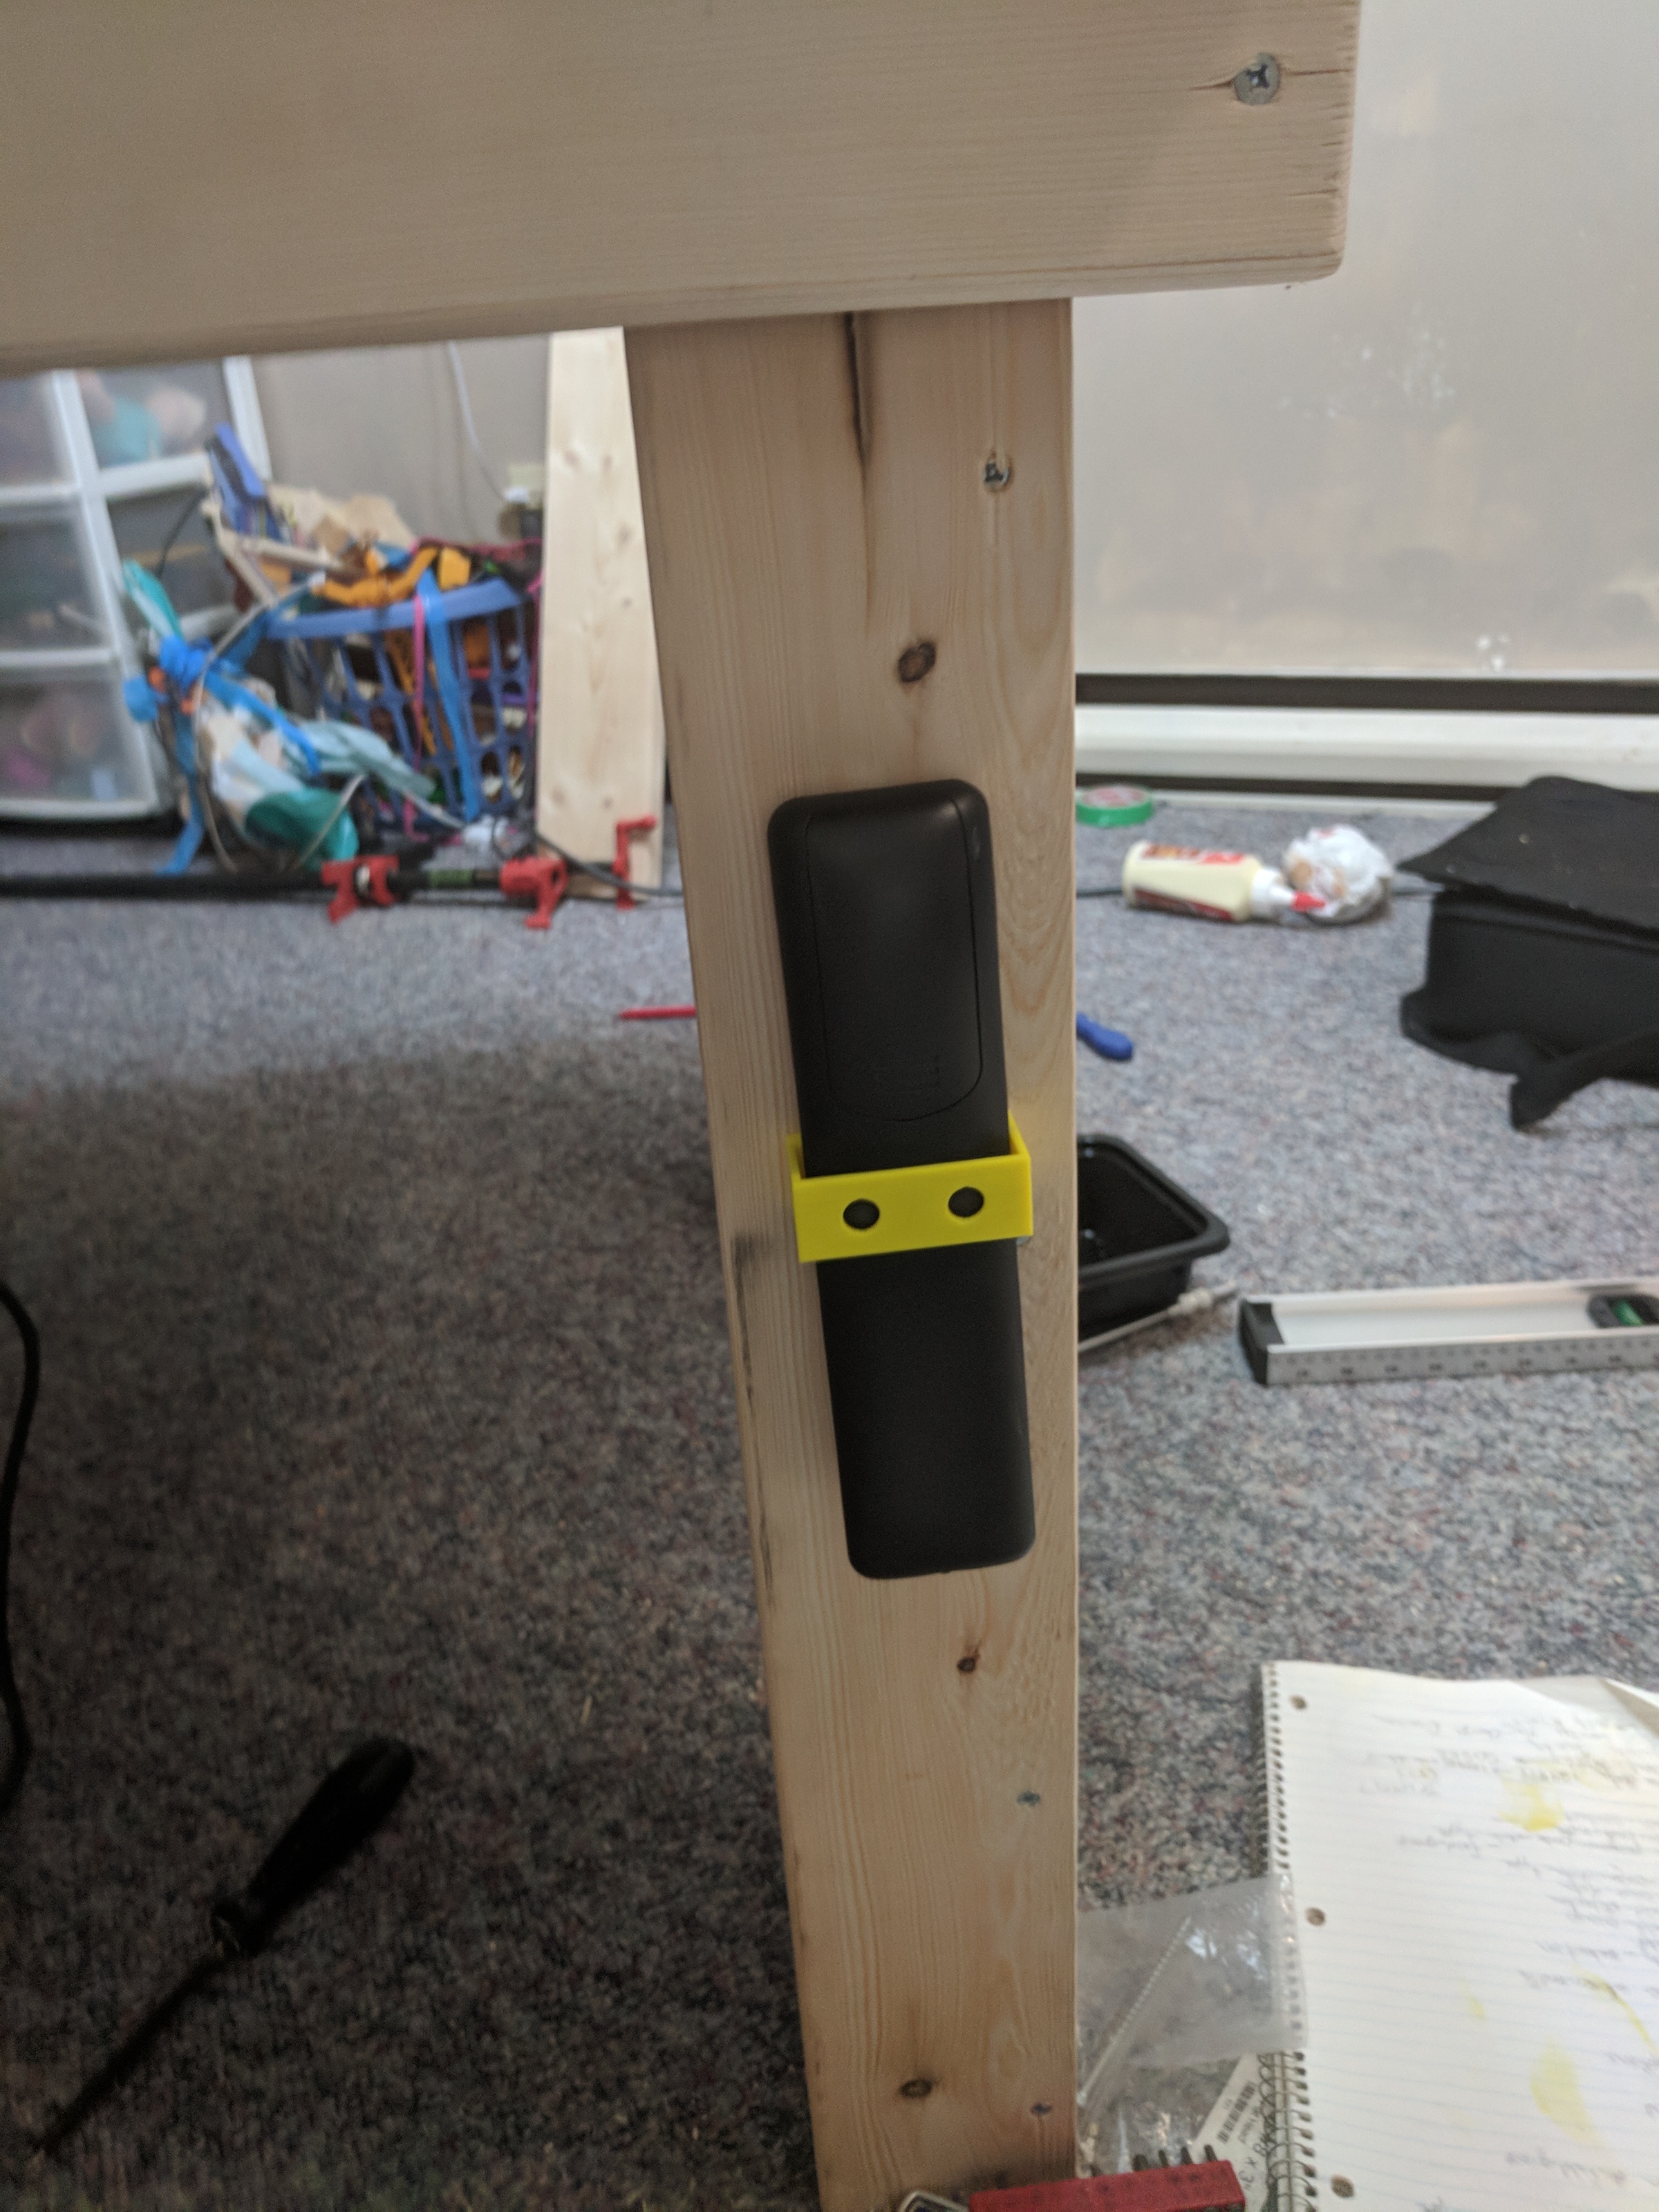
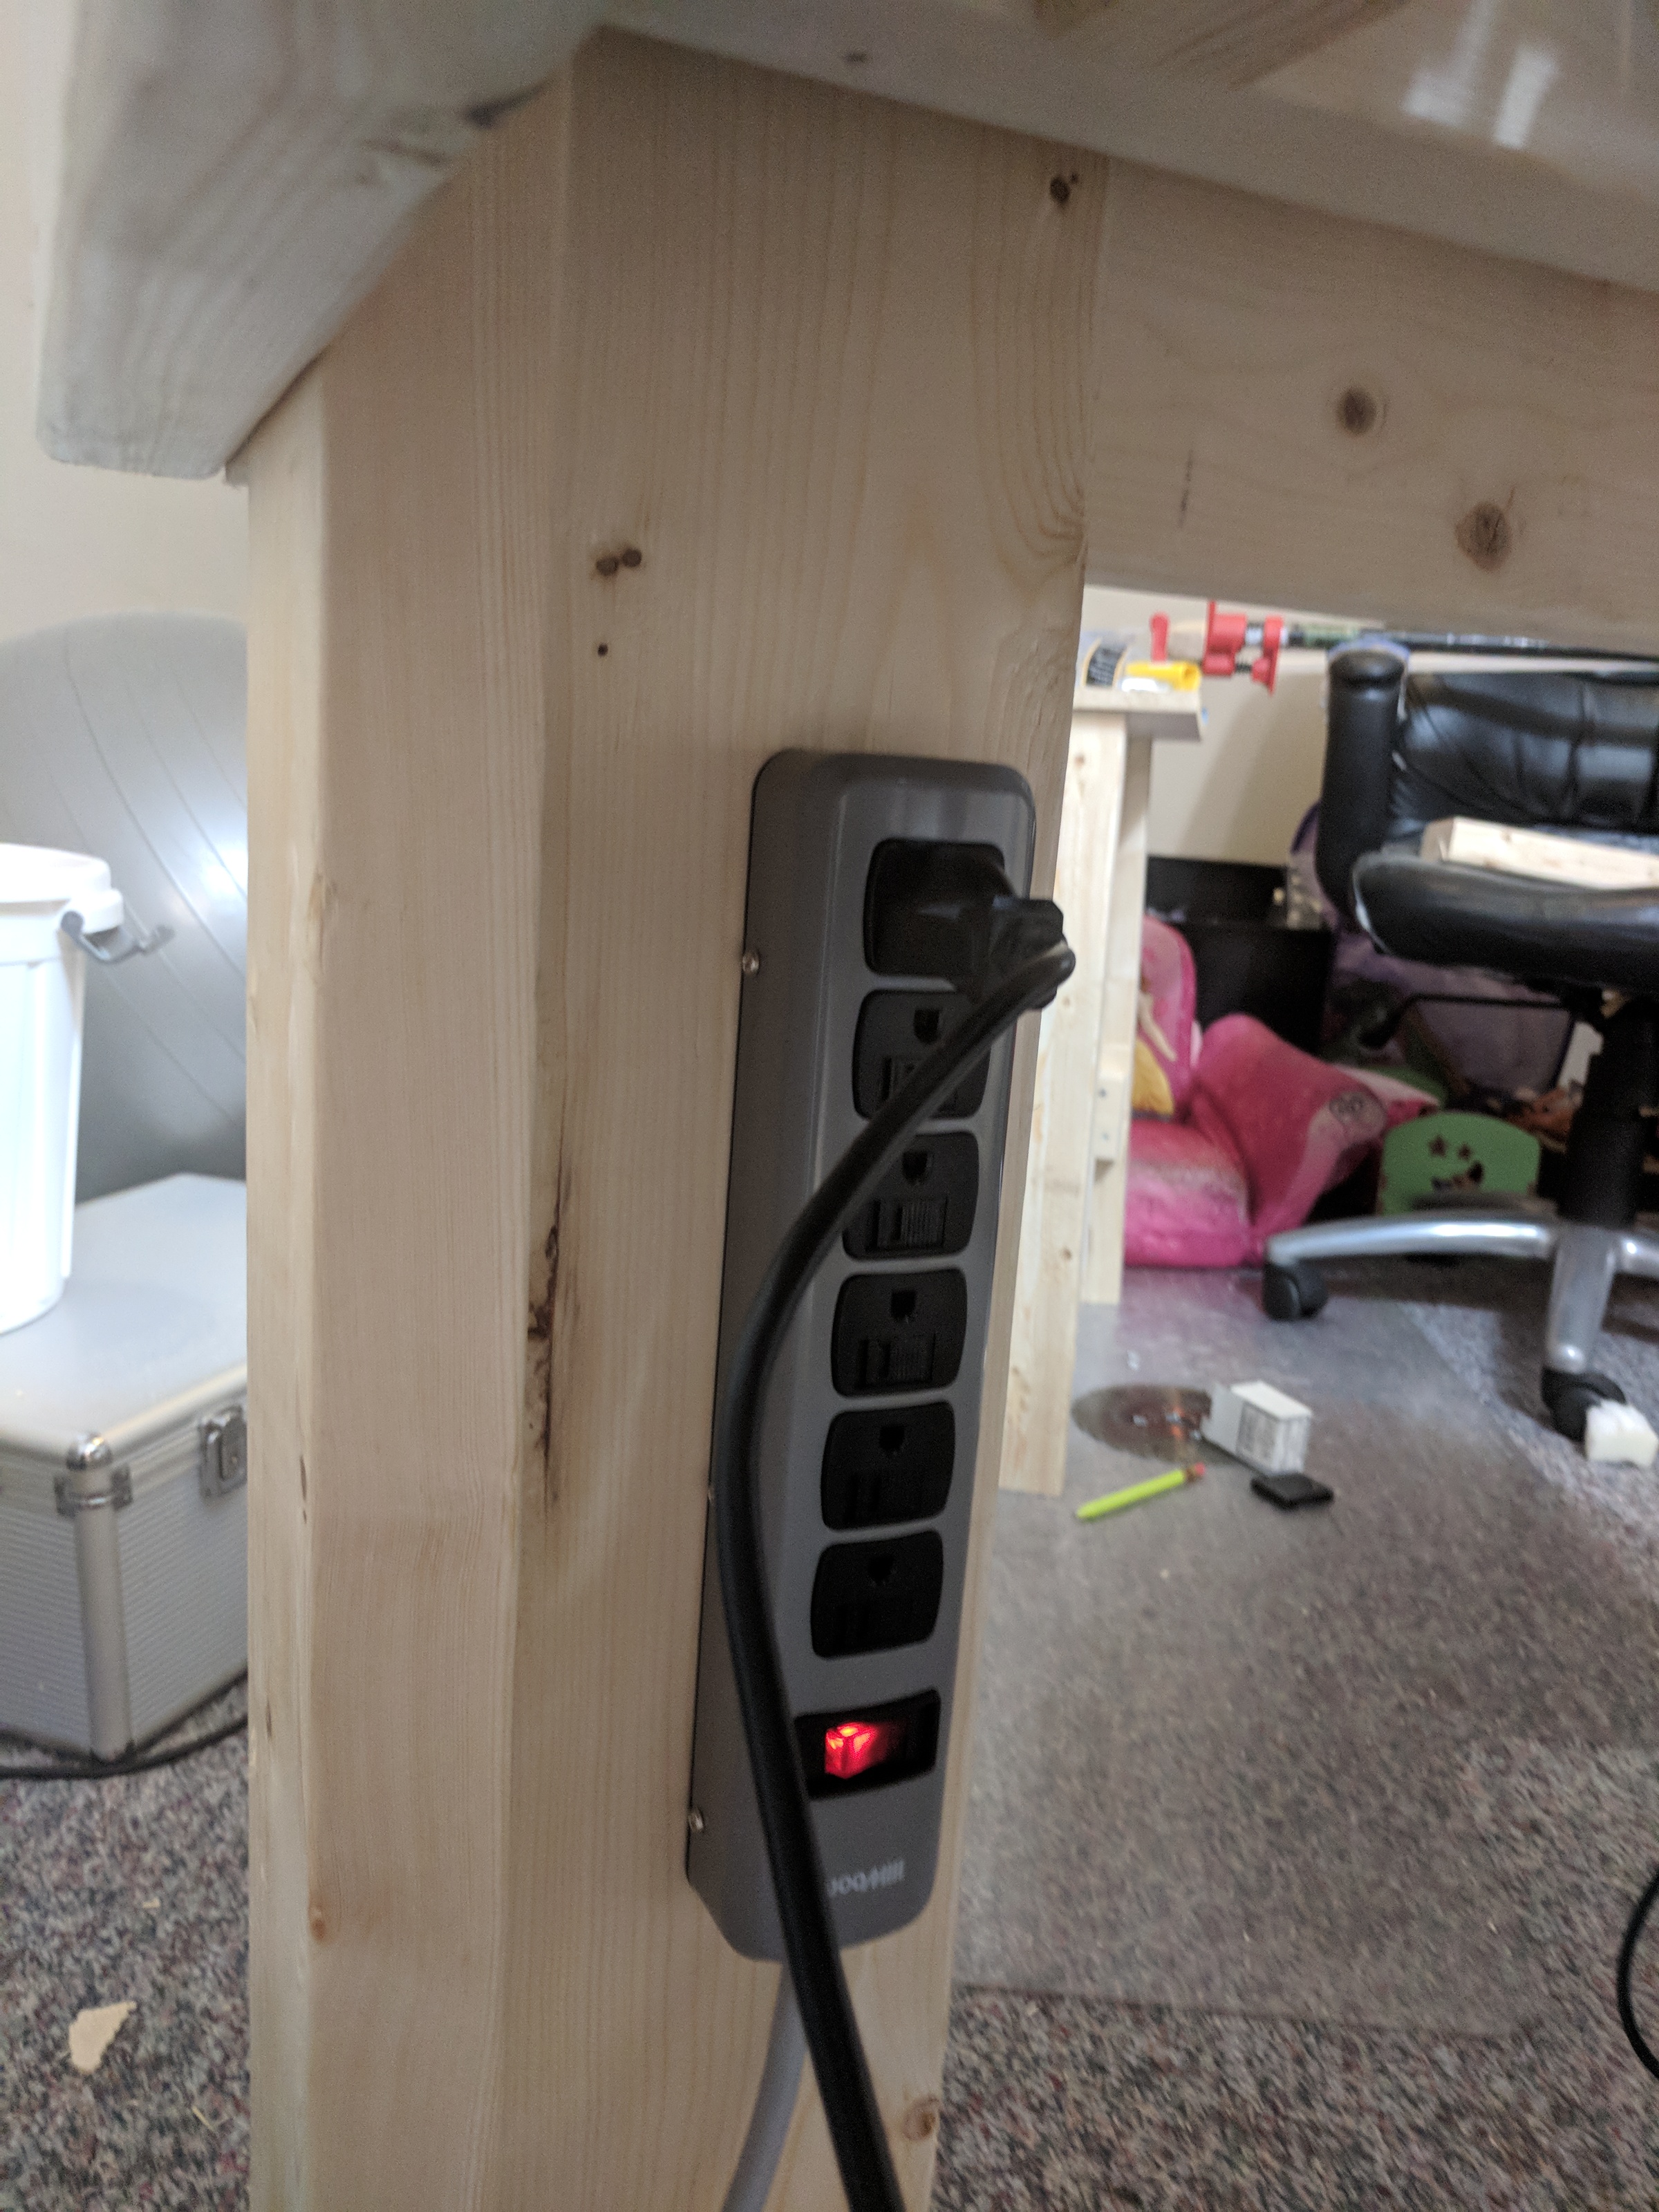
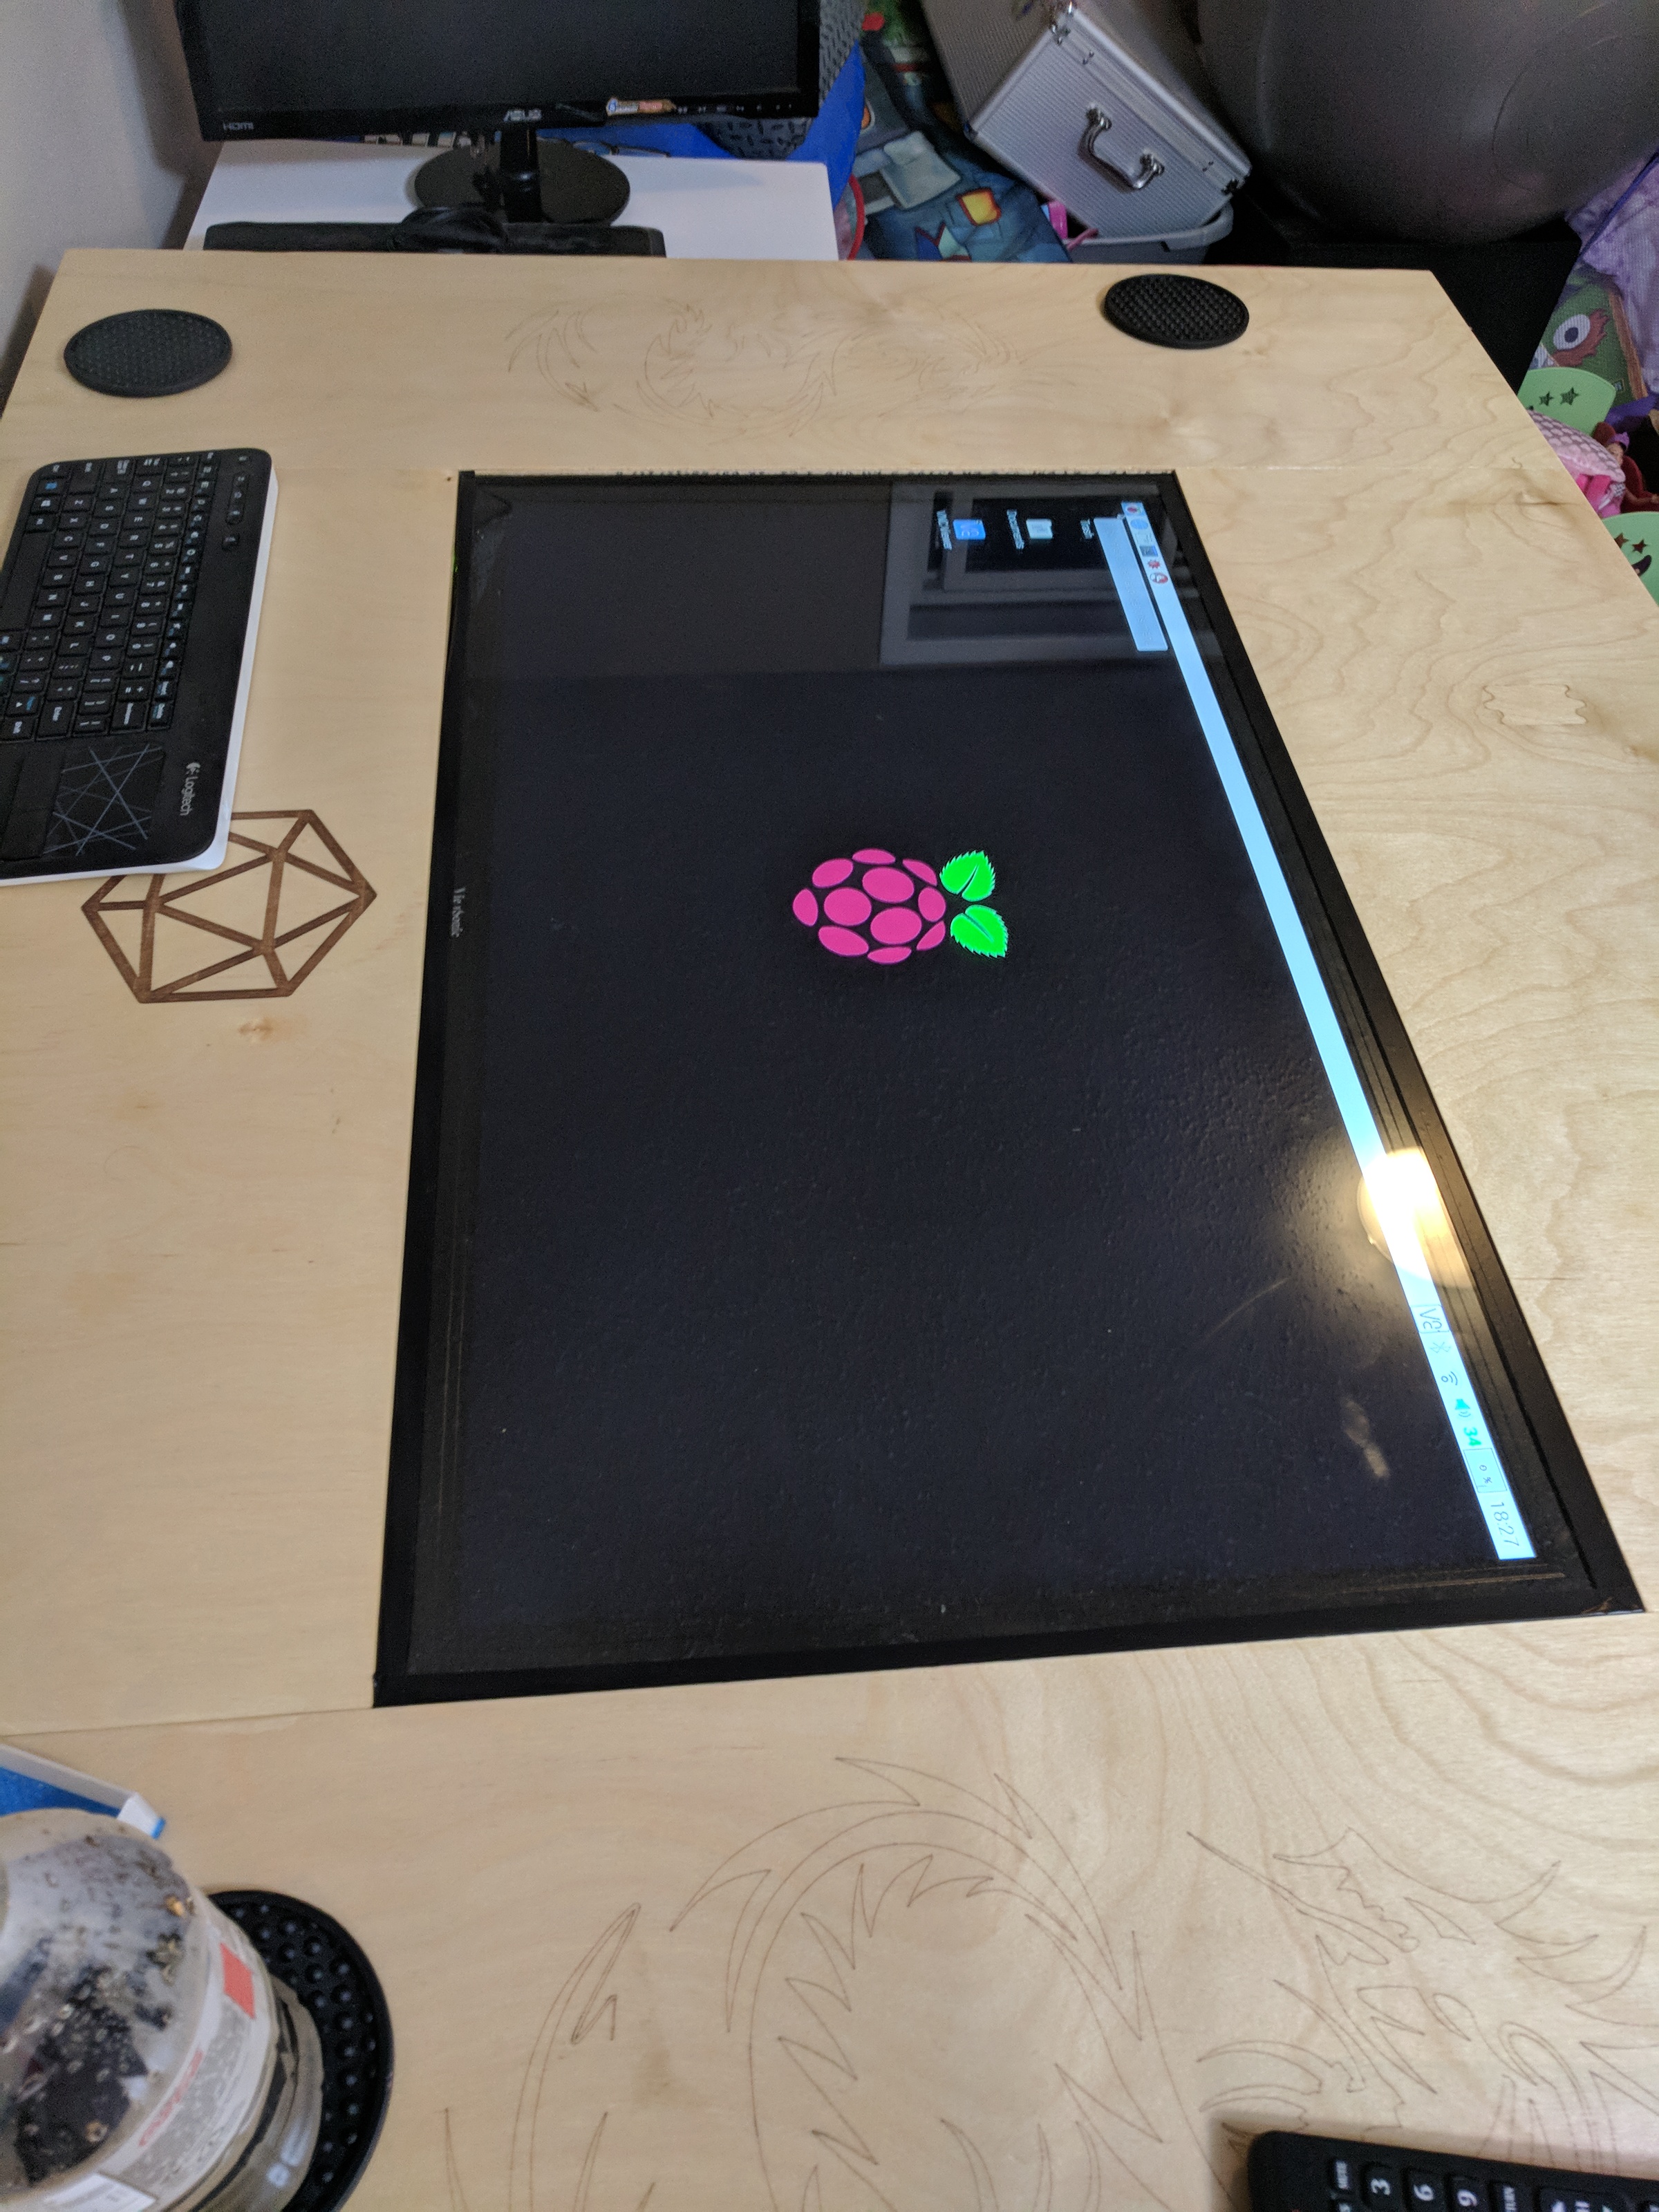
I also 3D printed a bracket to hold the remote in place so we never lose it, mounted a power bar on the table leg, and mounted a Raspberry PI under the table that runs the TV.
Since the TV has a serial port, I also wrote a program that runs on the RPI to give the TV a web interface - where we can change the input, turn the TV on and off, and adjust color and volume from our phone or laptop.
Software
The RPI is just used to VNC to a virtual machine running Maptool. This is a free program that lets us import the maps or design our own with tiles.
Originally the plan was to run Maptool directly on the RPI, but we found it to be a little too slow for our liking. Using it just for VNC to a more powerful machine works well, and also means I have a VM running 24/7 that our DM can remote into and create the maps at their leisure. When we play, the DM runs another copy of Maptool on their laptop and connects to the server running in the virtual machine to control the map.
For the most part we play with physical minis, so we zoom in the map to make each square about 1 inch. For larger maps we can zoom out and use virtual minis when we need to.
Future Improvements
There are a few things I might do one day to improve the table:
- Using bolts instead of screws to attach the legs. This would let us disassemble the table and make it “portable”, though I still wouldn’t want to move it very often. This is something I’ll have to do if I ever move - it was built in the room we play in, because it won’t fit through the doorway fully assembled.
- A bit of trim around the edges of the glass, just to hide the taped edge
- A more powerful mini PC under the table. The RPI is great, but it would be nice to have something a little more powerful.